Chicago Area 240sx
Since 2006.
|
|
| | David's CA18DET build-up thread! |  |
|
+18k c Rated240R tyler TaCo_StaMp D*S Trucky Adikt Stab Master Sharson Dirty Dee D*S Roski A-Town-SR Atown 240 FusionR300zx chitown240SX D*S Dstar whiteazn1184 Nachtmensch Specter davidricardo86 22 posters | |
| Author | Message |
|---|
davidricardo86
Light Duty Poster


Number of posts : 160
Age : 37
Location : Chicago
Vehicle : 92 S13 SE Coupe
Reputation : 0
 |  Subject: Re: David's CA18DET build-up thread! Subject: Re: David's CA18DET build-up thread!  February 26th 2007, 1:22 am February 26th 2007, 1:22 am | |
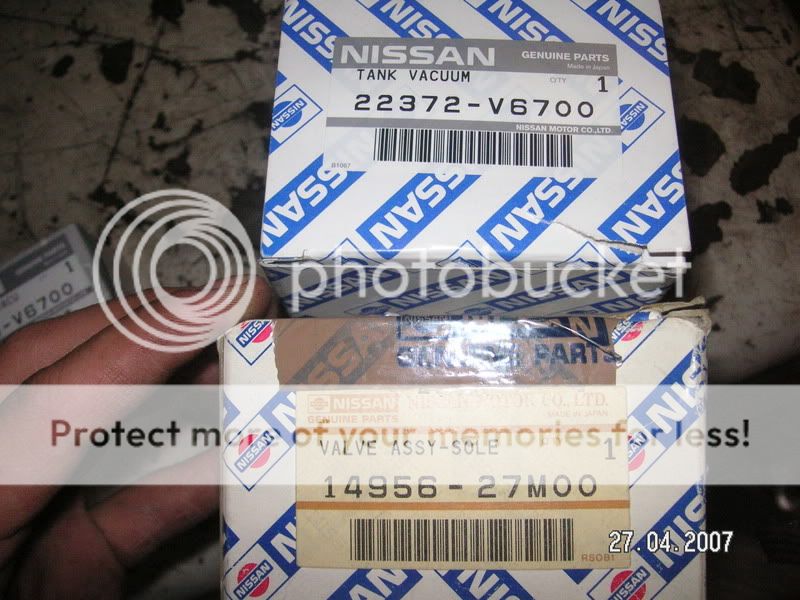
| Good news! I finally put the head and block together. Got a few things torqued down and next week hopefully ill have my freshly powdercoated covers! I got my Cometic HG(1.55mm), ARP sr20 main stud kit, timing belt, timing belt component kit and a bunch of other little odds and ends. Before reassembly. 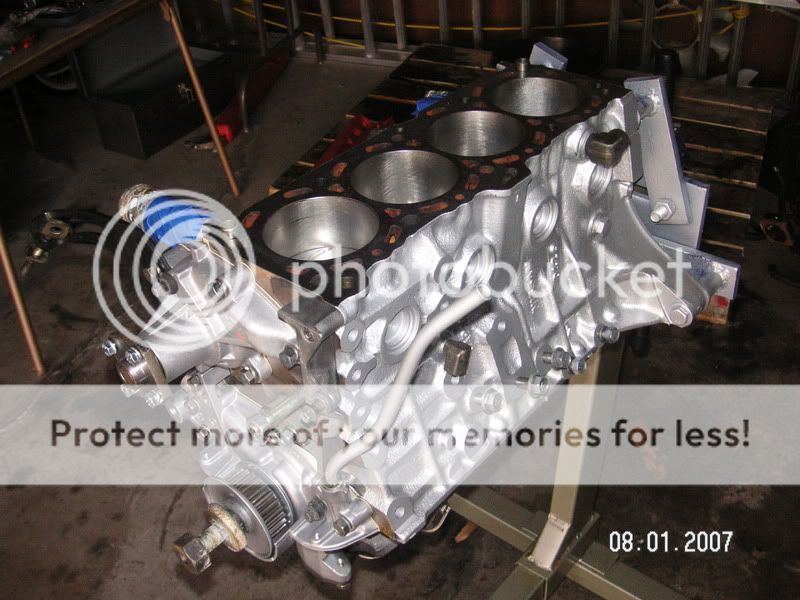 Theres my block, head, and other parts that will soon go on. There's my school's shop where ill be finishing my project. 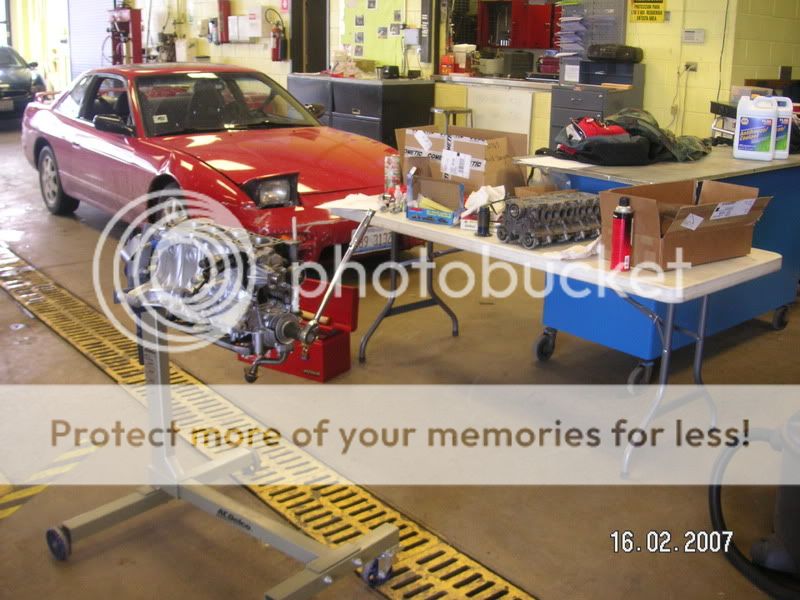 Prepping the block. 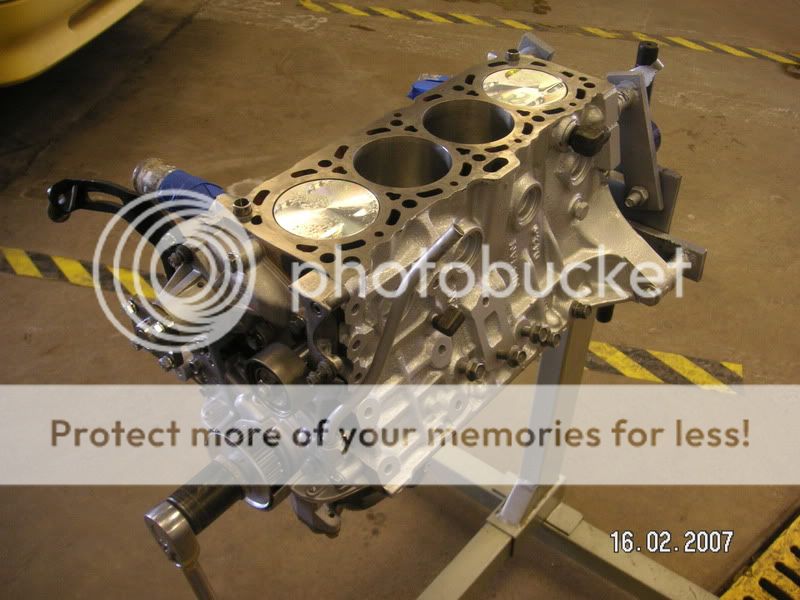 Heres the block ready for the headgasket. As a reminder the block had much done to it, those are CP pistons 8.5:1 CR, balanced assembly, honed walls, decked, and new bearings. I wish i couldve changed the rod bolts but we'll start with this for now. New seals, gaskets, bearings and paint to freshen-up the bottom end. 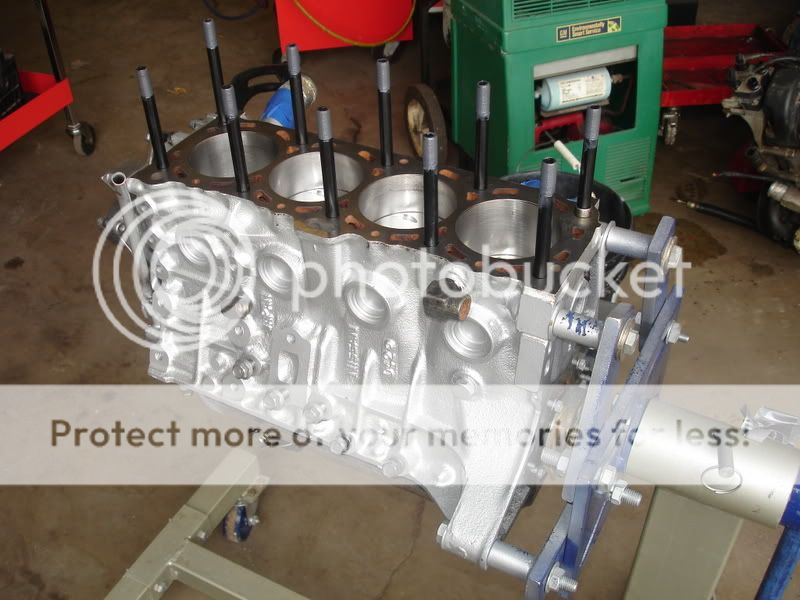 So fresh and so clean! New water pump from a rwd ca18et, new oil pump from the fwd ca18de, and timing components. The transformation begins. :bowdown 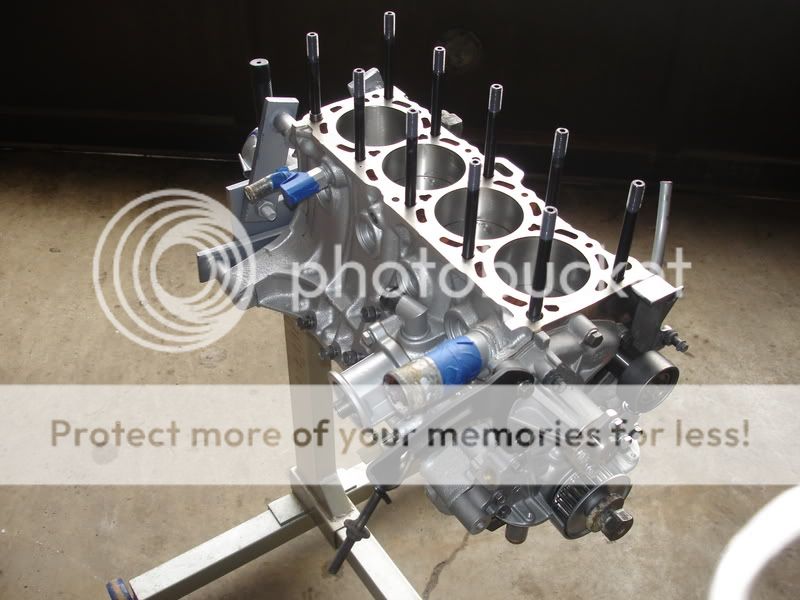 Quick comparison of the oem Nissan gasket and the Cometic gasket. It'll be good to see how it goes. (i know one is upside down and the other down side up, if that makes sense) 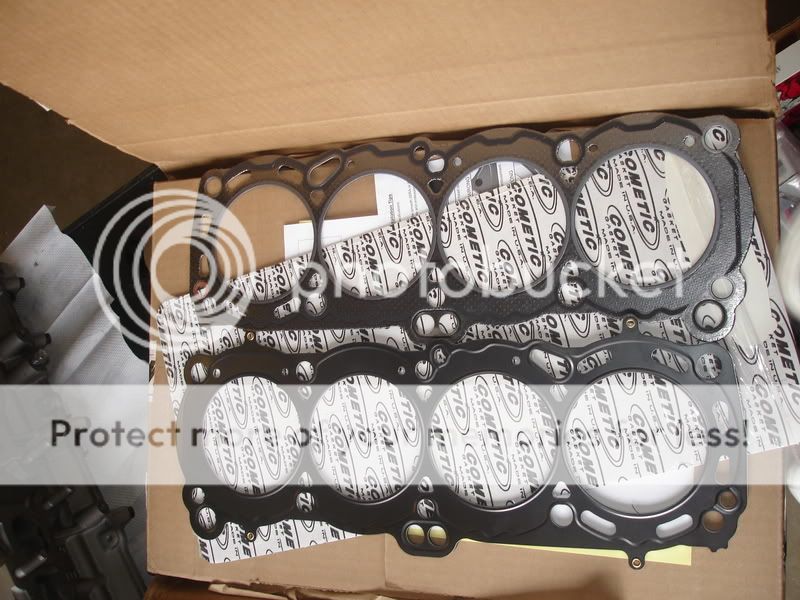 Headgasket goes on. Watch out for that Moly Lube! 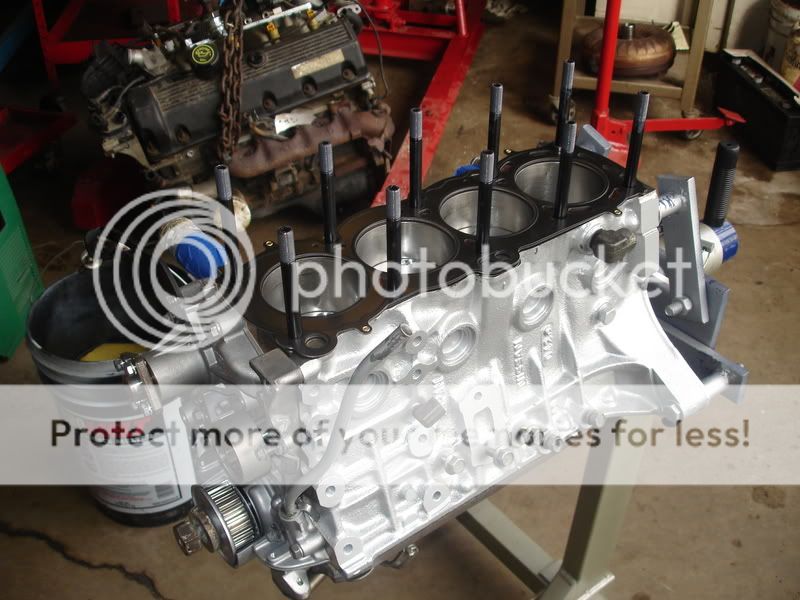 I love the way everything looks so shiny and clean. I love new parts. 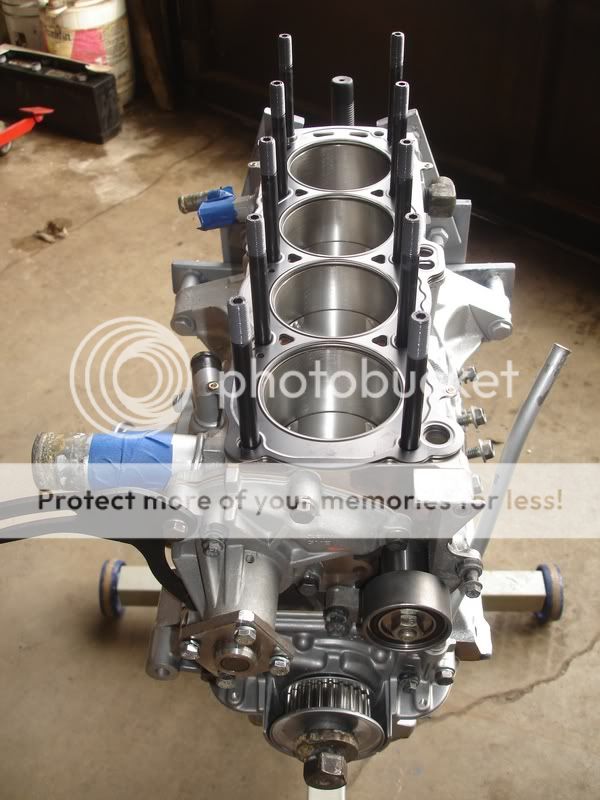 Take a close look in there!  Another nice detailed shot. This time i wasnt using my camera because i lost my battery. The is a 7MP Sony Cybershot and it performs way better than my Konica Minolta 5MP Dimage x50. Ill try and use it again later. 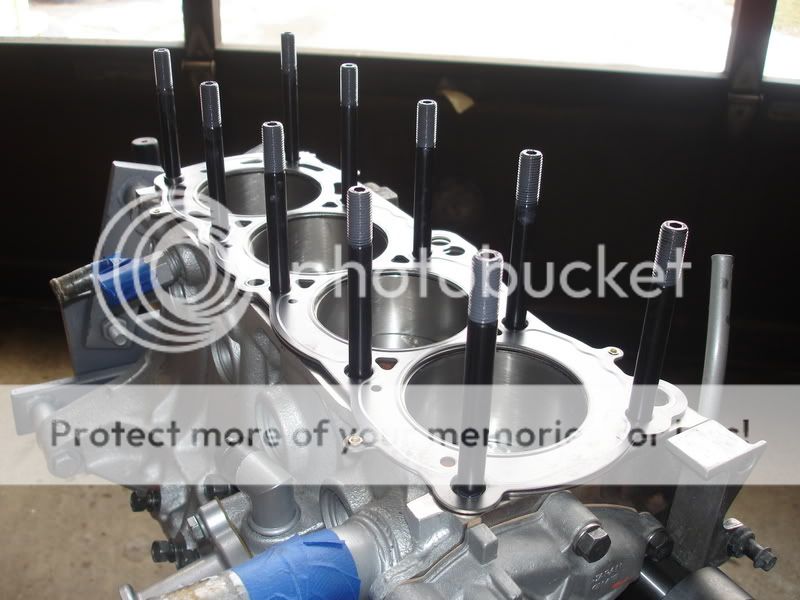 And another one... 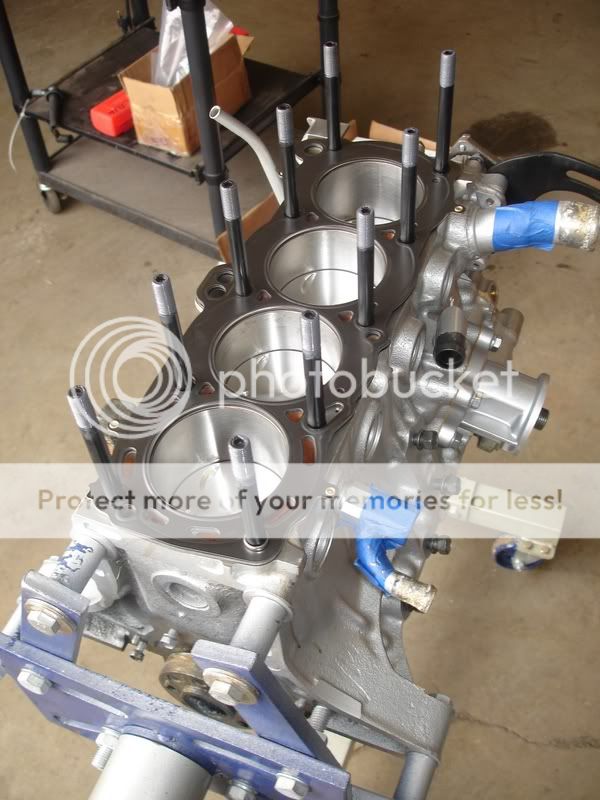 There i am putting the cylinder head on. I highly recommend you put the ARP washers in before you put the head back on! I tried both ways and the only way i could get it to work was if i dropped the washers in there firsts, all eight, then set the head down. If you try putting the washers in after you set the head down, there wont be enough room for them to go through. Be aware and use what ever works but this is what worked for me! 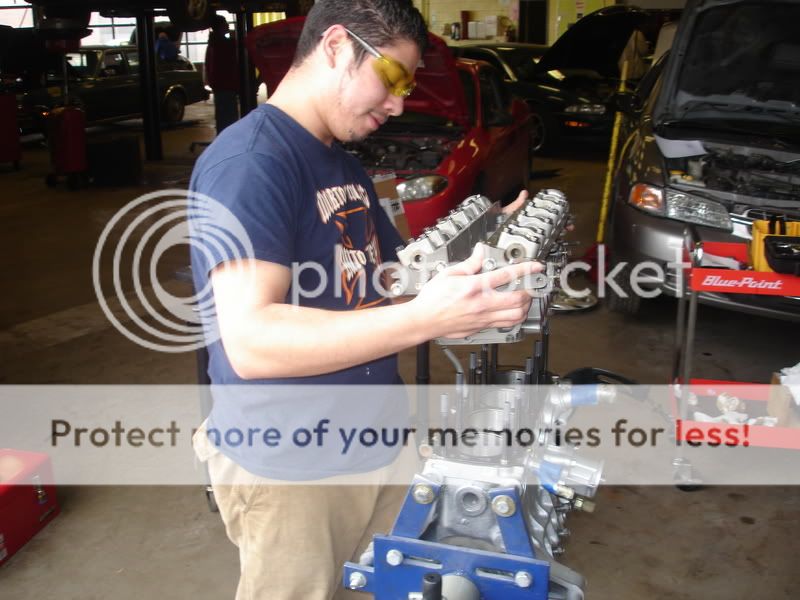 If only i knew how to use macro mode on this camera. Heres the gasket all squeezed up. 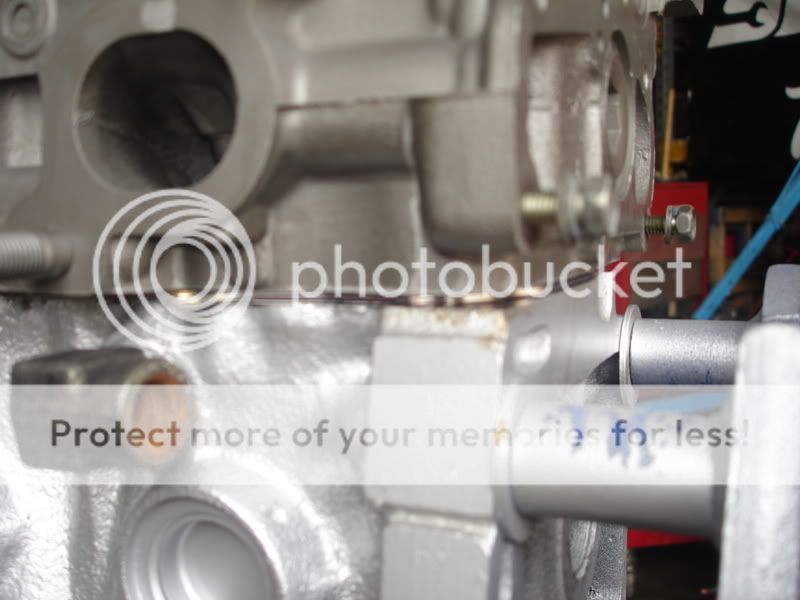 Damn blurry photos. 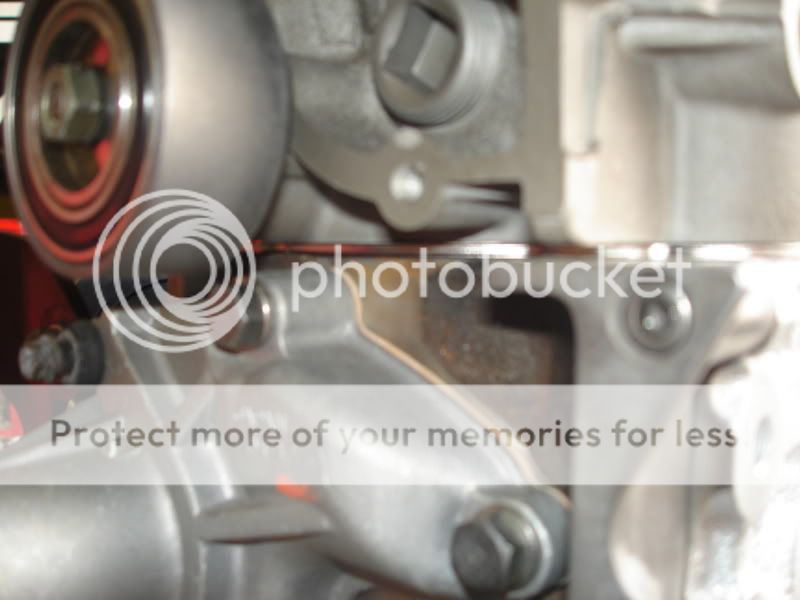 Here we go! That gasket looks mighty thick compared to the oem unit buts its that way for a reason. Since i had the block and head machined the extra thickness is for compensation, nothing else! 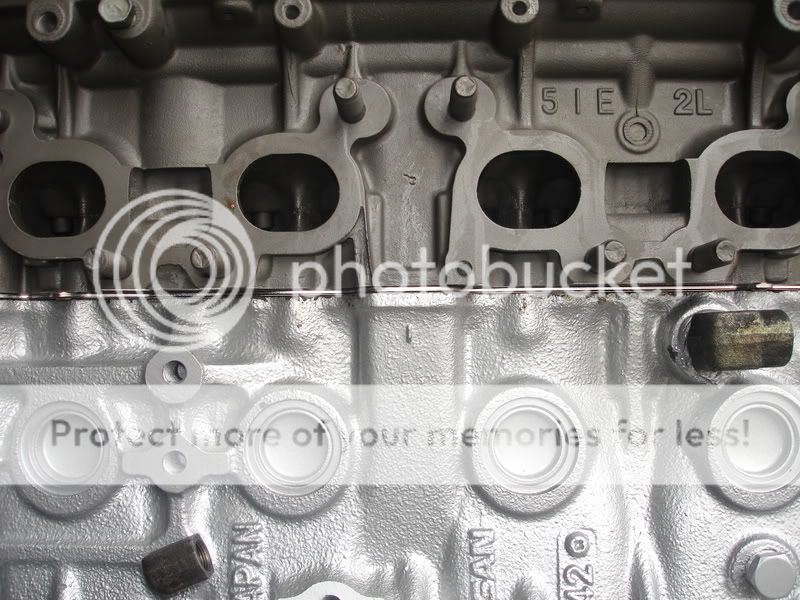 There i am again torque-ing everything down to spec. ARP instructions said to torque it down to 70 ft lbs using their specially formulated Moly Grease. The FSM says 76 ft lbs. I did 72ft lbs because i had to use a few adapters. Get a load of my sweet yellow safety glasses! :pface 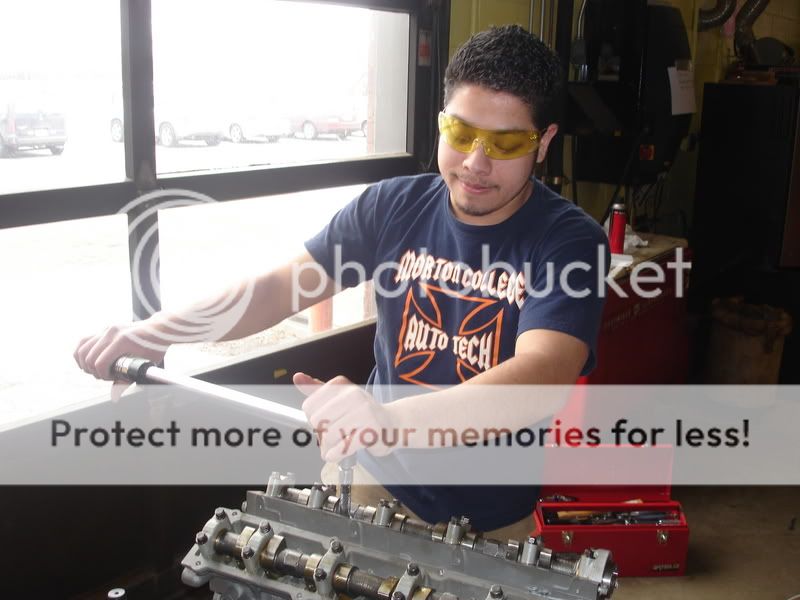 Finished. Next are the covers, plates, fuel rail which will be powdercoated. 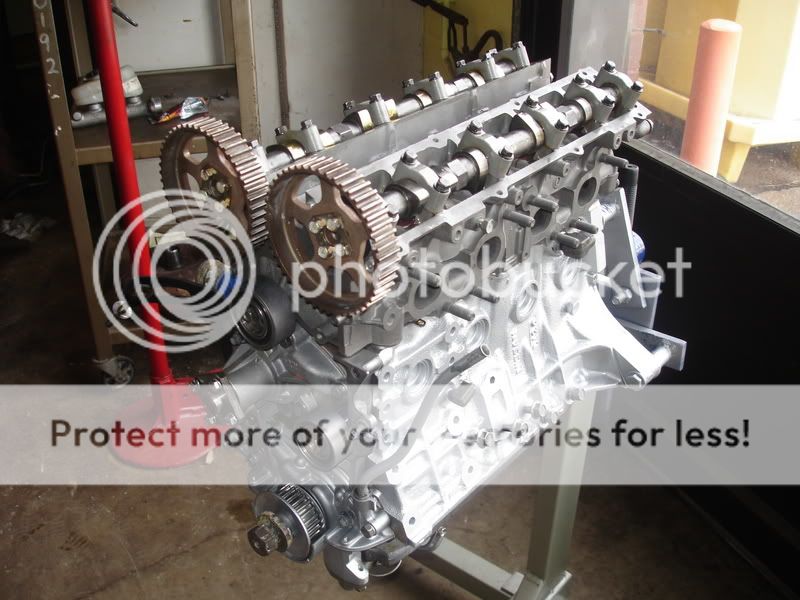 As of now, how much was all this you ask? pressure wash block - $90.00 deglaze hone 4 cyl (upto .030) - $90.00 deck straight block - $100.00 balance crankshaft (internal) - $160.00 change pistons (4 cyl set) - $58.00 standard short block assembly - $325.00 tear down short block - $40.00 rod bearings (clevite) - $31.88 main bearings (clevite) - $49.95 sales tax - $5.32 freight - $13.57 TOTAL - $963.72 CP Pistons (pistons, rings, pins, clips, and shipping) - $570.34 TOTAL w/ pistons - $1534.06 Nissan OEM gasket kit 10101-CA18 - $236.34 CA18DE Oil Pump - $ 101.49 Crankshaft gear - $23.05 Crank plate 13022-42L00 (behind crankgear) - $2.78 CA18ET Water Pump - $43.49 CA18DET Alluminum pulley kit (alternator, water pump, PS pump) - $80.00 Bead/Sand Blasting Valve Covers, Timing Covers $30.00 Cylinder Head (3-angle valve job, milled, exhaust valve, misc fee) - $241.00 ARP SR20 Main Stud Kit 202-5402 (head stud kit) - $82.84 Timing belt component kit - $88.97 Timing Belt (Gates/Napa) - $19.92 Camshaft Rear Seals (half moon shaped) - $6.95 Cylinder Head (Mill and wash Head again due to crappy 1st shop) - $60.00 Cometic MLS Headgasket (1.55mm) - $127.65 TOTAL (so far) - $1144.48 TOTAL w/ previous total - $2678.54 :ahh Yup thats a lot of money and its not yet finished! Ill update with more goodness as soon as they become available. Modified by davidricardo86 at 7:34 PM 3/28/2007Modified by davidricardo86 at 7:38 PM 3/28/2007Modified by davidricardo86 at 8:02 PM 3/28/2007Modified by davidricardo86 at 8:05 PM 3/28/2007
Last edited by on April 24th 2007, 11:40 am; edited 1 time in total | |
|  | | Rated240R
Official Chef


Number of posts : 666
Age : 51
Location : Chi-town
Vehicle : 1991 Nissan 240sx
Reputation : 2
| | Subject: Re: David's CA18DET build-up thread! February 26th 2007, 9:48 am | |
| Nice work so far! Lookin clean!! | |
| | | | A-Town-SR
Post Enthusiast


Number of posts : 1423
Age : 36
Location : Algonquin, IL
Vehicle : SR 240sx (hatch)
Reputation : 0
| | Subject: Re: David's CA18DET build-up thread! February 26th 2007, 10:15 am | |
| almost there cant wait to see the finished product what car are planning on putting this in do you have a car for it yet? | |
| | | | D*S Dstar
*********


Number of posts : 11246
Age : 37
Location : Mission Control, motherfucker.
Vehicle : RED SHARK V1-5, MOBY DICK.
Reputation : 128
| | Subject: Re: David's CA18DET build-up thread! February 26th 2007, 2:11 pm | |
| Fucking nice. So close you can taste it.
How long before its done? | |
| | | | Stab Master Sharson
Straight outta Locash

Number of posts : 4345
Age : 34
Location : sOuF-ChI
Reputation : -37
| | Subject: Re: David's CA18DET build-up thread! February 26th 2007, 2:35 pm | |
| how much power can those pistons,rings etc. handle?
shit looks g'd out.... | |
| | | | davidricardo86
Light Duty Poster
Number of posts : 160
Age : 37
Location : Chicago
Vehicle : 92 S13 SE Coupe
Reputation : 0
| | Subject: Re: David's CA18DET build-up thread! February 27th 2007, 12:37 am | |
| Rated240R Mon 26 Feb 2007 - 8:48 -------------------------------------------------------------------------------- Nice work so far! Lookin clean!! Thanks! I think it looks great and i cant wait till i actually drive it. Ill have my suspension by that time, fingers crossed. I think i made it over the hump. Its almost done and im just glad. A-Town-SR Mon 26 Feb 2007 - 9:15 -------------------------------------------------------------------------------- almost there cant wait to see the finished product what car are planning on putting this in do you have a car for it yet? The engine is going into a 92 s13 coupe. The one i currently drive. It has a lot of "problems" right now but ill get to those as soon as i can. D*star Mon 26 Feb 2007 - 13:11 -------------------------------------------------------------------------------- Fucking nice. So close you can taste it. How long before its done? I have.  Uh it's scheduled to go in ASAP, but the deadline is around early May. I have some time but im still a few things away. fukthe5o Mon 26 Feb 2007 - 13:35 -------------------------------------------------------------------------------- how much power can those pistons,rings etc. handle? shit looks g'd out.... Well let me tell you this, stock CA18DETs can make upwards of 300hp on stock internals, other fellow tuners have done/are doing it. This is only possible one way, correct tuning. Detonation and preignition are some of your other problems you've got to combat not to mention the type of fuel your using. You should also be considered about leaning out/lean AF ratios, advancing the timing too far, or retarding so much as to sacrafice too much power either. Bigger injectors and a high flow fuel pump are a must, usually its better and safer to be richer and have more fuel. Piston, rod and crankshaft dimensions play a roll too not to mention material or makeup. I opted to go with the CPs because of their strength over the stock ones. I also went for the ARP head studs because of the stud's many advantages over the bolt (arp.com). The Cometic MLS HG is a nice touch but a oem hg can be a great "fuse!" I chose reliability and assurance more than anything. I know that with a good tune these will surpass the OEM units, so with my factory setup they'll perfom flawless. Later if i decide to upgrade the turbocharger and fuel delivery, the bottom end will be able to handle the increased stress. I'll be fun seeing how much power i can squeeze out of it (distant future). To answer your HP question, last time i checked it was like +400hp. Thats high but theres some CAs out there that have produced even more than that. It comes with a price too! Im not concerned about high HP just yet.  | |
| | | | davidricardo86
Light Duty Poster
Number of posts : 160
Age : 37
Location : Chicago
Vehicle : 92 S13 SE Coupe
Reputation : 0
| | Subject: Re: David's CA18DET build-up thread! April 24th 2007, 11:42 am | |
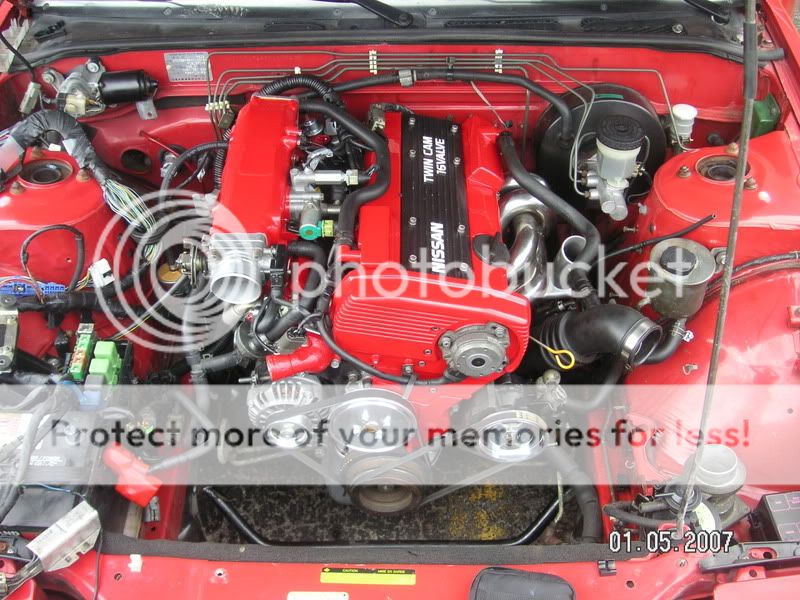
| Check it out guys... I havent posted in a while but its because ive been working on the engine and taking pictures of the progress. Heres some pictures of what ive been currrently doing. This past week ive been going to my school and getting as much as possible done as the deadline draws near. Im still missing a few things here and there like the exhaust system, intercooler system, and other miscellaneous parts. So far ive just been putting back together what i have available and still waiting on my cam covers aswell. Im also still waiting on my income tax return refund and some paycheck money. Once i have this money, im buying some more things. :bigthumb Rear cam gear plate goes on. Line it up and bolt it down! Install the tensioner and spring afterwards. Torque down the idler pulley if you havent done so already. Make sure you torque down everything according to OEM specifications! 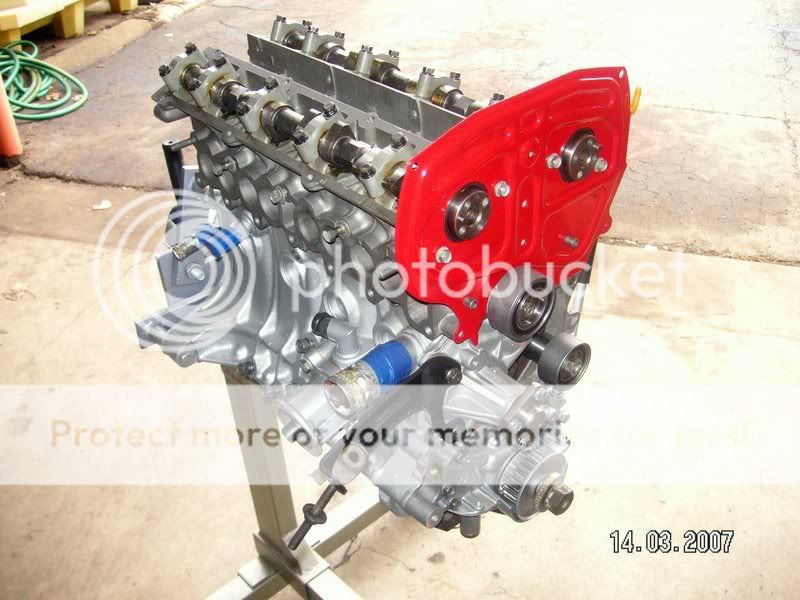 Using a correct size allen wrench/key to rotate the tensioner in a way so that the timing belt can go on. Remember to set number one piston to top dead center and line up the marks on the crank and cam gears. 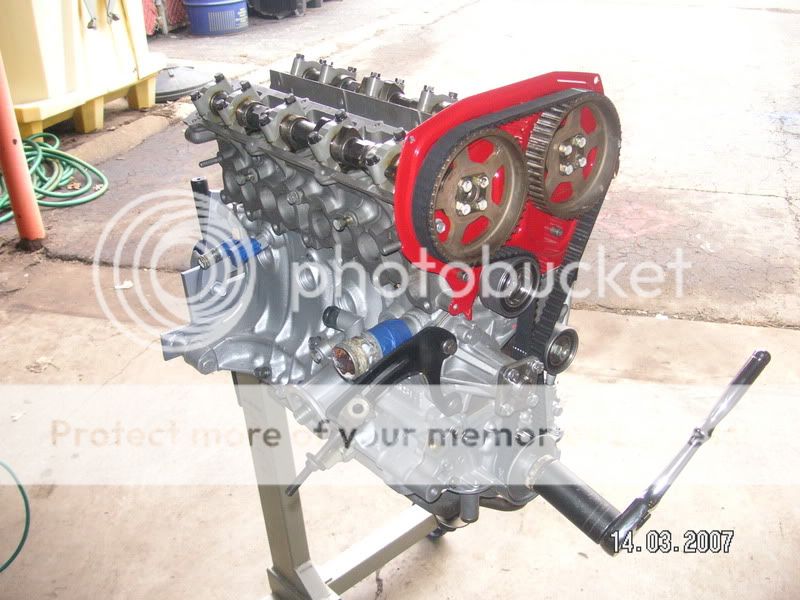 Here it is installed! Make sure everthing is lined up correctly and nothing hits, like piston to valves. 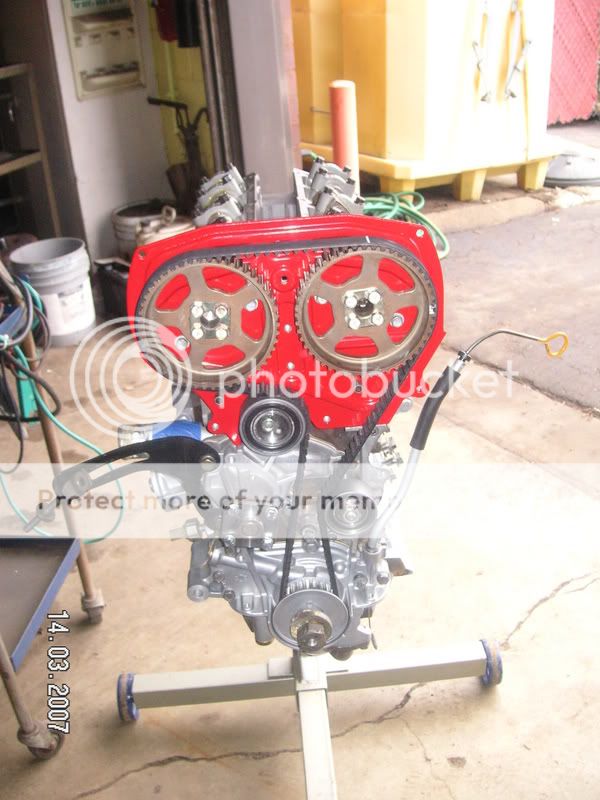 Thats it! 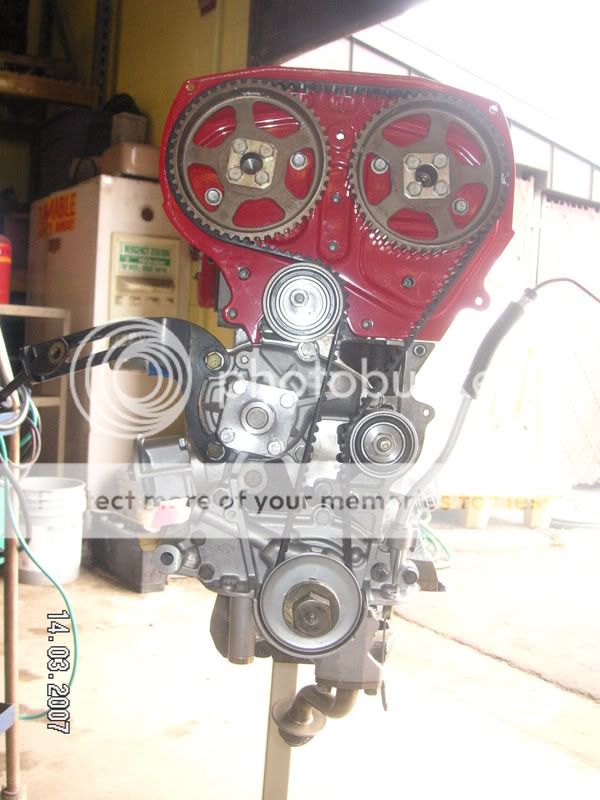 Heres a nice black and white. :gapteeth 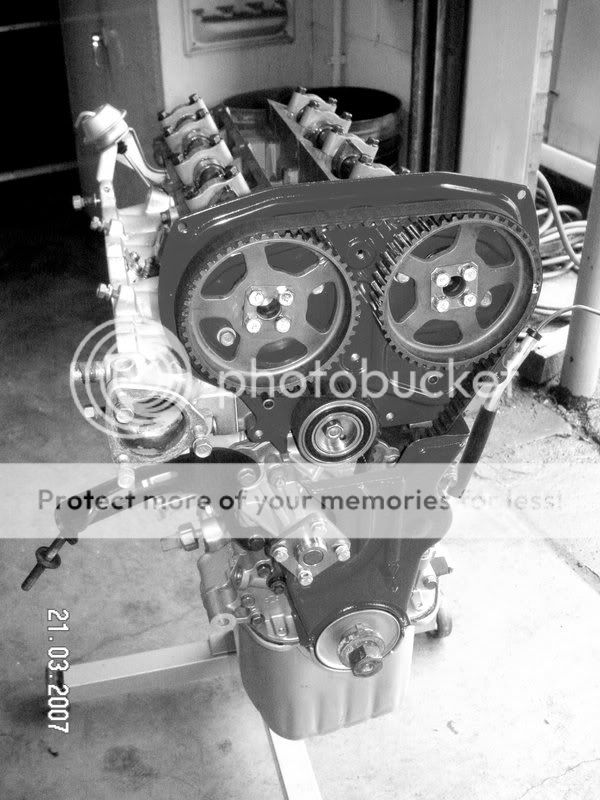 Picasa picture editing program to the rescue! Install lower timing belt cover. 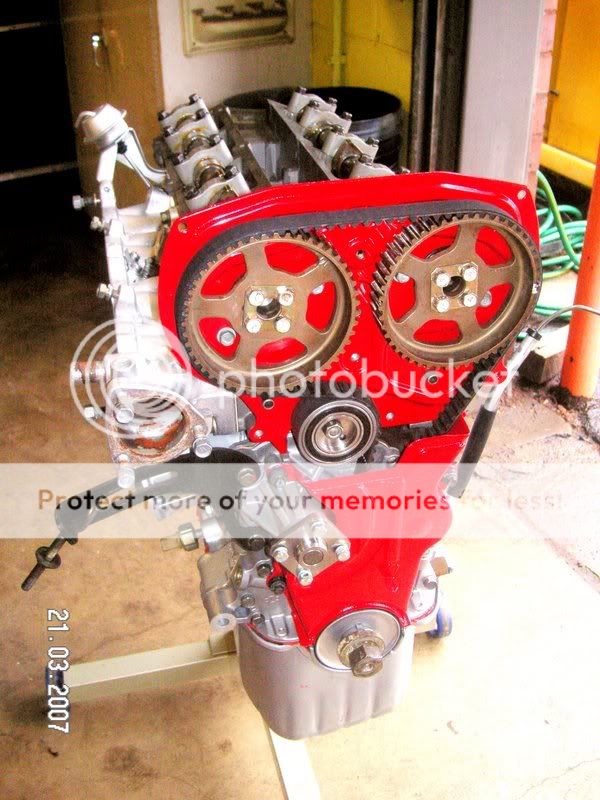 Install the cam gear cover. 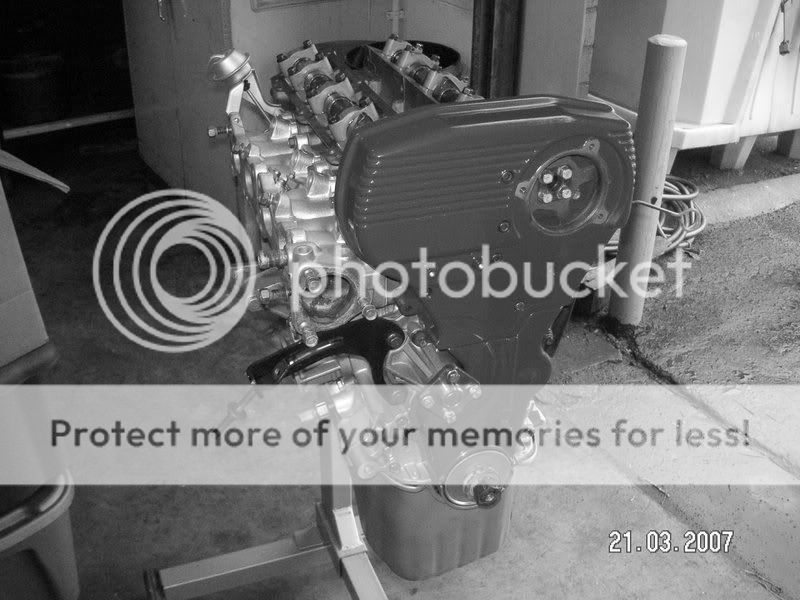 Heres a shot with the cam gear/timing belt covers back on. These were powder coated "Little Wagon Red." 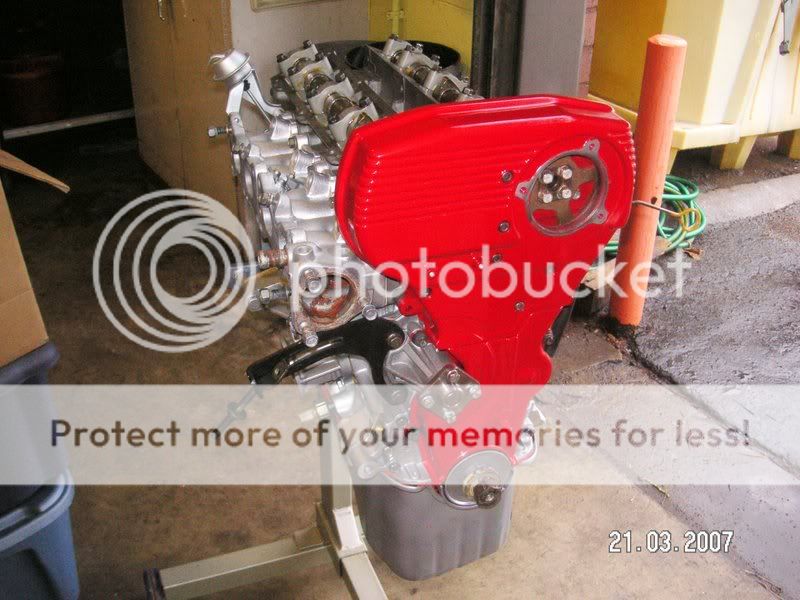 Some more photo editing by me. 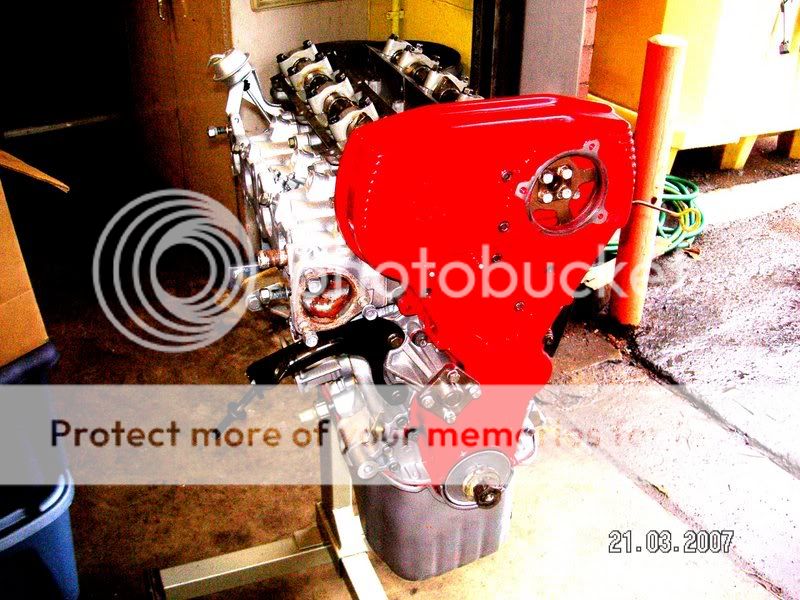 Heres a test fit of the remainder of the intake manifold. I also test fit the exhuast manifold and rebuilt CA t25 tubro. When installing the Crank/Cam Angle Sensor line up the spline in the camshaft with the shaft on the sensor. Do no force anything as it has become a common thing for this to break off. I dont know how as it isnt rocket science but just ease it in, nice and slow. Finger tighten your three bolts that hold it to the cam cover and leave them loose incase you need to adjust timing later. :uhhuh 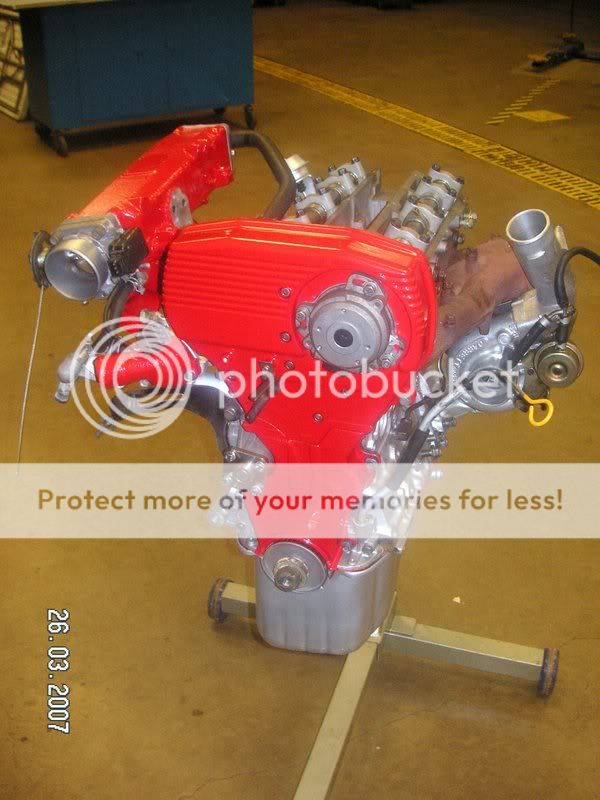 Black and white of the test fitting. 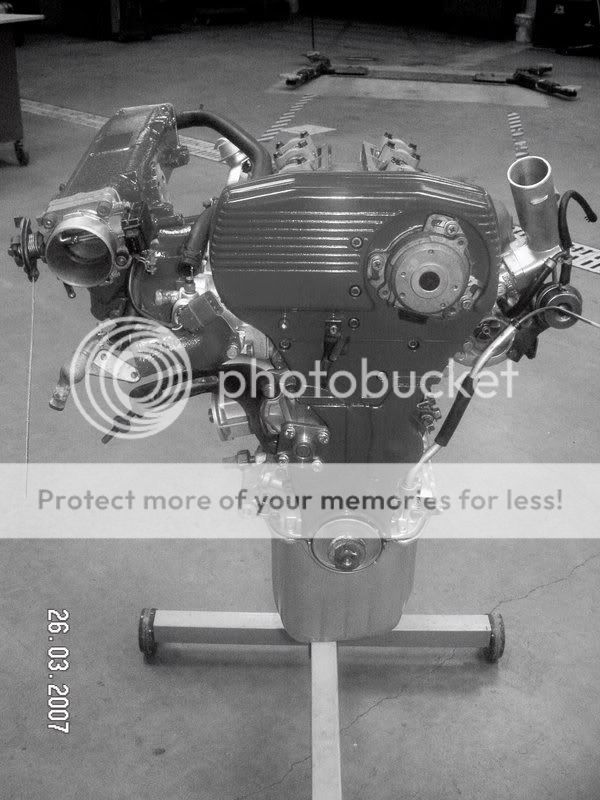 And i cant think of a better caption for this one. 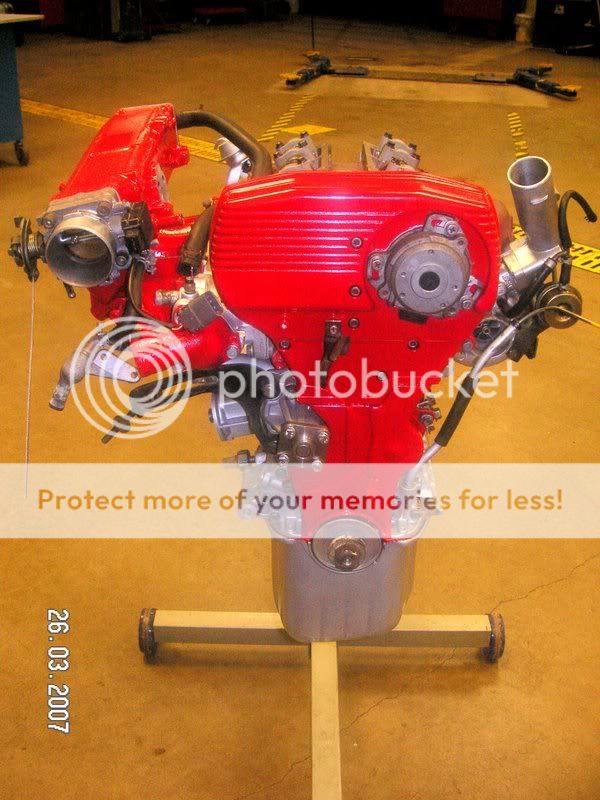 Nismo adjustable Fuel Pressure Regulator and my nicely redone fuel rail. Replaced the phillips style bolts with hex head because of less chance of stripping the bolt. Looks better this way. 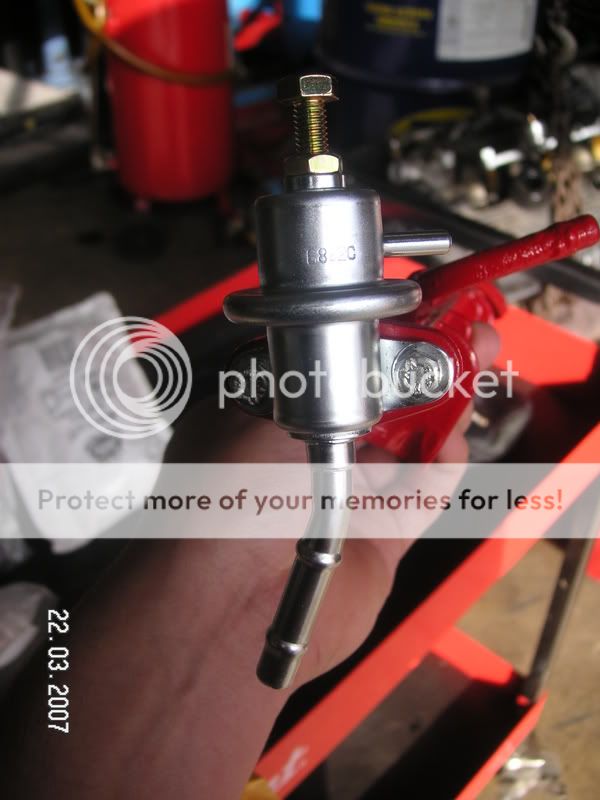 Here i cleaned up the area in and around the thermostat housing. We still need the coolant temp sensors. 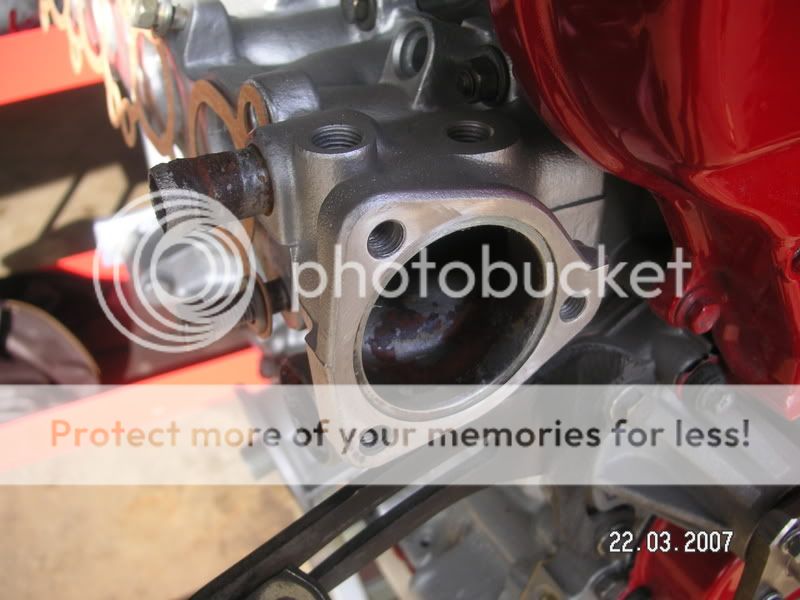 New thermostat and gasket... 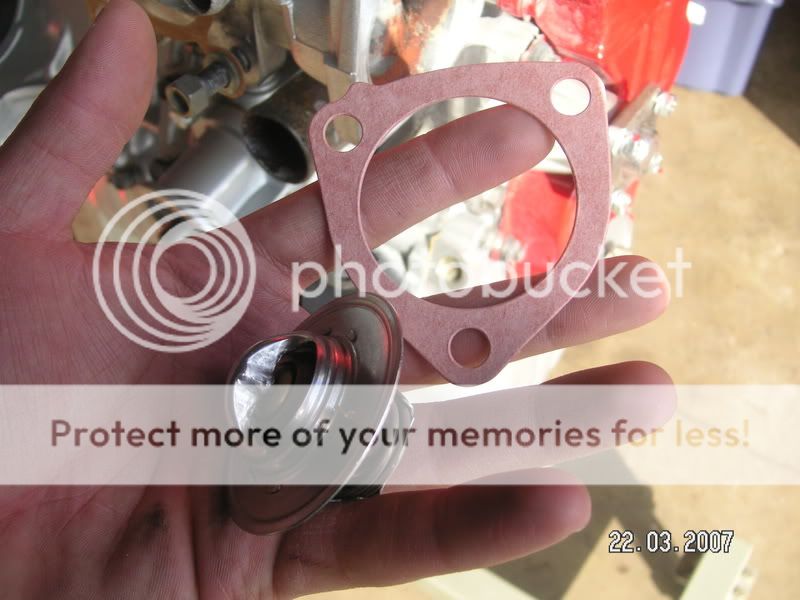 Torque down the three bolts and youre done! 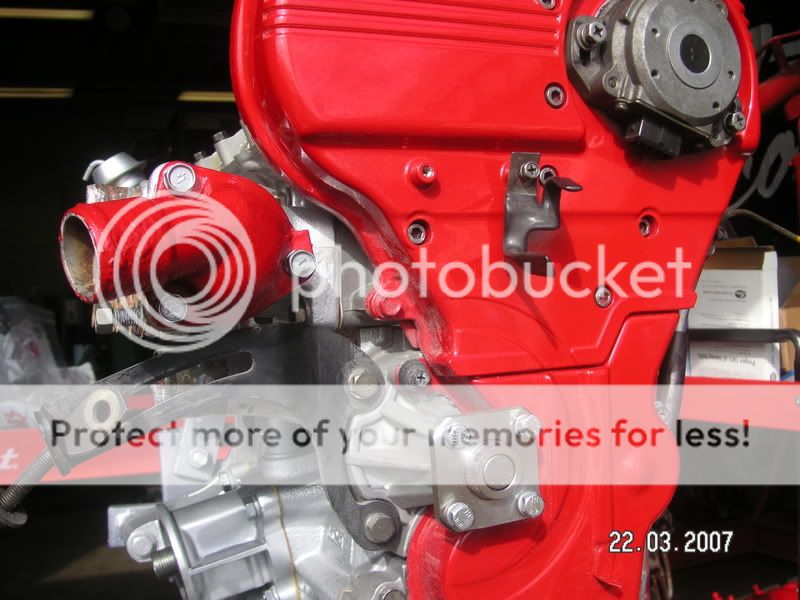 Rear collector cover for the intake manifold. This is so i have something of how the hoses were origanally. 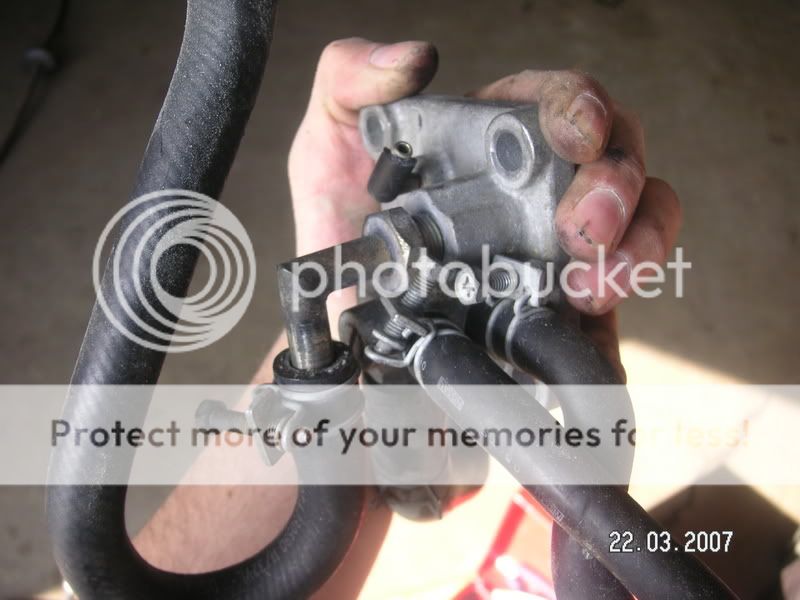 Looking more complete! I still need to install the injectors and fuel rail. Hoses and lines are next. 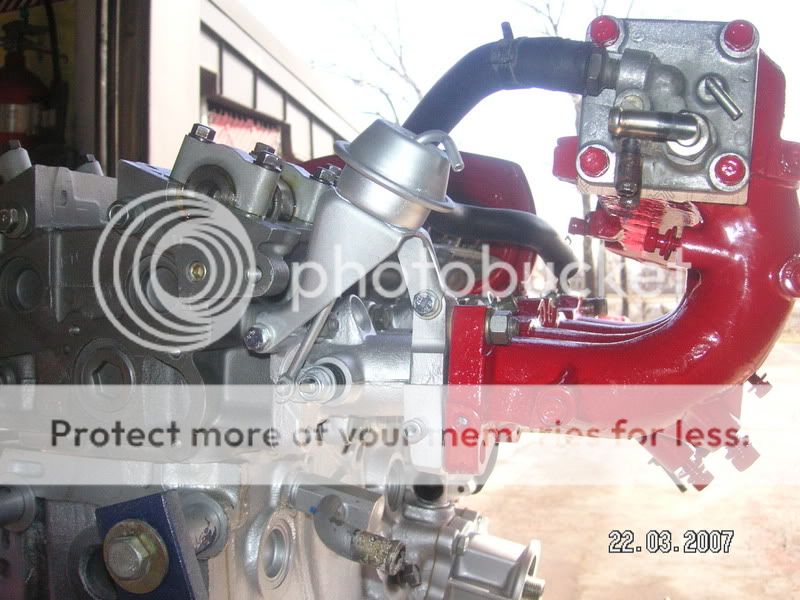 Remember to install the coolant temp sensors as shown. I like taking lots of pictures! :biggrin 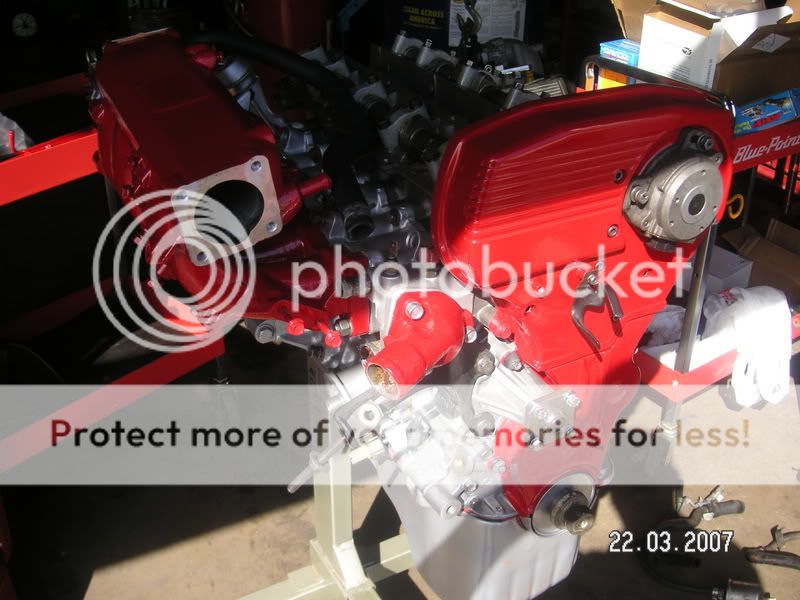 Heres a good shot of the powedercoated manifold. Its not the greatest but it sure looks really nice in the red. The whole scheme came out pretty damn good towards the end. 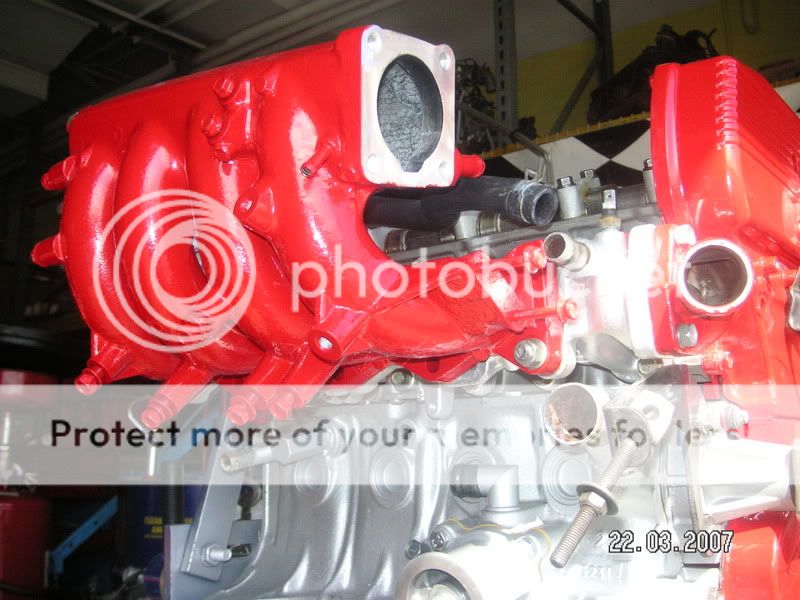 This ones a little easier to see. 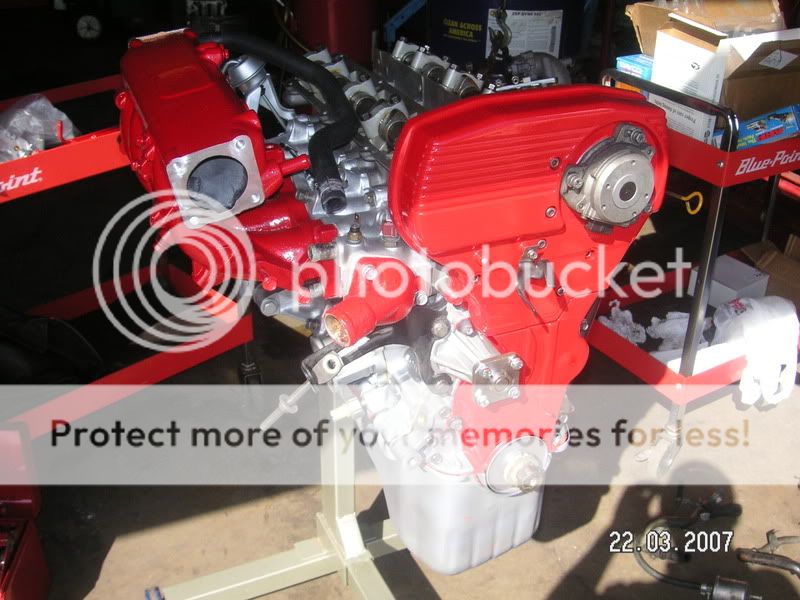 A performance rebuilt CA18DET, $2600.00+ and counting... The day i get it running, priceless. :ylsuper 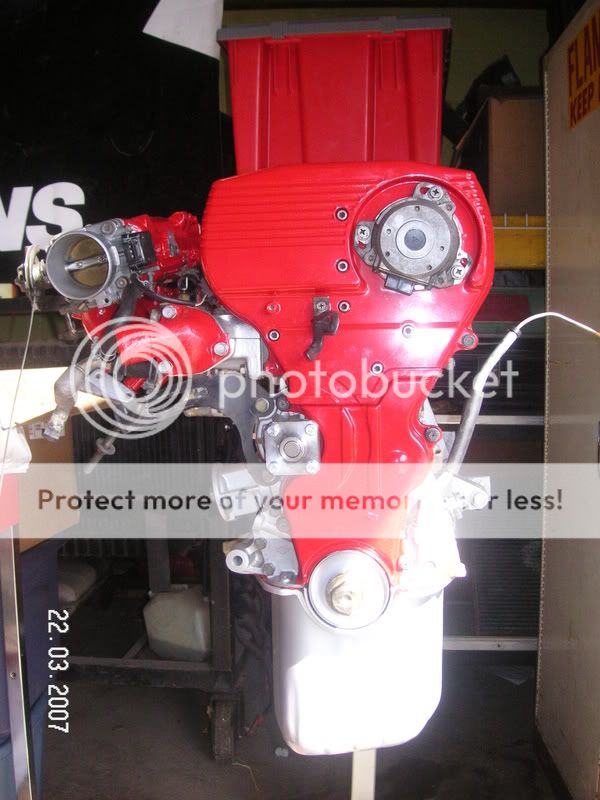 Incase i didnt mention it earlier, the oil pan is installed using Nissan RTV type sealant and new front and rear seals. 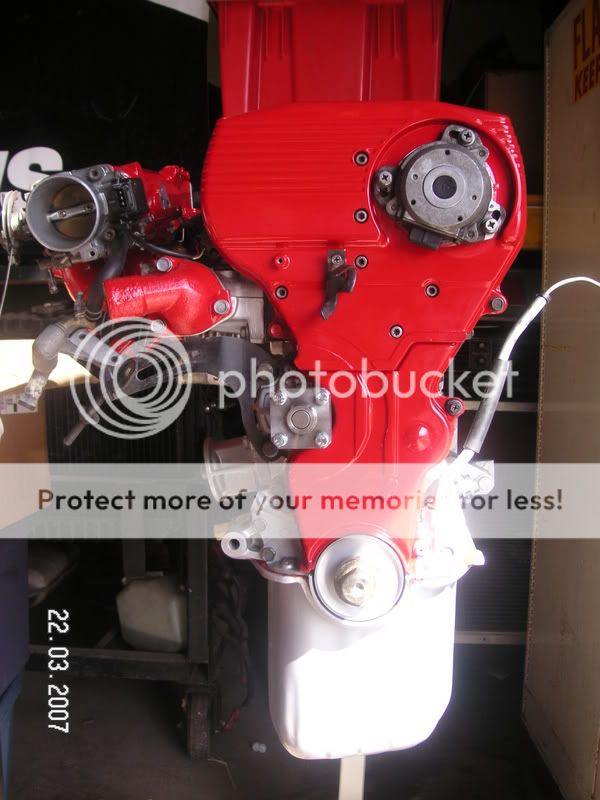 A closer look... 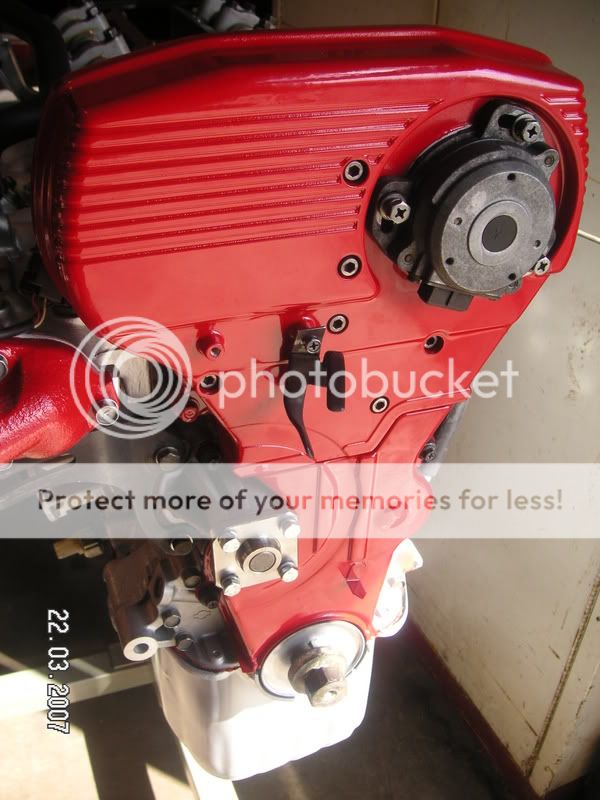 and another... 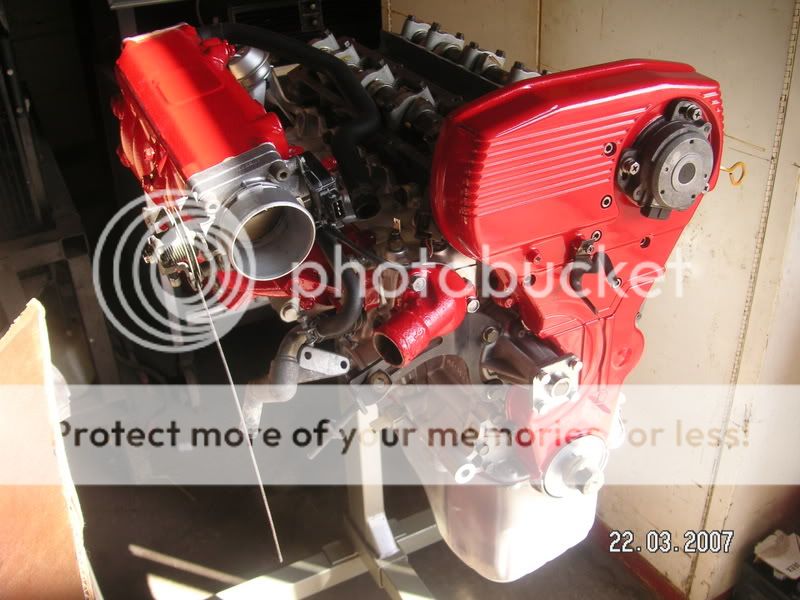 I installed the throttle body and tested the TPS but couldnt verify if it is truely working correctly. There was a break in the signal when testing with a DVOM but i havent tested it with a Digital Osiliscope so i cant deem it worthless just yet. I am going to go buy a new TPS and compare the new one to my old one. 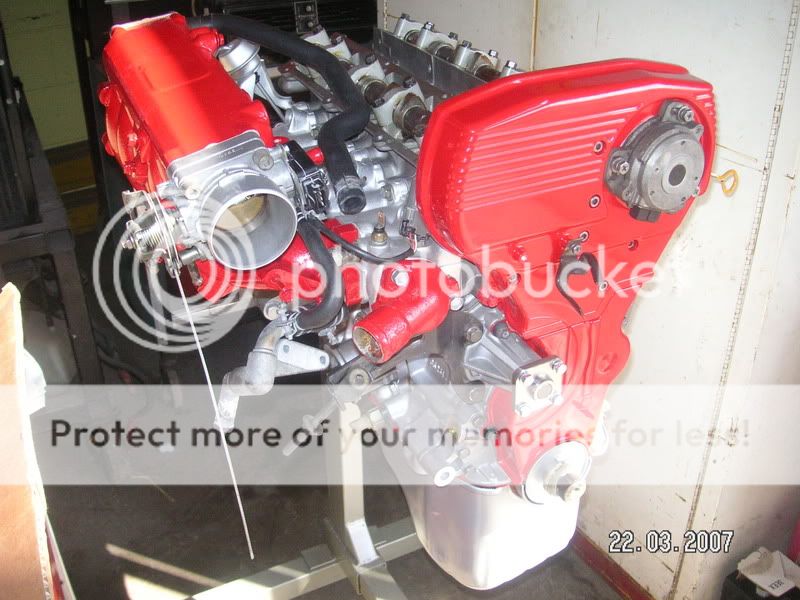 Im soon coming up on a year since i got this engine and its not yet complete. By the end of the month, April, i plan on having it done. Im glad ill be getting help from others, teachers, and the school shop for this one. 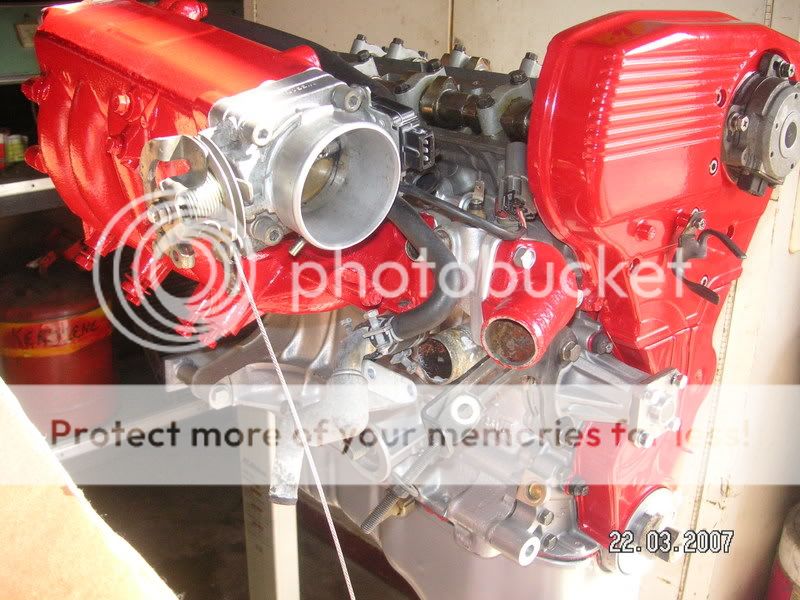 :naughty Nice! 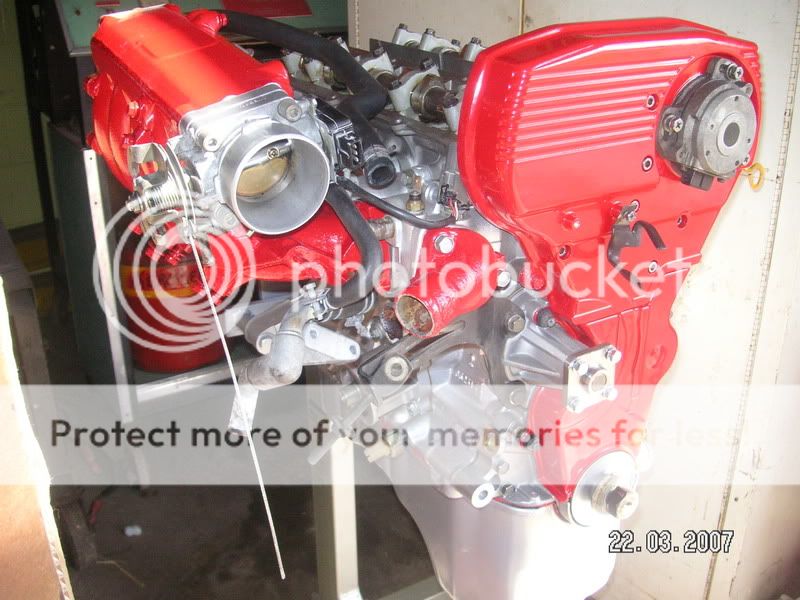 Heres the exhaust side without a manifold yet. Im currently shopping around for an aftermarket manifold and ive almost narrowed it down. Its most than likely going to be an "Ebay" manifold. I think im going with a Megan Racing turbo outlet and flex downpipe. Any ideas?  Cornered away... 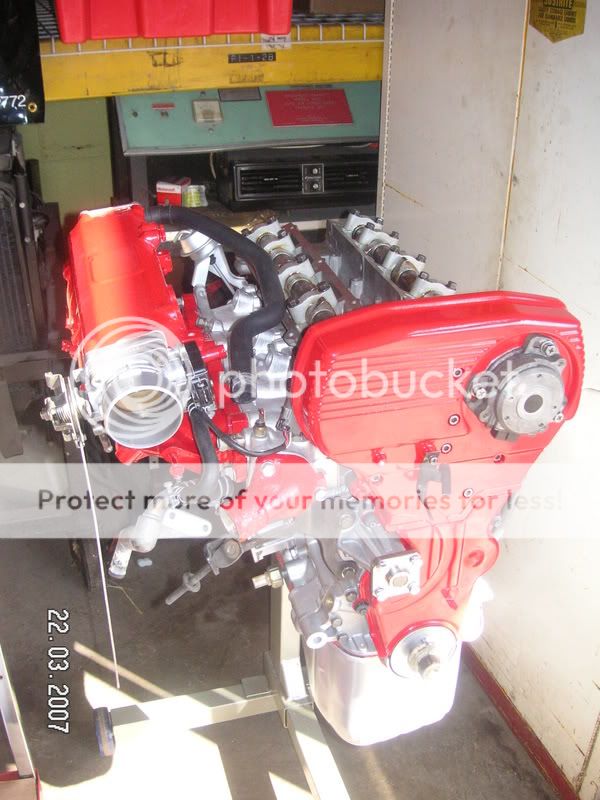 Now theres a good side shot. Fuel rail, injectors, seals, and o-rings all installed. 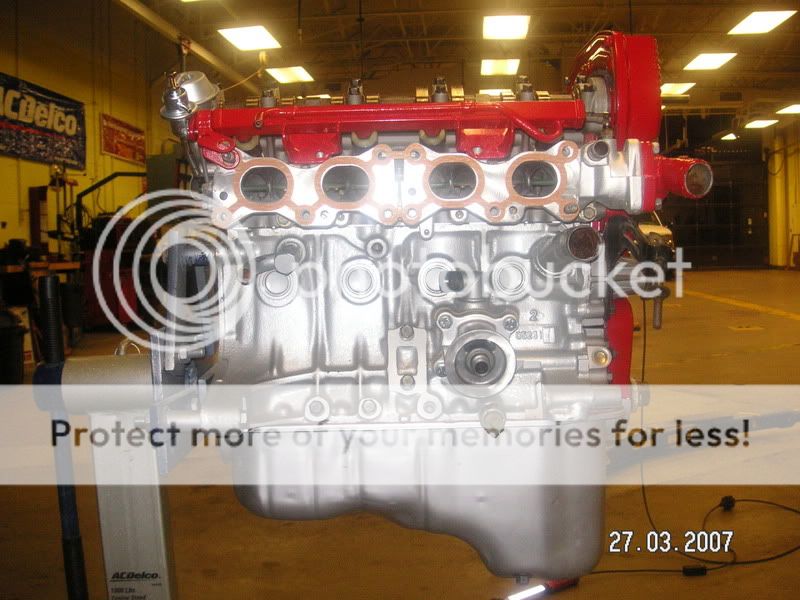 Heres a good look at the Butterfly Vacuum Actuator and Nismo Adj Fuel Regulator. I tested the vacuum pot and it held vacuum so i can assume it is still in good condition. I also replaced the phillips type bolts with hex head style for increased strength. These little suckers dont like to come out when they've been sitting in there for years and years. 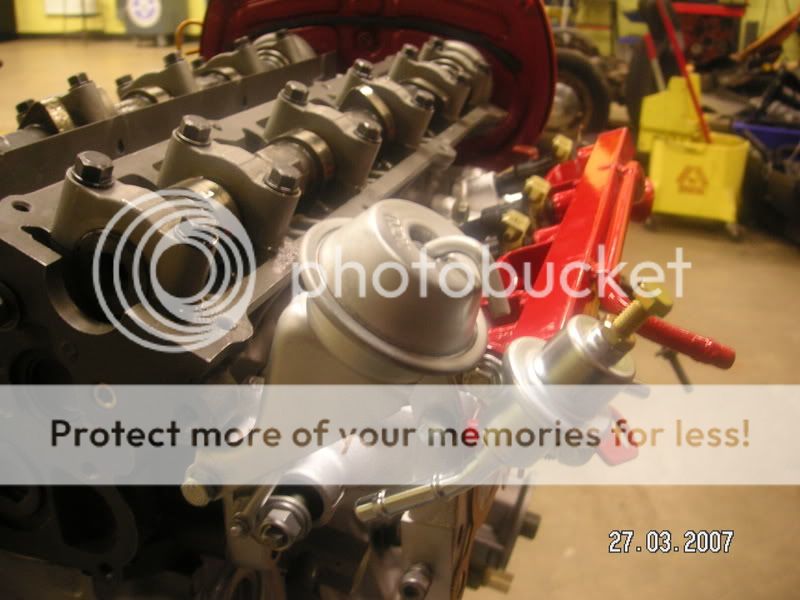 Heres the original 370cc injectors that came with my motorset. I did a resistance check, replaced the o-rings, replaced the other rubber grommet, and made sure they were clean from any obstructions or clogs. I could have had them sent out to have them further tested and balance test, etc. but i didnt think i should be too worried as these arent that expensive to replace. Before i put them into the fuel rail, i made sure there was no debris inside and put a little bit of oil on the o-rings to ease them in. 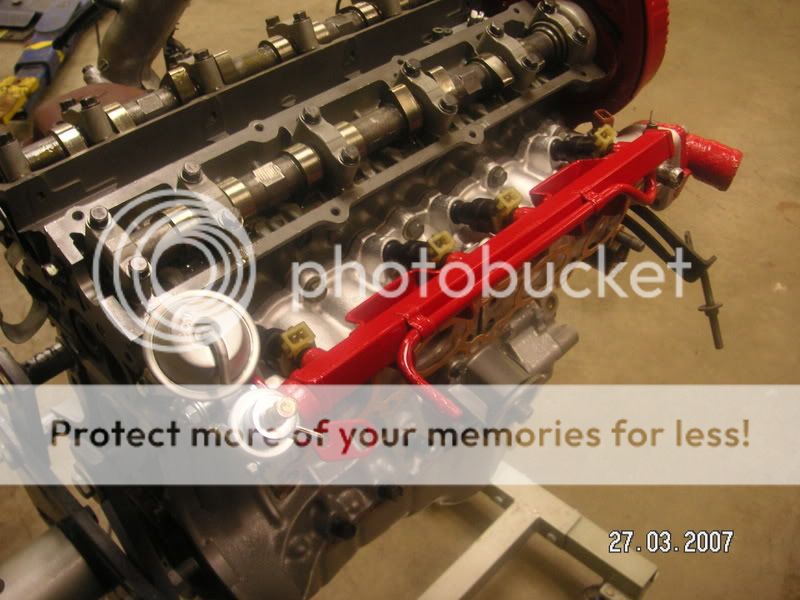 Stock fuel system will do, for now. 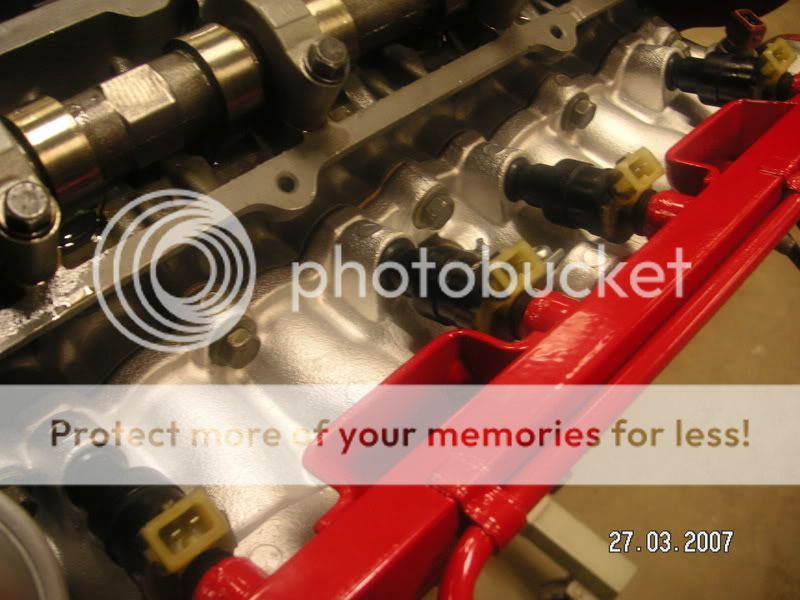 Theres my rebuilt CA T25 and manifold. I rebuilt it myself using common tools and instructions i found online. Before this, i had never done this so it'll be good to see what happens. If it all blows and fails, well i wont feel so bad as it didnt cost me much and it was a great learning experience. I made marks and lined up the compressor wheel and turbine wheel so i think ill be ok. Ive heard that these things were balanced by Garrett individually piece by piece or as an assembly. Im just hoping to get a few thousand miles out of it and then comes an upgrade. Ill post any news if anything happens. 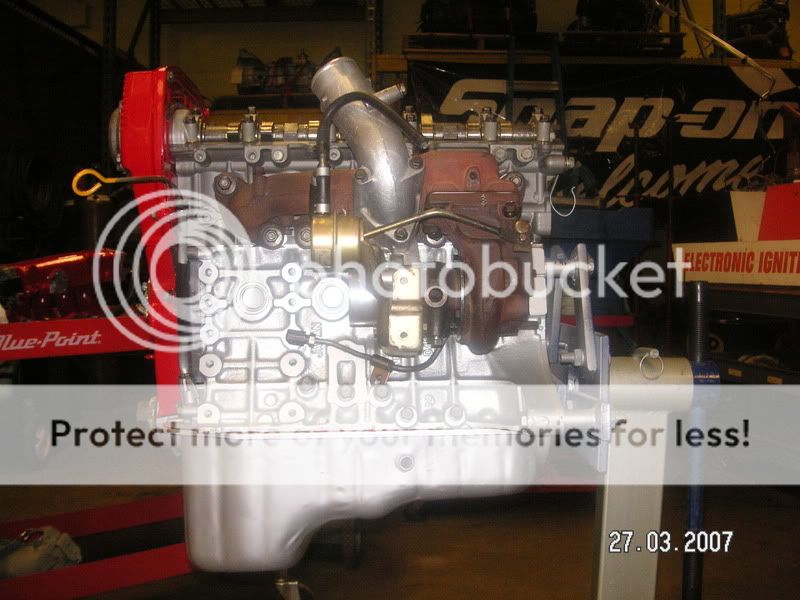 Dont you just love that freshly rebuilt engine smell...  Backside view of the exhaust housing and turbine wheel. Plans for the turbo are Taka SS lines and Megan Racing Outlet and Downpipe.  Rear top view... 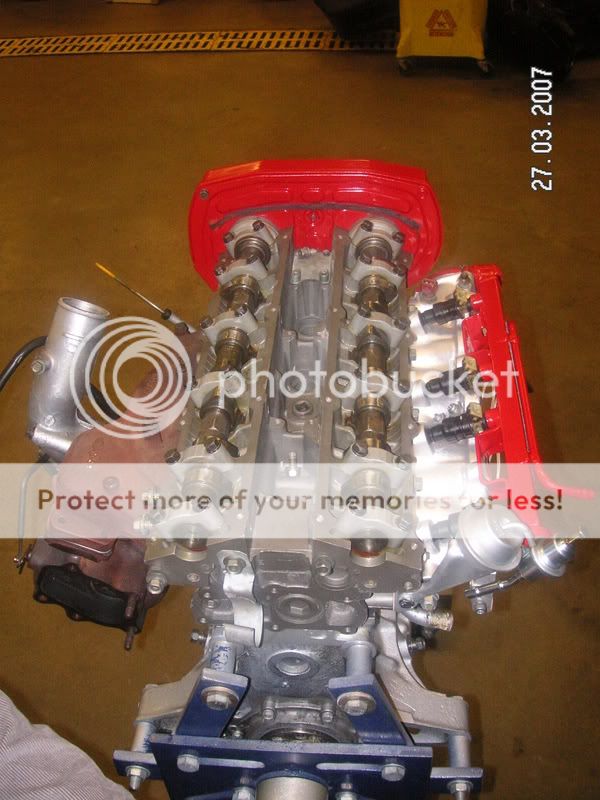 Front view... 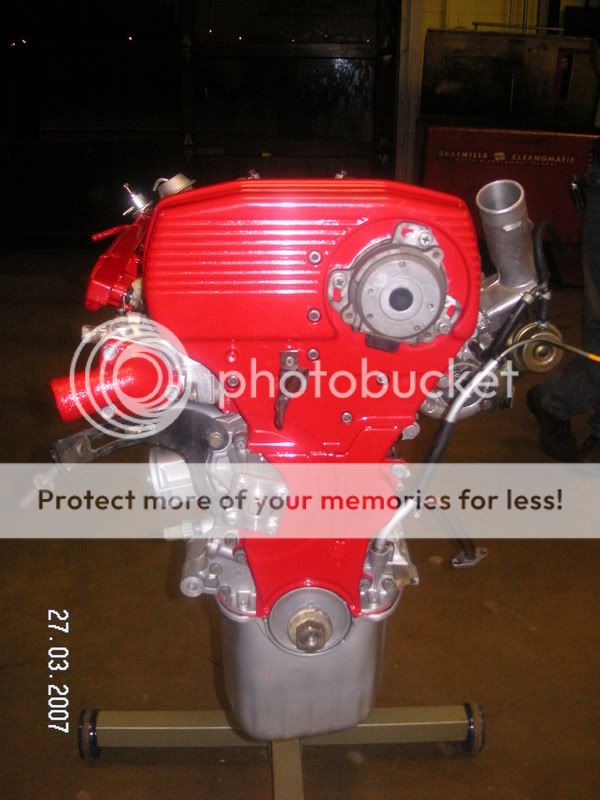 Another rear-end view?! 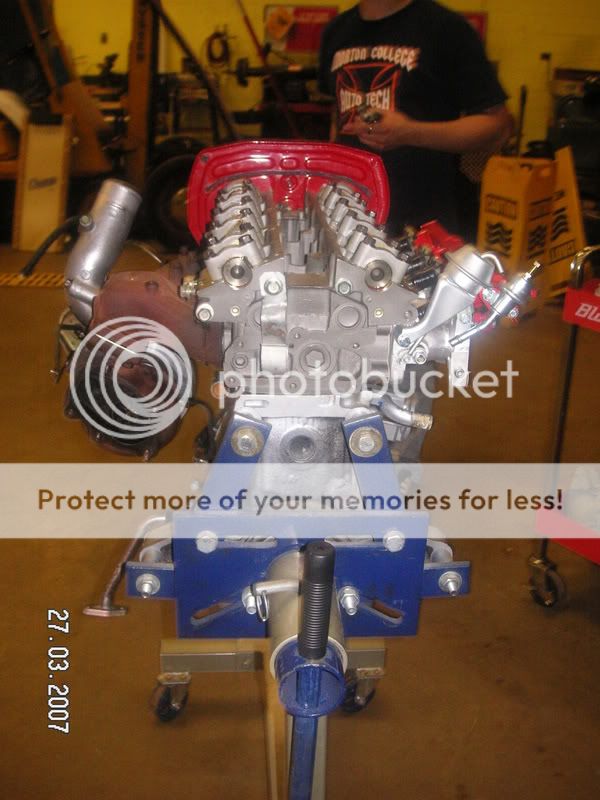 Sub-manifold and misc accesories...  Sometimes i take tooooo many pictures... :pface 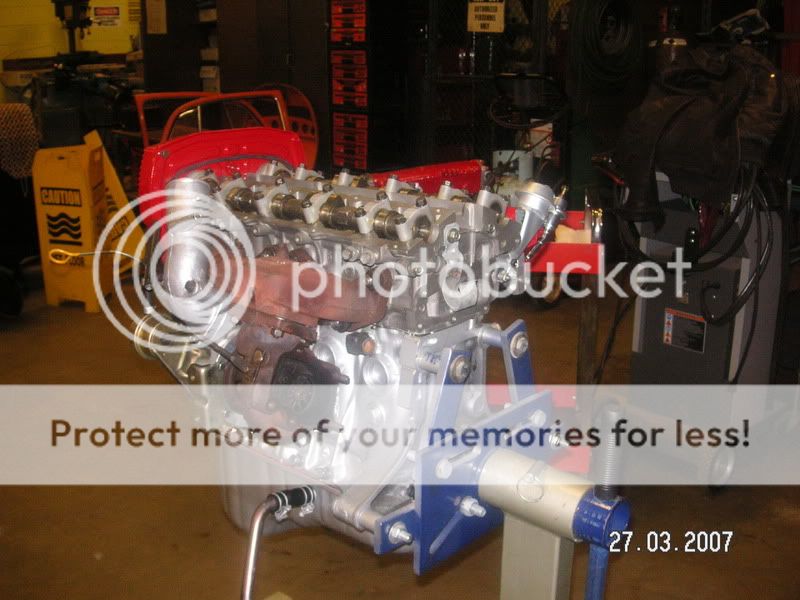 Heres a shot of the cleaned up mating surface for the idle control devices. On the bottom left you can see a part of the idle control valves all cleaned up and ready to go. I also tested the valves/devices according to the FSM and made sure they are within specs. I disassembled the valves and made sure the moving pistons/peices inside were free to move and not sticking. Hopefully this will eliminate any future problems related to idle and warm up. 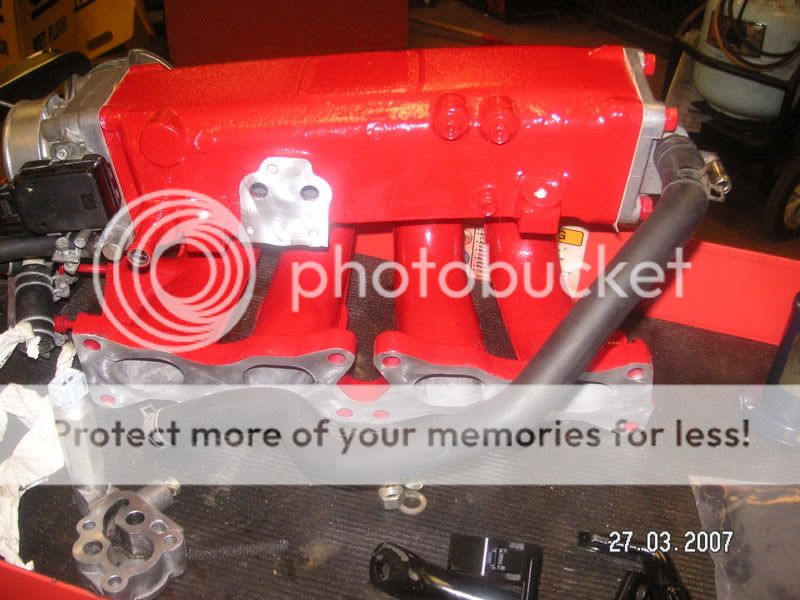 New gaskets and free moving parts. Those little pistons at the bottom left came from the Auxiliary Air Control valve. 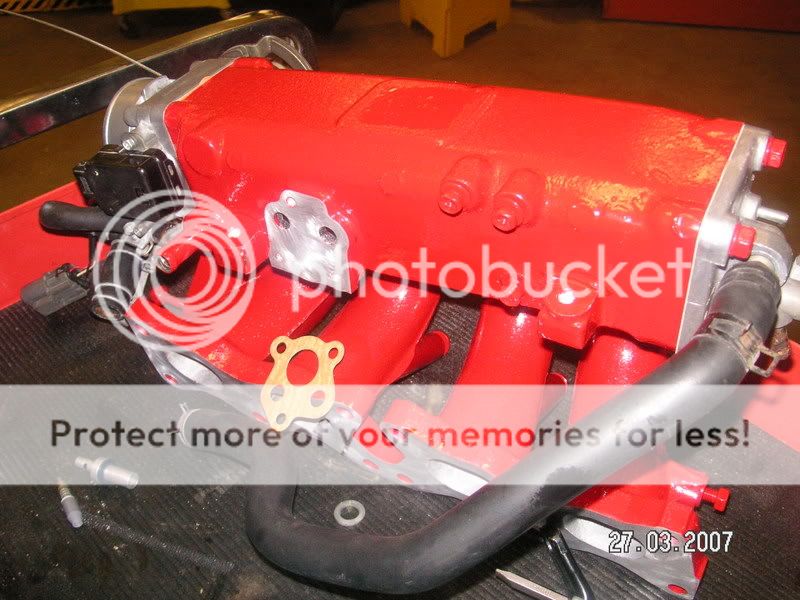 A close up of you know what... 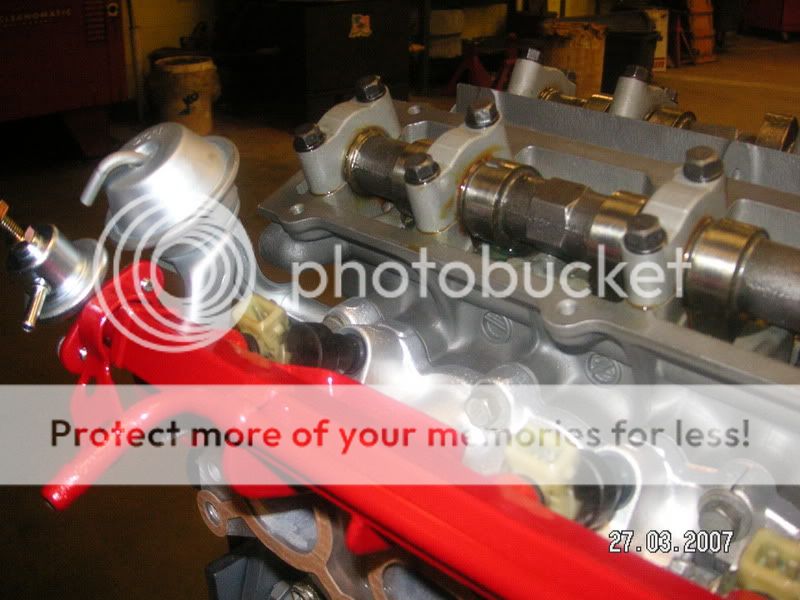 If youre thinking, where the hell are his cam covers, well heres what happened. When i went to pick up all the pieces that i got powdercoated, i looked at the cam covers and refused to use them the way the company left them. The coating was bubbling and flaking off, especially at the flat mating surface where the "ornament" cover goes (c.o.p. cover). They also bubbled up on the top of the covers and were very noticeable. For what i paid, i didnt expect THAT from them. I took them back, talked to the powdercoater, and he agreed he would go back and try again to get them smoother and looking better. I'll post pics later when i get them back. 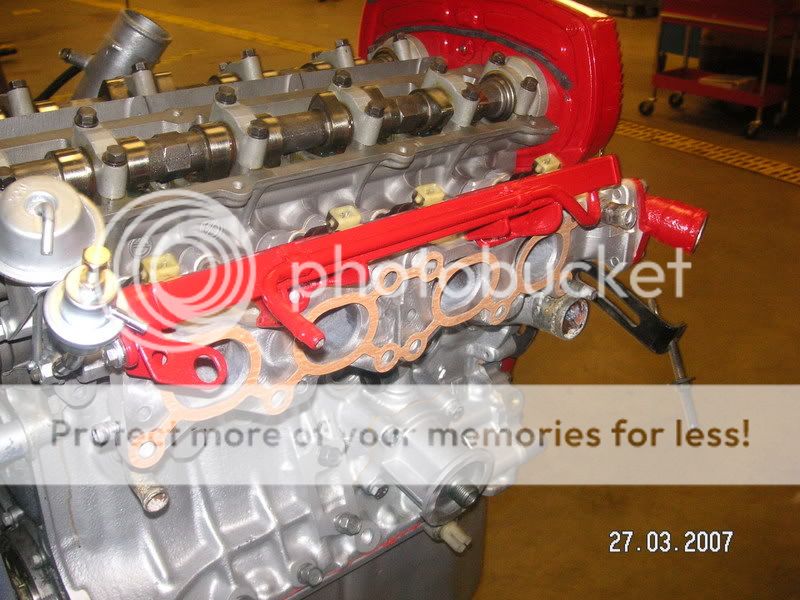 Side view of motor and manifold setup. 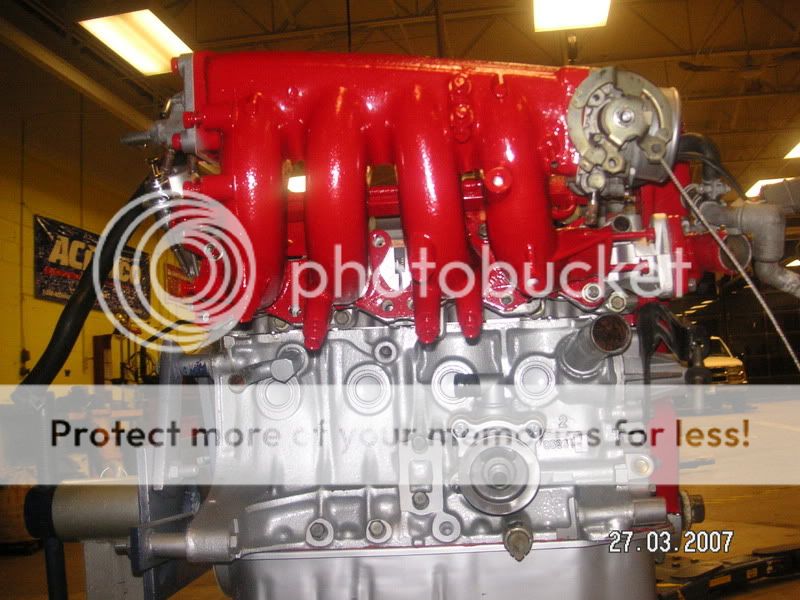 Would there be a risk in not putting back the brackets that come originally on the engine? Has anyone done this(im sure someone has)? Any experience with this?  Some picture i took for some reason i do not remember. I think it was just to show off the red manifold. 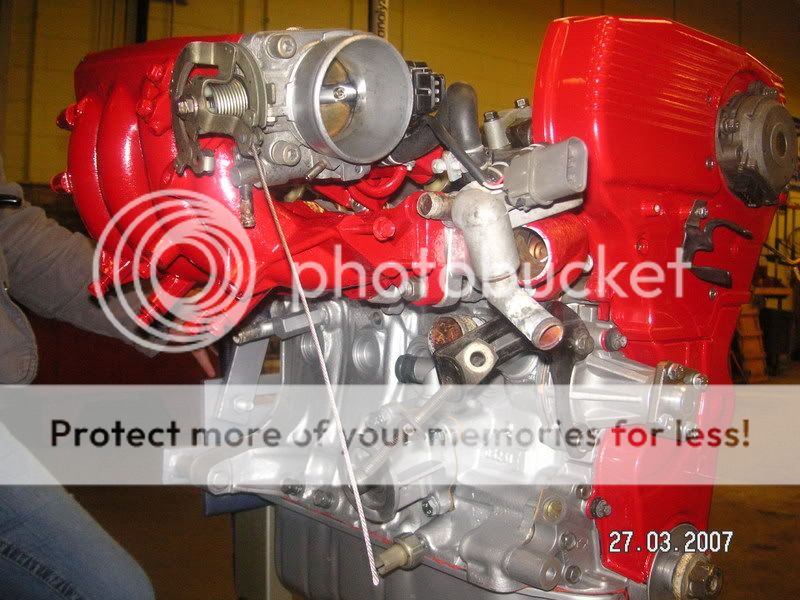 There the Idle Air Adjusting Unit, it includes the AAC and FCID. 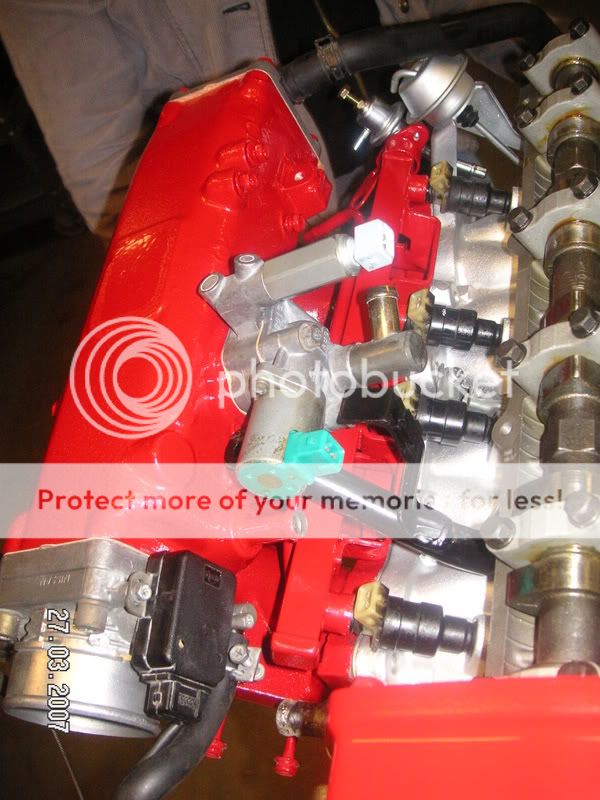 Under construction... Modified by davidricardo86 at 12:47 AM 3/29/2007Modified by davidricardo86 at 5:13 PM 3/29/2007Modified by davidricardo86 at 6:08 PM 3/29/2007 | |
| | | | davidricardo86
Light Duty Poster
Number of posts : 160
Age : 37
Location : Chicago
Vehicle : 92 S13 SE Coupe
Reputation : 0
| | Subject: Re: David's CA18DET build-up thread! April 24th 2007, 11:44 am | |
| Ive got more progress to post. I just gotta dig around. | |
| | | | davidricardo86
Light Duty Poster
Number of posts : 160
Age : 37
Location : Chicago
Vehicle : 92 S13 SE Coupe
Reputation : 0
| | Subject: Re: David's CA18DET build-up thread! April 24th 2007, 11:50 am | |
| CA T25 Rebuild:Also heres some pictures of my ca t25 rebuild. Its a pretty cool to know how these little guys work! It was actually a really straight forward job. Follow the instructions, get the right tools, and just give it a shot. My goal of this job was to rebuild a turbocharger using new seals and bearings from a service kit. Heres some shots of what the turbo looked like when i got the engine. My first impression was that its really small and i wasnt sure if it was in "good" condition. I know you are suppose to measure shaft axial play to check for wear and tear on the internals. It didnt move too much but i never bothered to use a dial indicator although i should've. 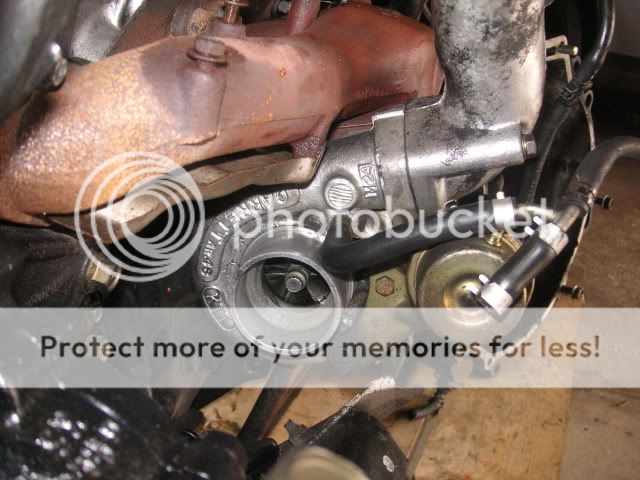 I let the turbo sit around for a while and oil would come out this side if i left the compressor side facing down. My guess was that the seals were bad. 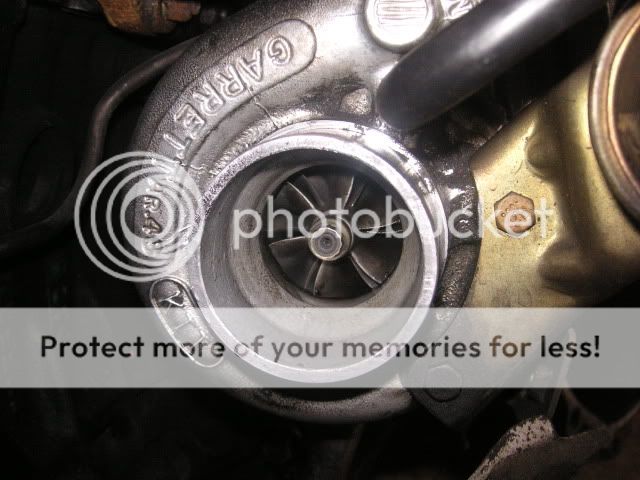 There it is on the longblock with most things still bolted in place. 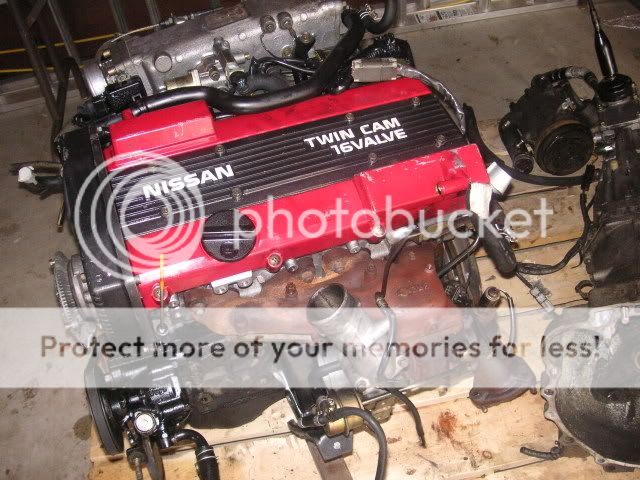 I put tape on there so the oil wouldnt drip on the floor. Oil coming out of the compressor or exhaust side doesnt sound too good to me. A rebuild is definately in order. 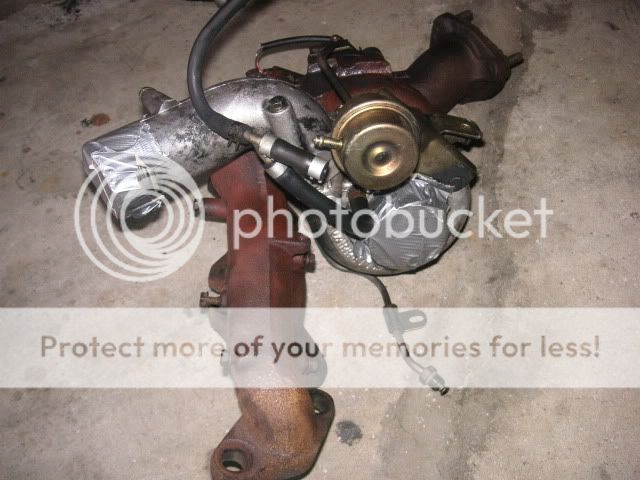 Heres a few things youre going to need to do this. Ill try and list prices and where you can find these things. Socket and wrench sets. Basic tools.T25/28 Rebuild kit with dynamic seal (my choice) $72.85 off http://www.ebay.com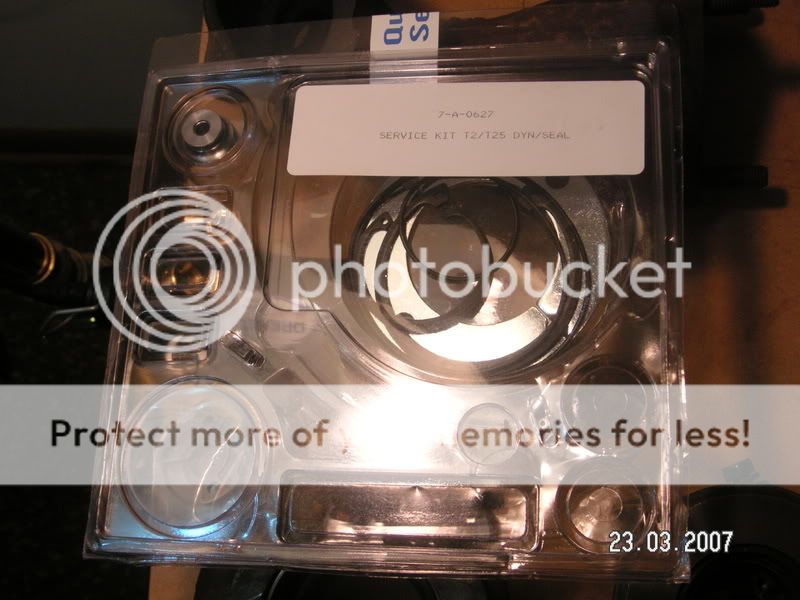 Make sure you've got everything you need! 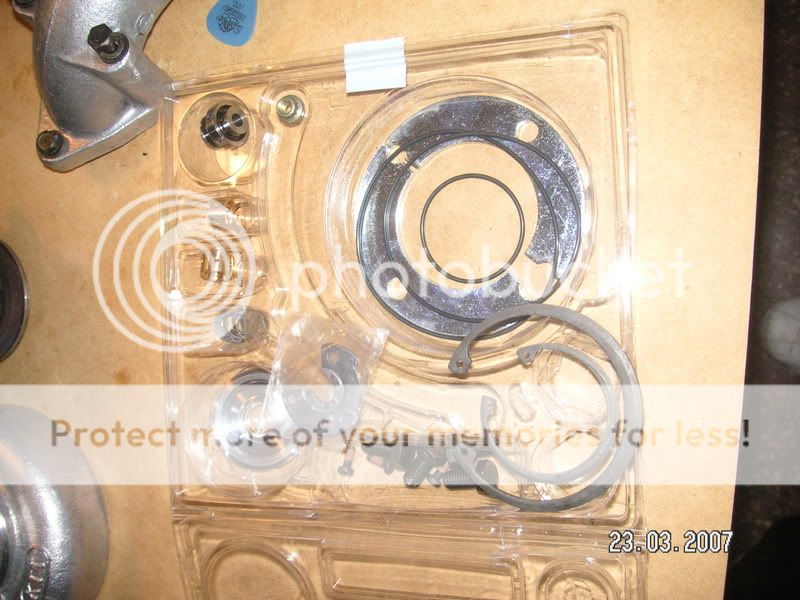 Snap ring pliers Snap ring pliers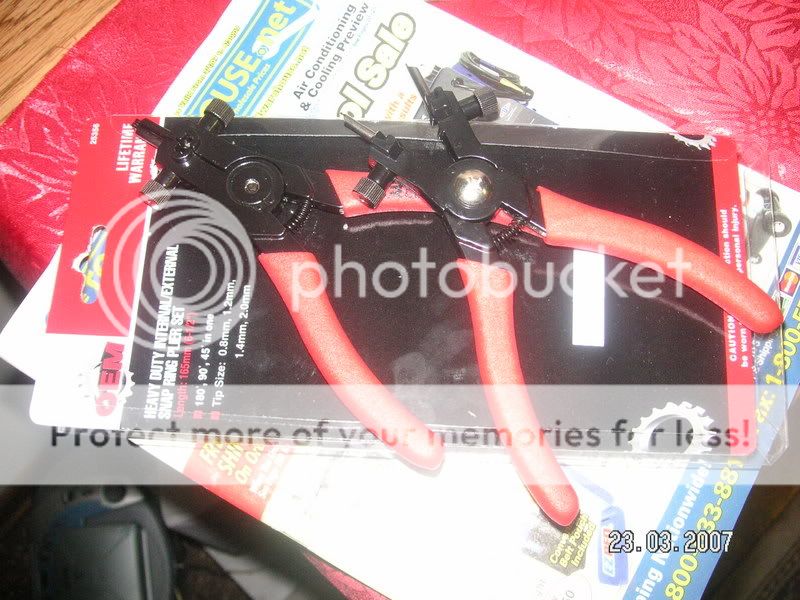 Some motor oil Some motor oil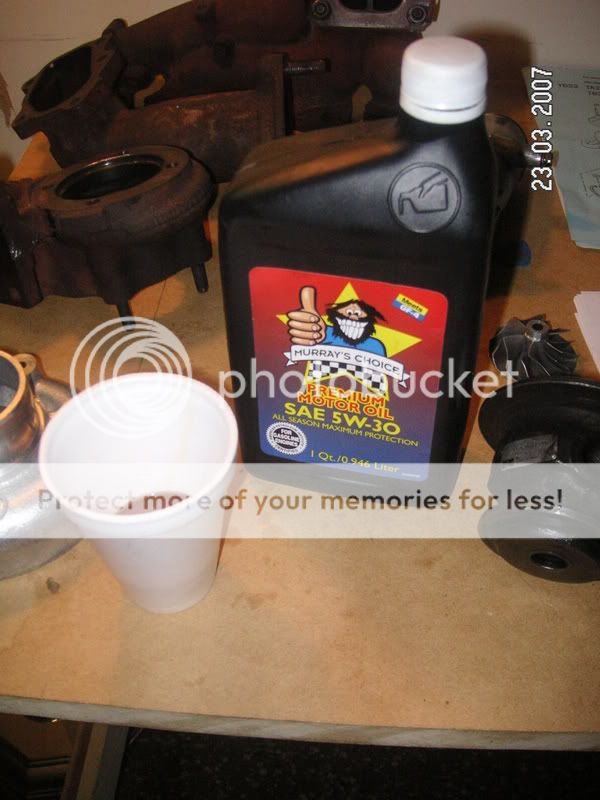 Instructions or guide. Instructions or guide. Here is the best one i found http://photo.platonoff.com/Aut...uild/! 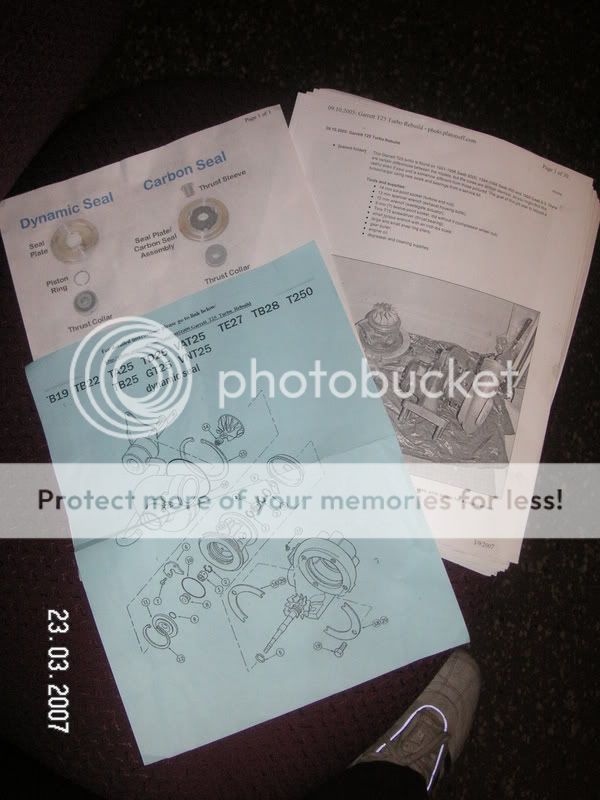 Heres the turbo all apart. I didnt get a chance to take pictures of the dissembly but its easier to take something apart rather than to put it back together. Anyways i did get pictures of the build up so you could back track aswell. Here are the major pieces that make up the turbo. I cleaned everything up in a solvent tank and a wire brush! Looks way better now. :bigthumb 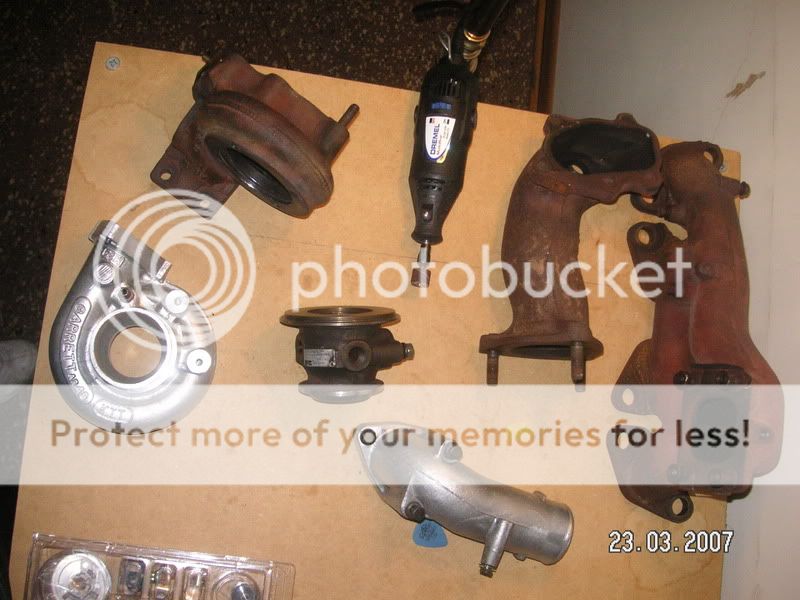 Heres my Dremel i used to clean up the area where the CHRA and the exhaust housing meet. Mine rusted a bit and i had to use a torch and rubber mallet to take it apart. It finally came apart and then i decided id clean this up and remove the rust. I then put a little bit of anti-seize on here to prevent this later. 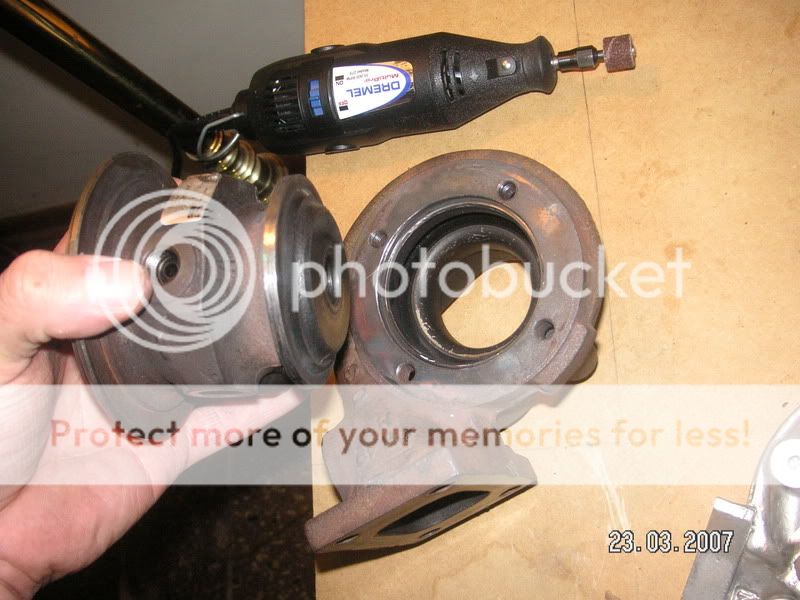 Aluminum compressor housing...  Compressor housing... 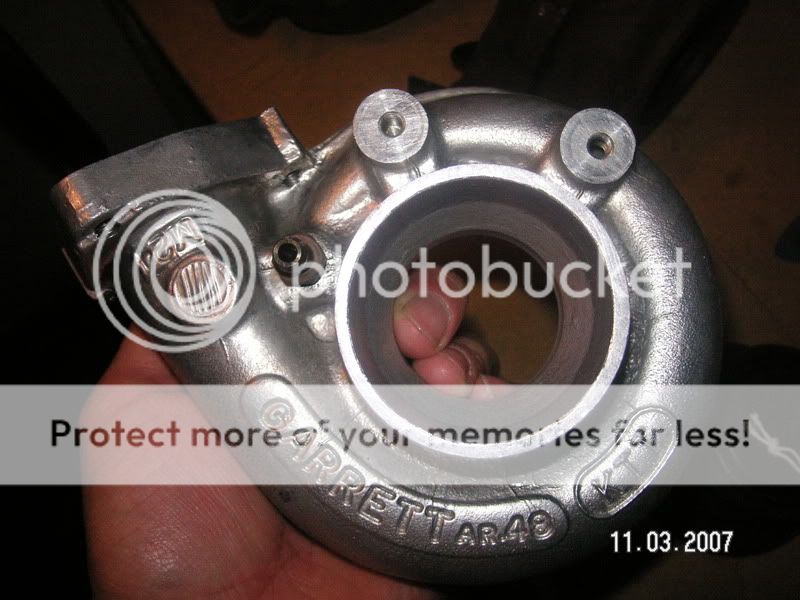 And again. I never knew thats what they looked like on the inside. Pretty cool! :pface  Compressor and turbine wheels with center shaft and all seals and bushings/bearings. I made two reference marks, one on each side as to not throw the balance off. I've heard that Garret balances these from the factory in two ways. One way is with all the rotating pieces seperately, or the other way is all together as one assembly. Ive also heard of people hacing turbos rebalanced after all rebuilds not just when changing wheels. Im not 100% sure so i just made referrence marks and hope that this will be enough. If it all fails well then i learned something atleast. Ill see what happens. 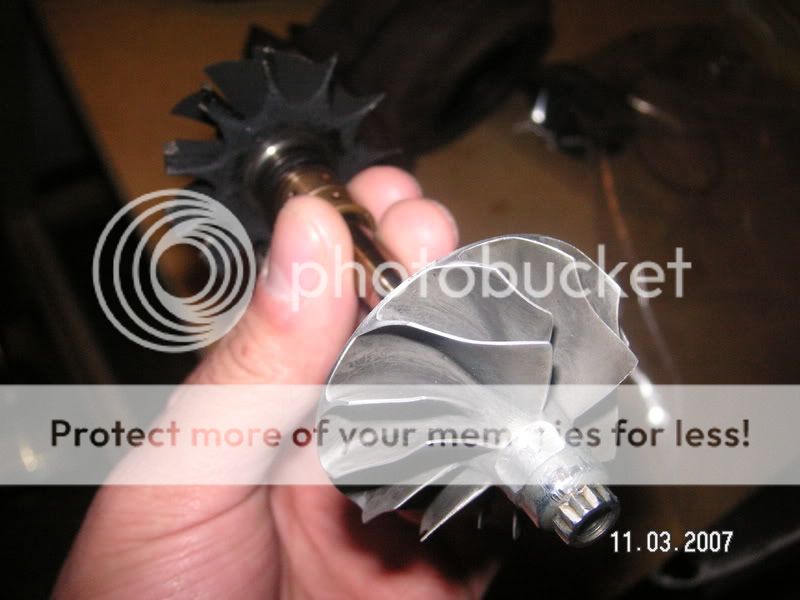 Compressor wheel. 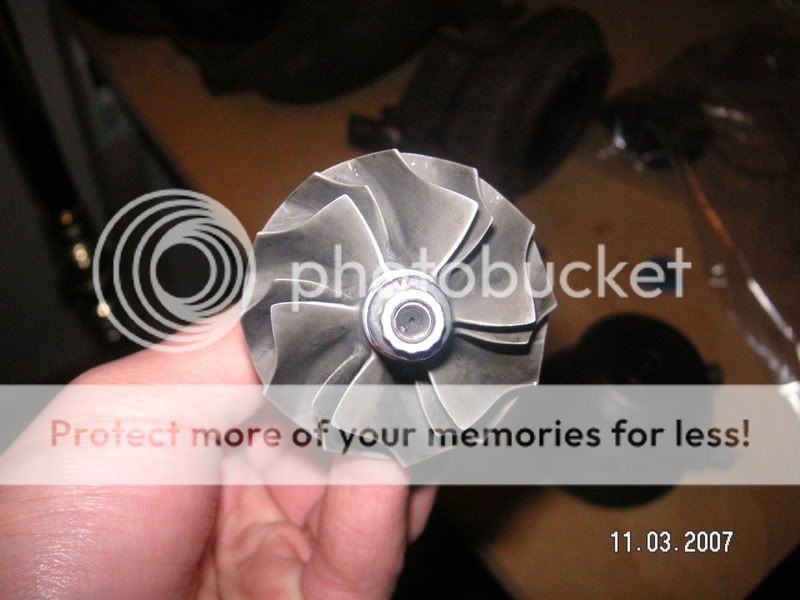 Turbine wheel! Oooh carbon and soot build up. 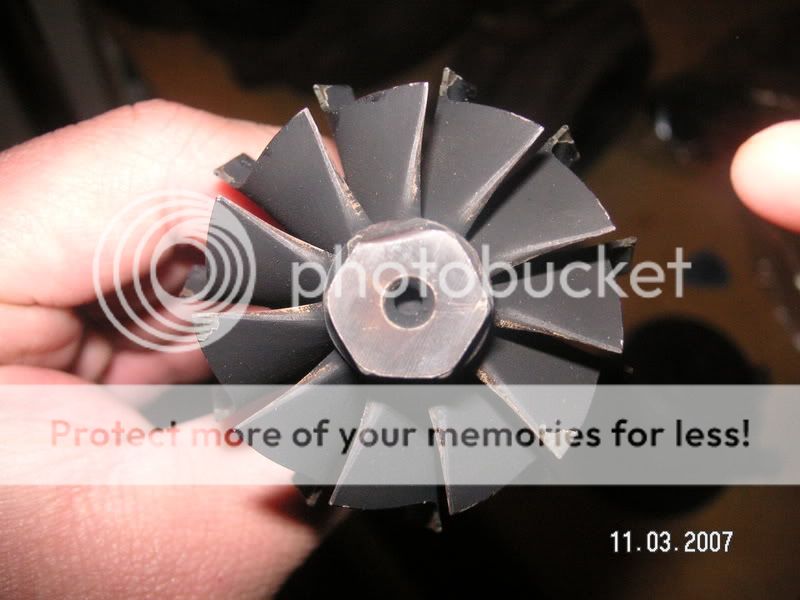 Heres a good high resolution shot of the compressor wheel! Its pretty cool how you can see the two impellers/blades. It feels very lightweight and really fragile, i wouldnt drop it.  Turbo ID. 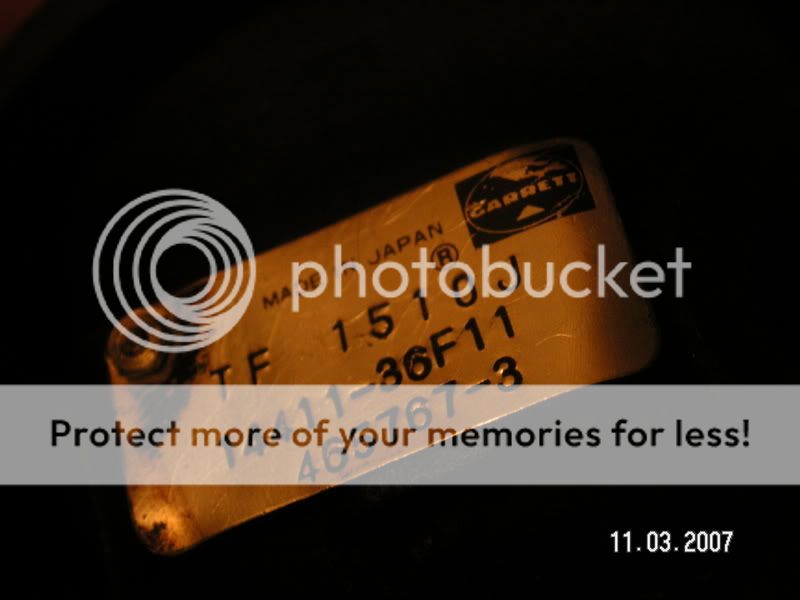 Garrett ID numbers.  CHRA ID plate. 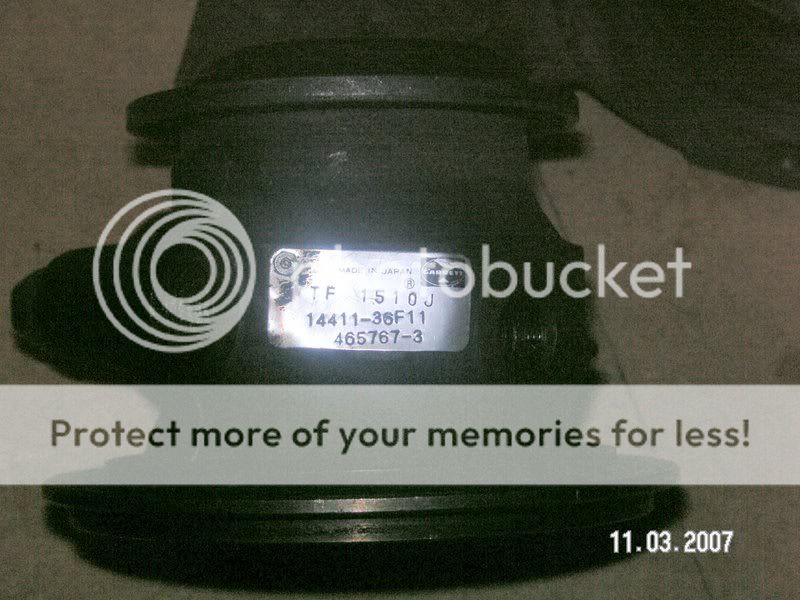 Heres what came out of the turbo. There plenty of small pieces so make sure youre organized and keep track of everything and the way it goes. 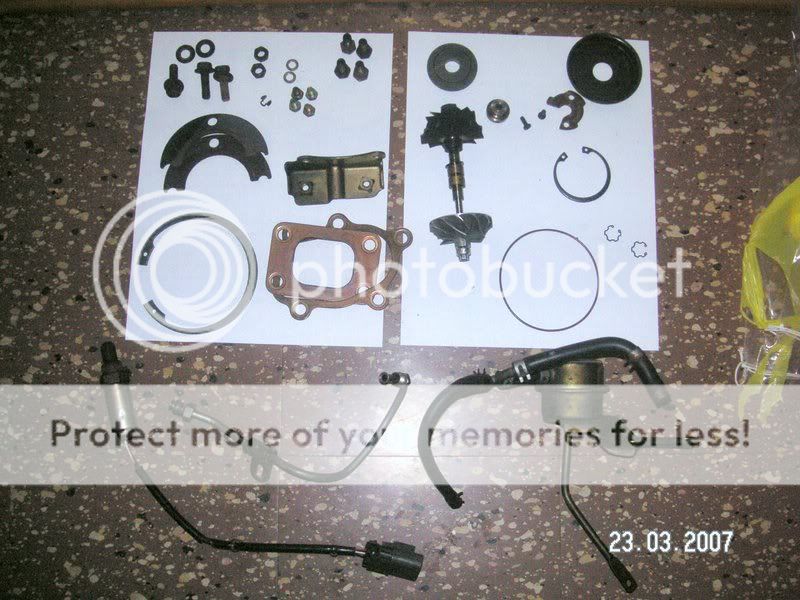 CHRA internals. These will be changed and freshened up. New seals and bearings. 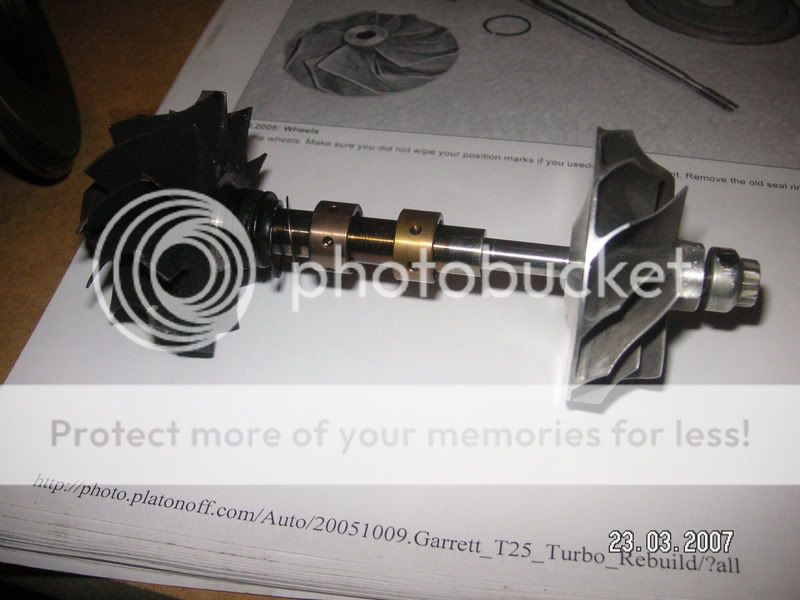 There are two types of bearings, use the correct ones! 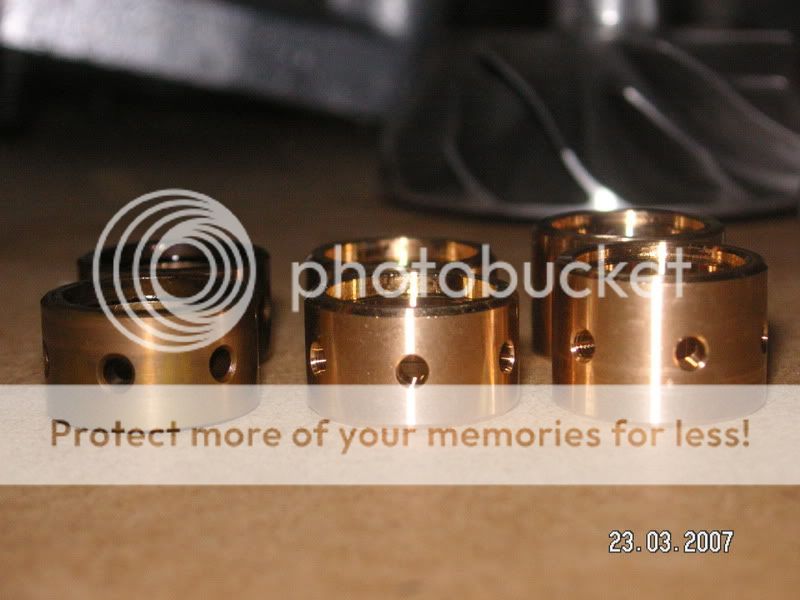 Heres the old seals and what i thought was a retainer type clip. 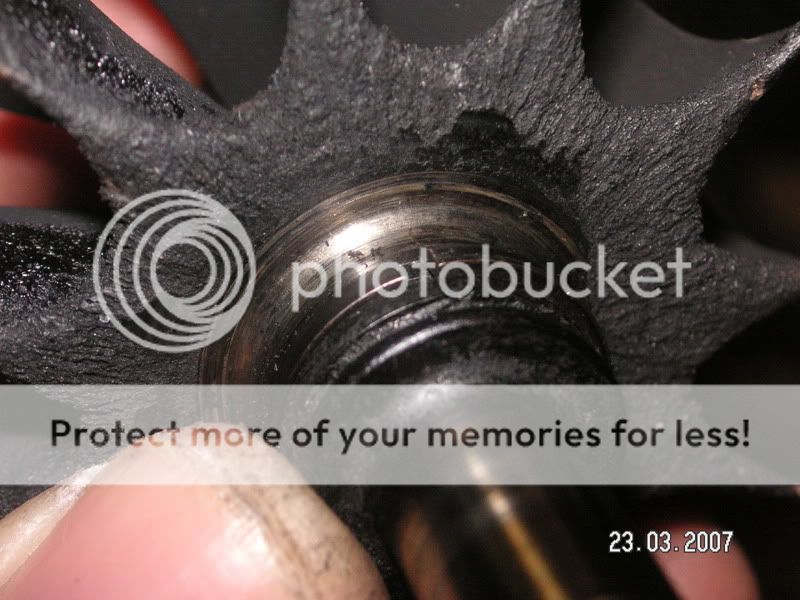 You can see the old seal there.  New seal is put on. 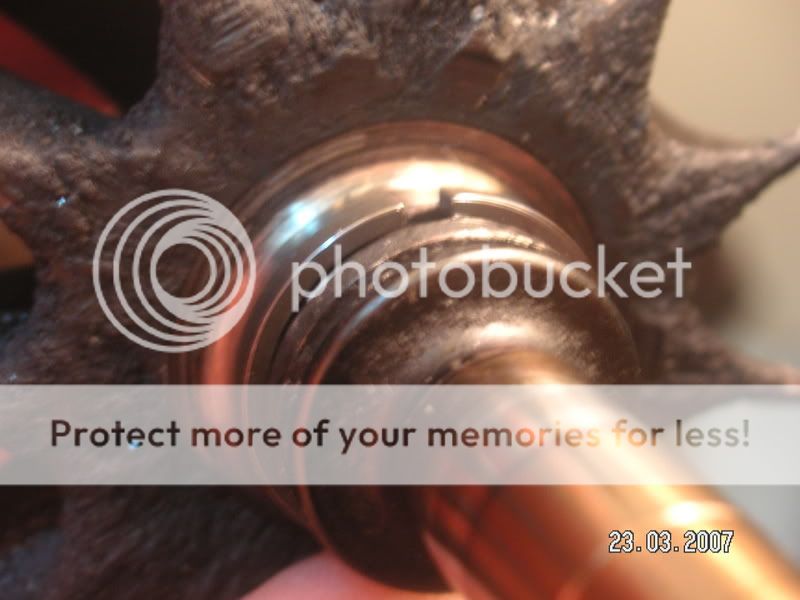 Next install the washers and retainer clips.  Think about this one here. Look at the way the clip is shaped and the way it is able to be moved. 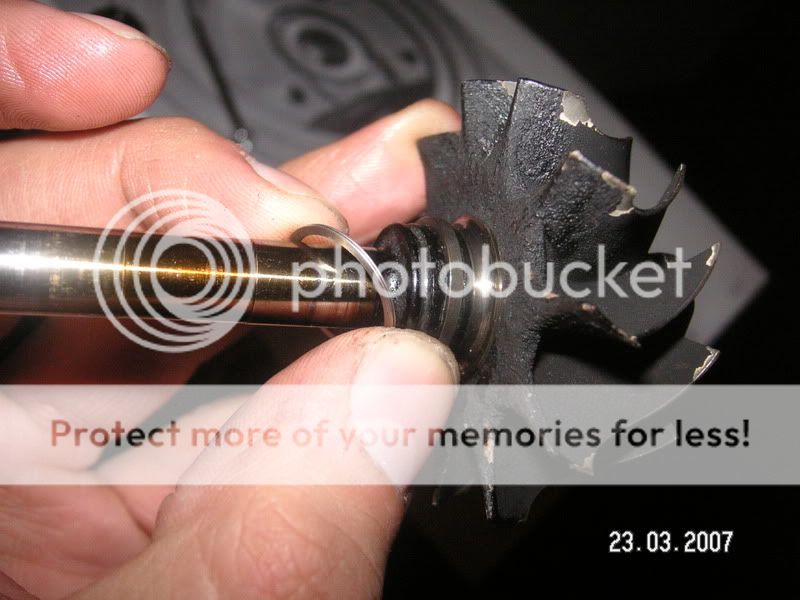 Open it up and rotate it on. 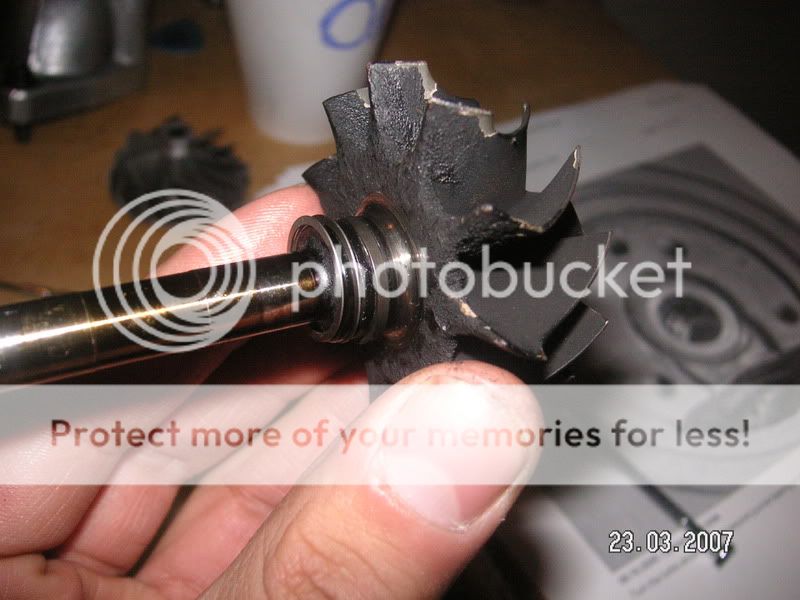 This is what yours should look like! 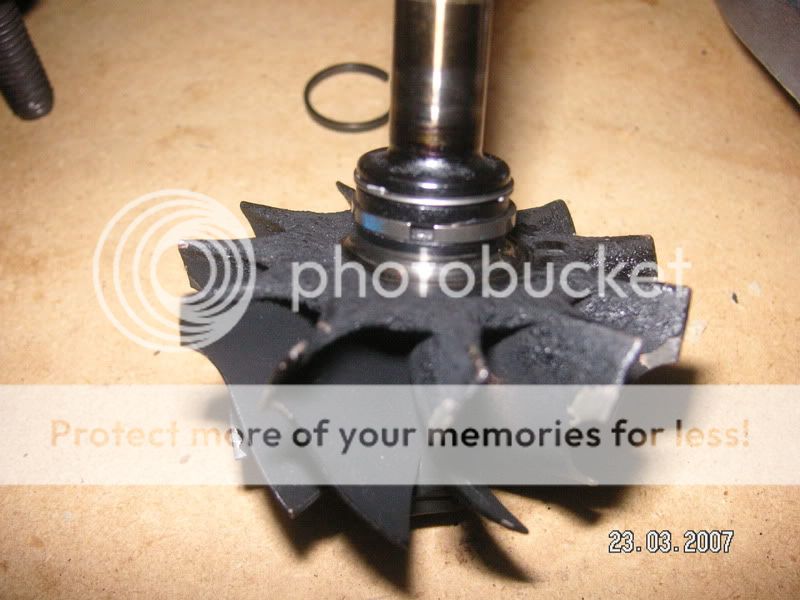 Install this c-clip with a small enough internal snap ring plier. 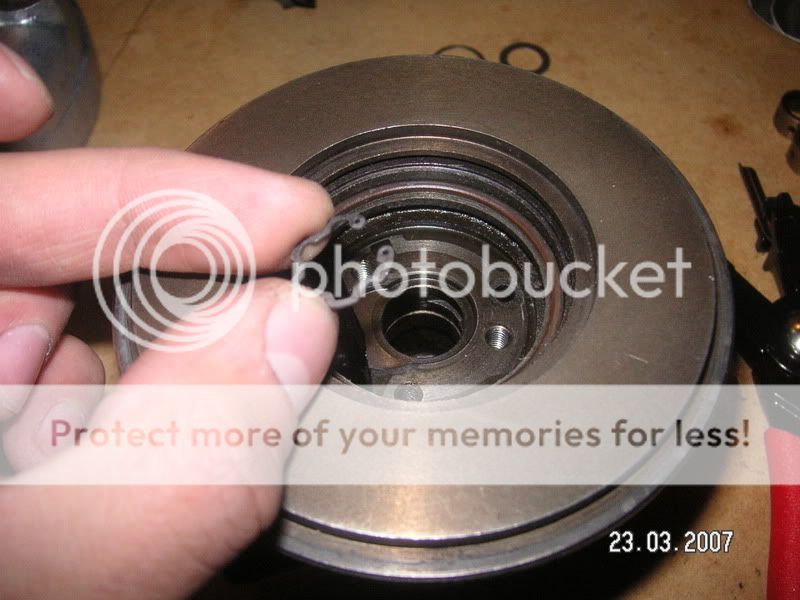 It fits inside the CHRA in a cut out. It will just snap right into place and it what holds the bearings from moving.  Get the first bearing and put it in your oil. 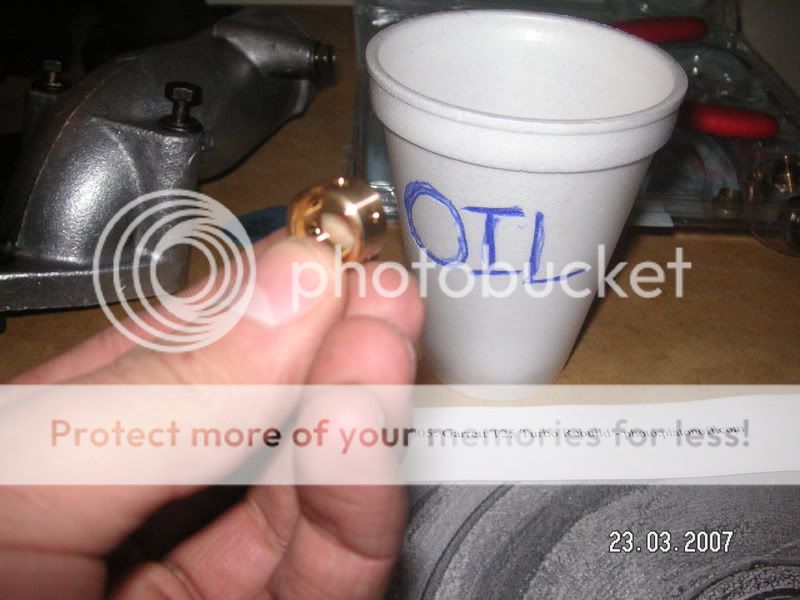 Put it into the turbine side. 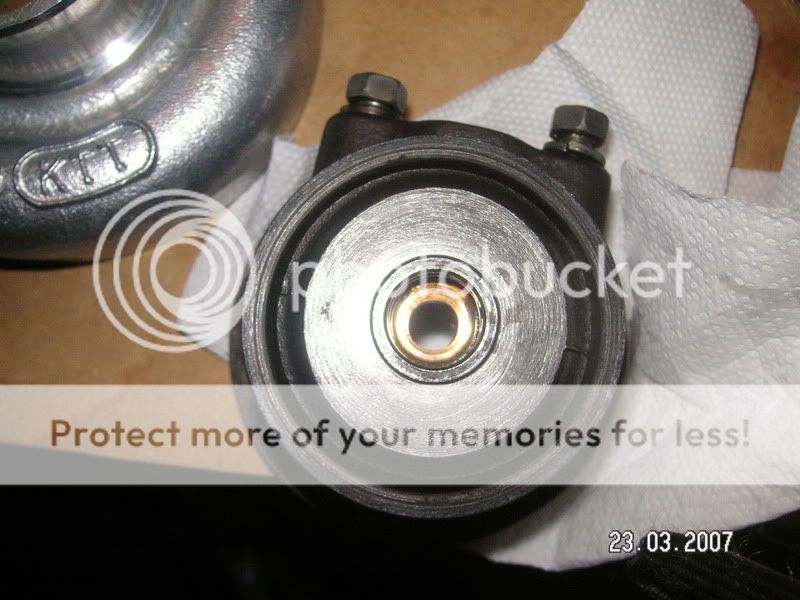 This washer follows the turbine side bearing. 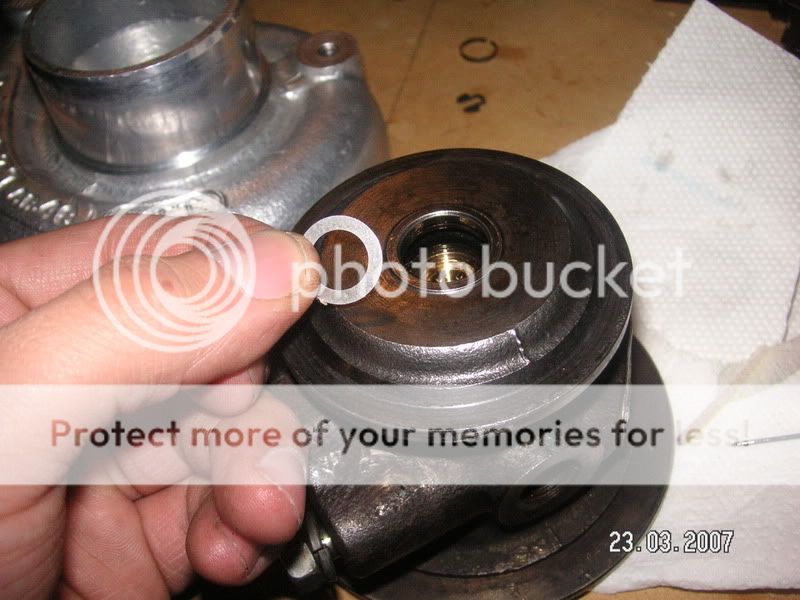 Put the other bearing in oil. 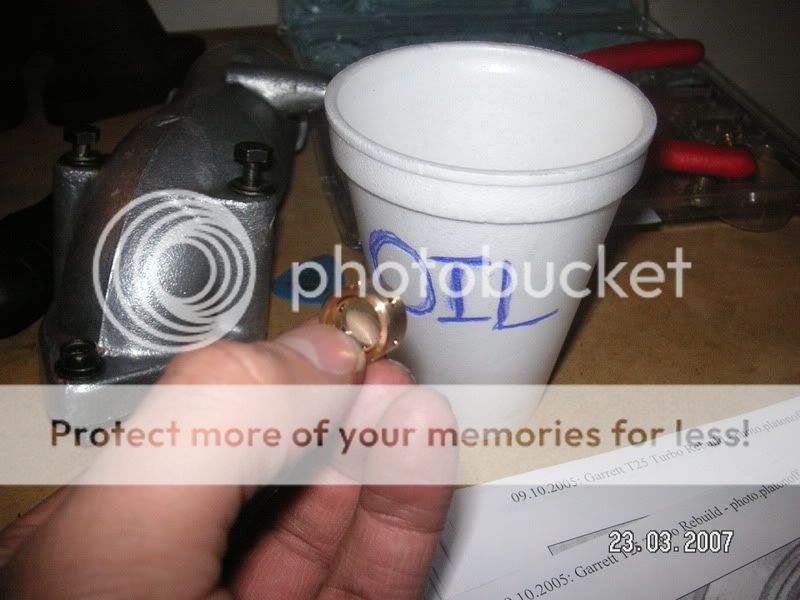 Insert it into the compressor side. 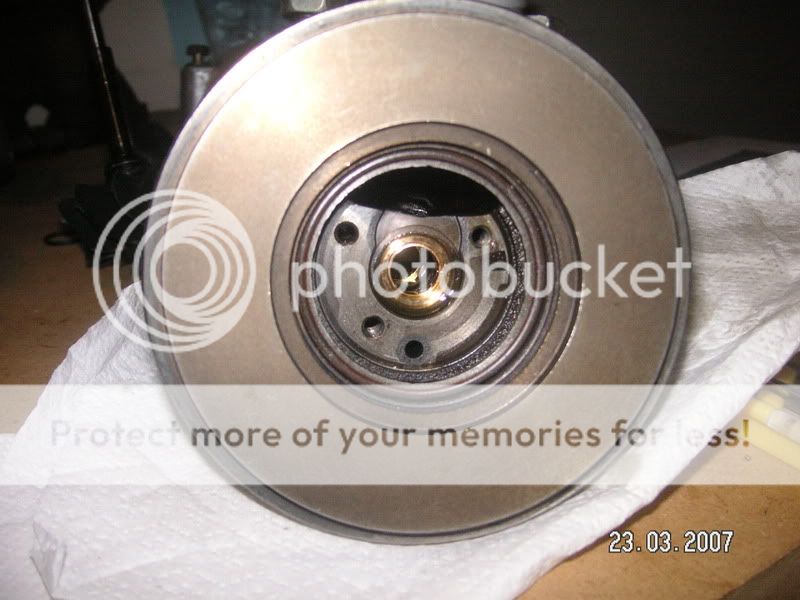 Next prepare the thrust bearing and and collar and install that seal("C") on the bearing part. 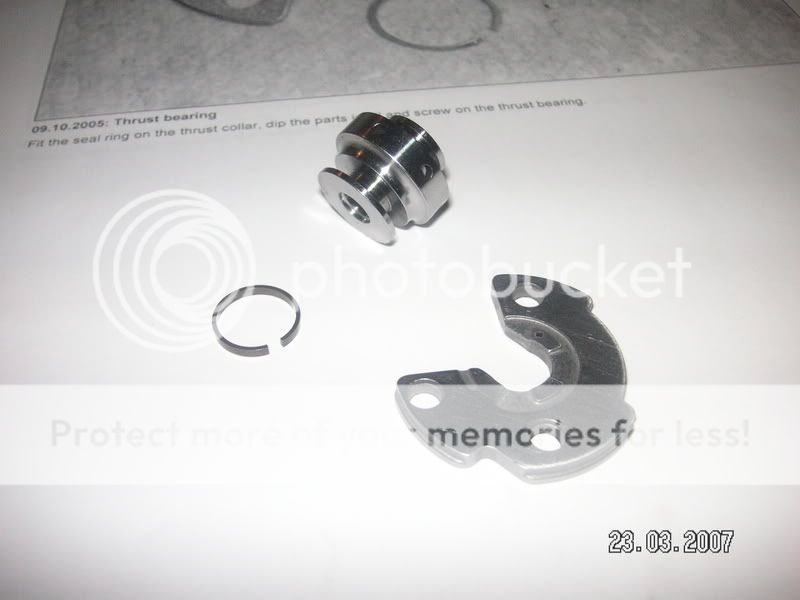 Here it is installed on the bearing. Use some thing like snap ring pliers to pry the end open enough. 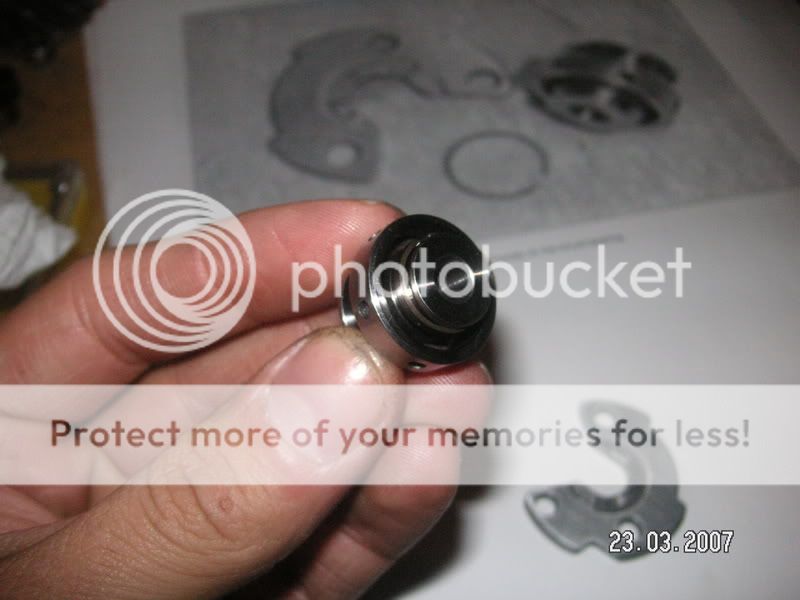 Put the parts into oil. 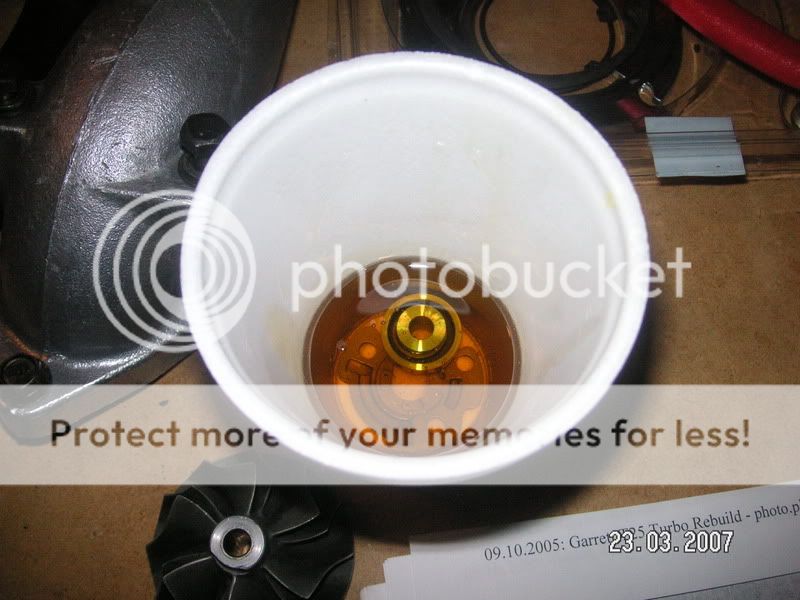 Install the thrust bearing and collar the correct way. Pay attention to the desgin of the metal and the way it was originally. 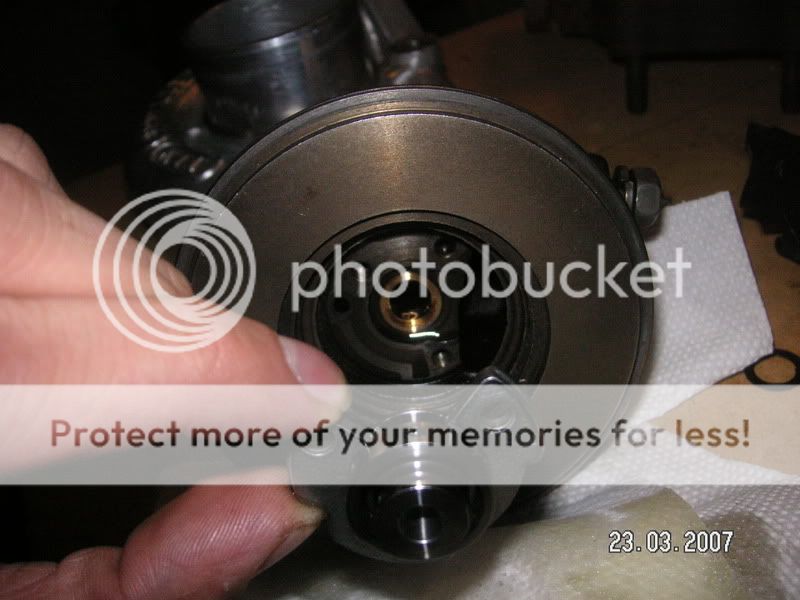 This is how it is suppose to be.  Next find the three bolts that hold the collar and bearing in place. They are very small and do not require a lot of torque. It appears that they even come with a type of "loc-tite." 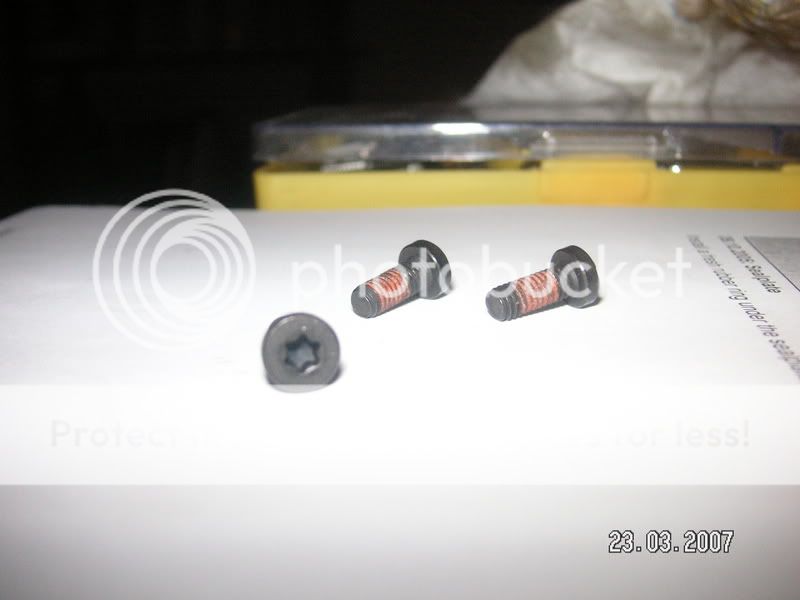 Use a T-15 Torx bit to tighten. 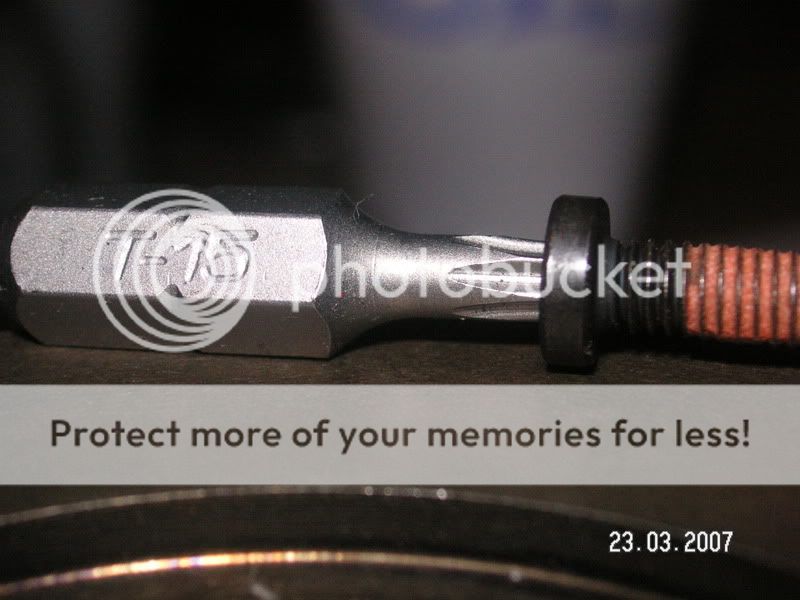 Tighten the bolts. 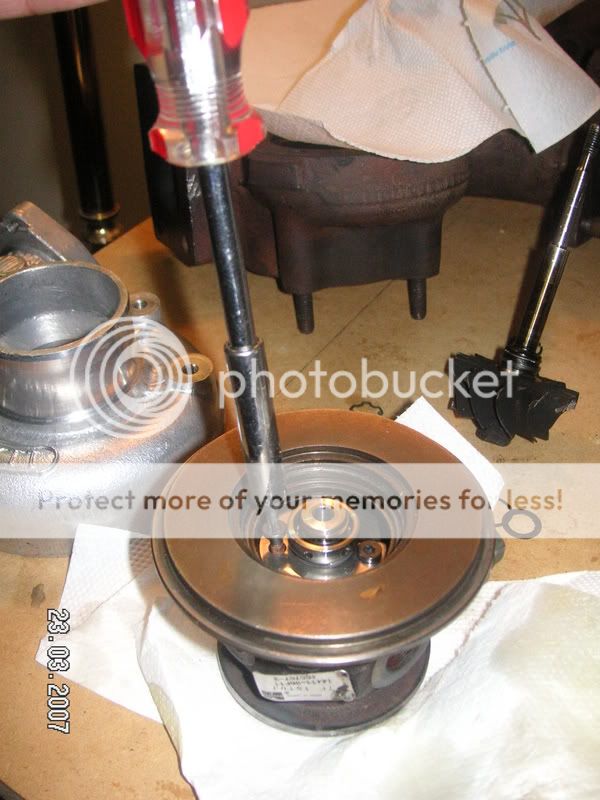 Next grab the dynamic seal plate, the rubber seal, and the right size internal c-clip, you'll know which one. 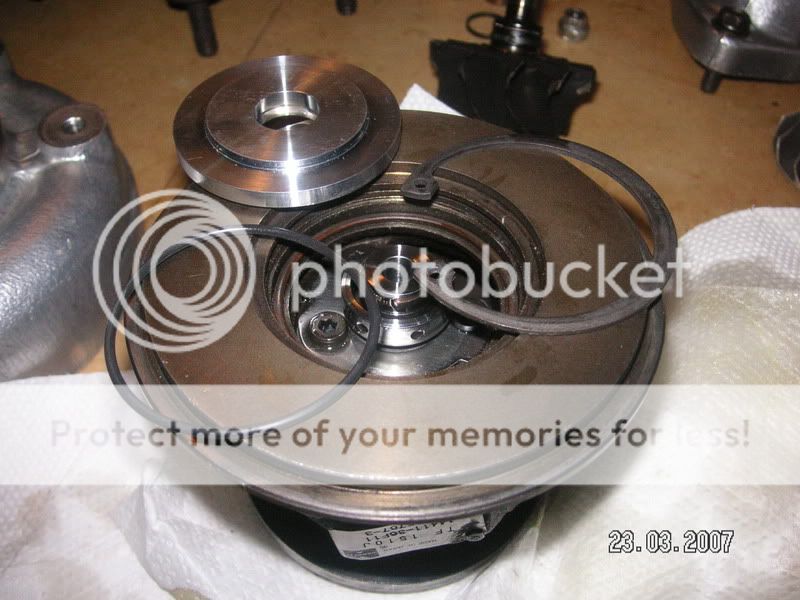 O-ring, then seal plate, then c-clip. Done.  Turbine side cover. 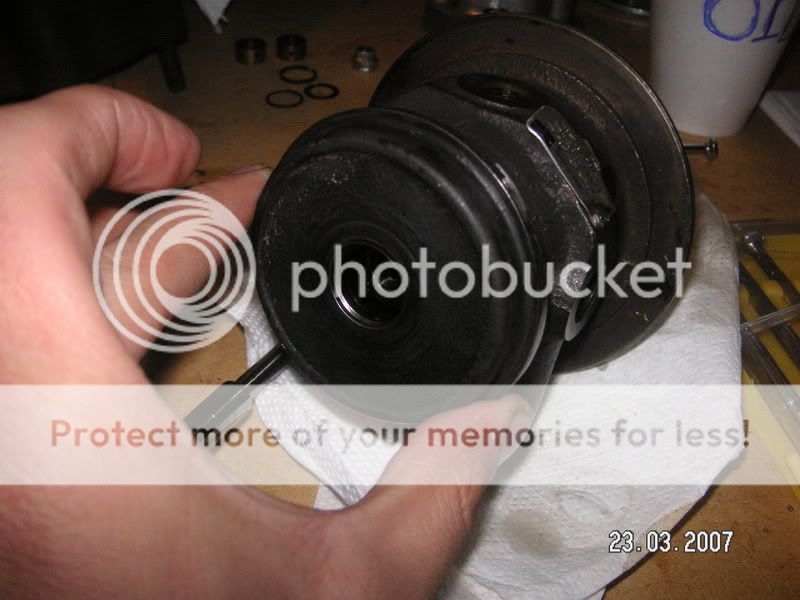 Again.  Install the CHRA internals through. The shaft wont go through all the way and will be forced through once you tighten the shaft left threaded nut. 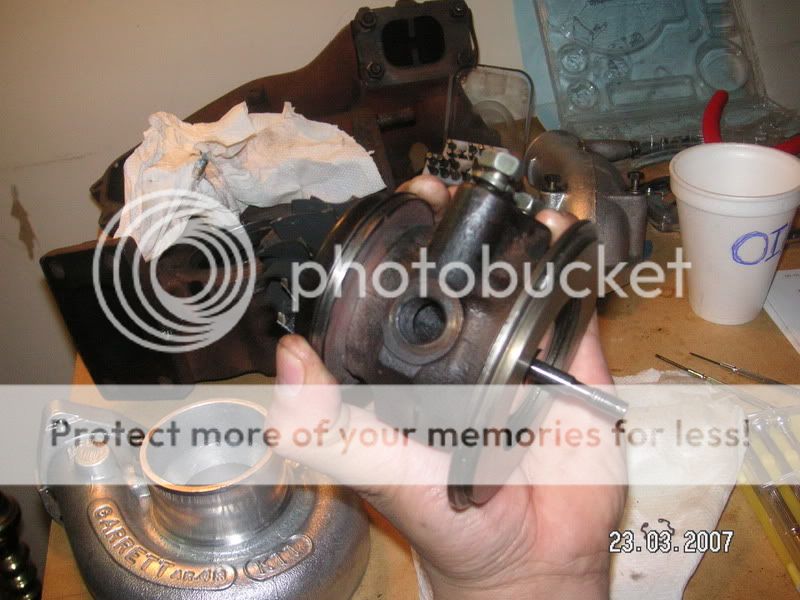 Get you nut onto the shaft. Make sure you check your compressor and turbine wheel/shaft markings. This is what i used to "maintain balance." 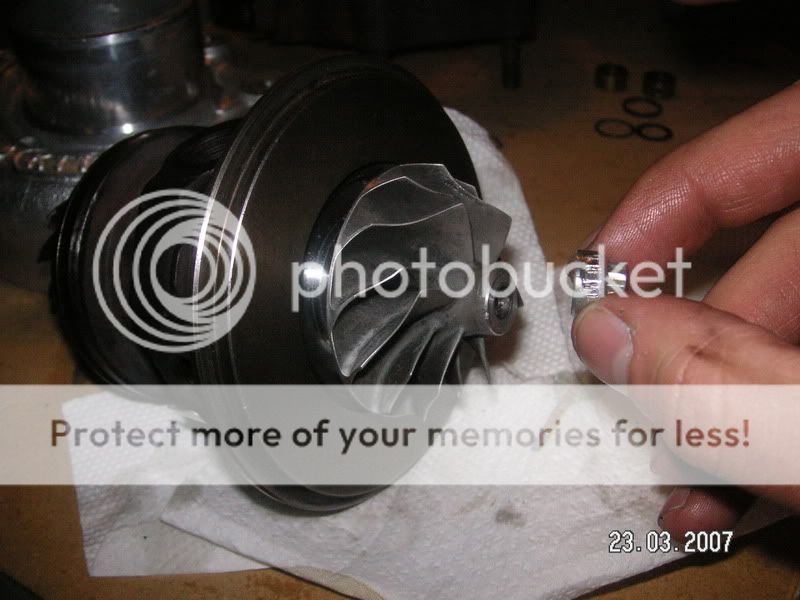 Tighten the nut once satisfied with position of wheels. 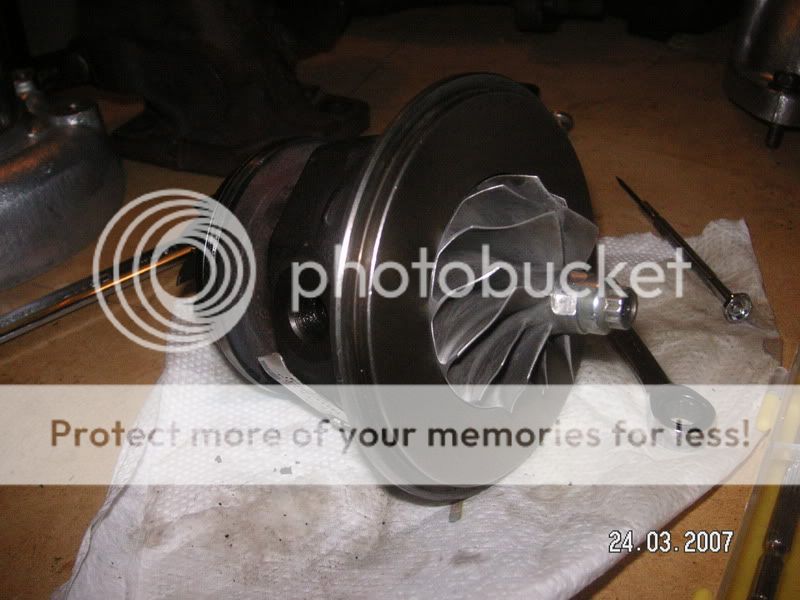 Next you will install the huge o-ring and huge internal c-clip. Use the correct size snap ring pliers and what youre alignment with the exhaust housing side. 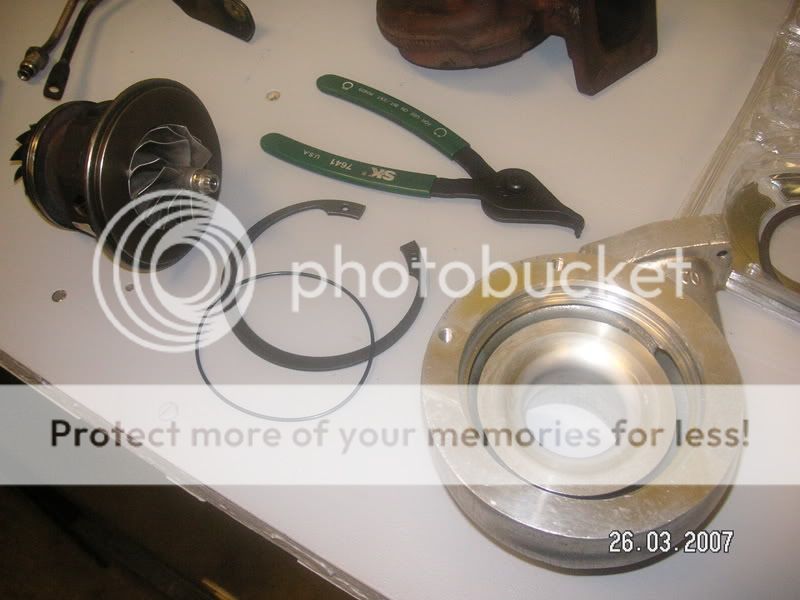 Grab your four new bolts and exhaust housing back plates. You might have to leave these a little loose when youre trying to line up the housings and when youre mounting it on the exhaust manifold. 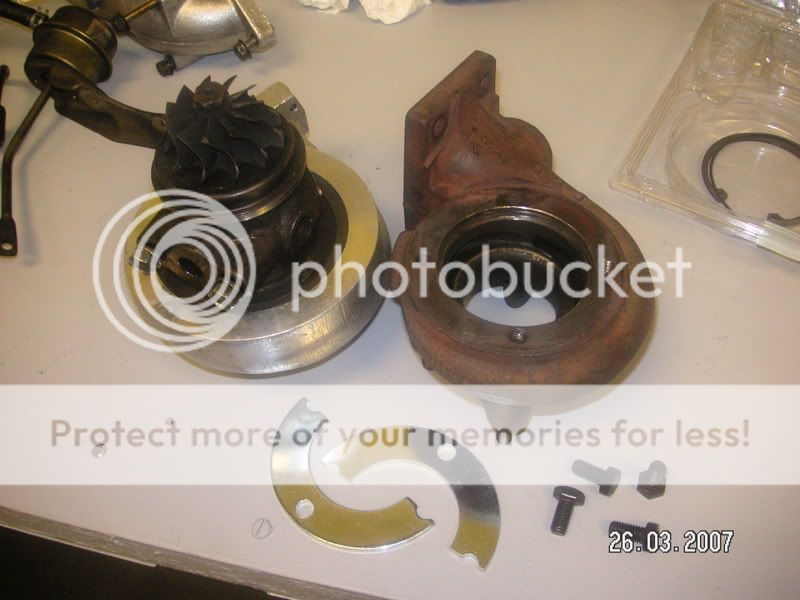 And this is it! Put it all back together and mount it back up. Check fitment or any obvious signs of something not being right. 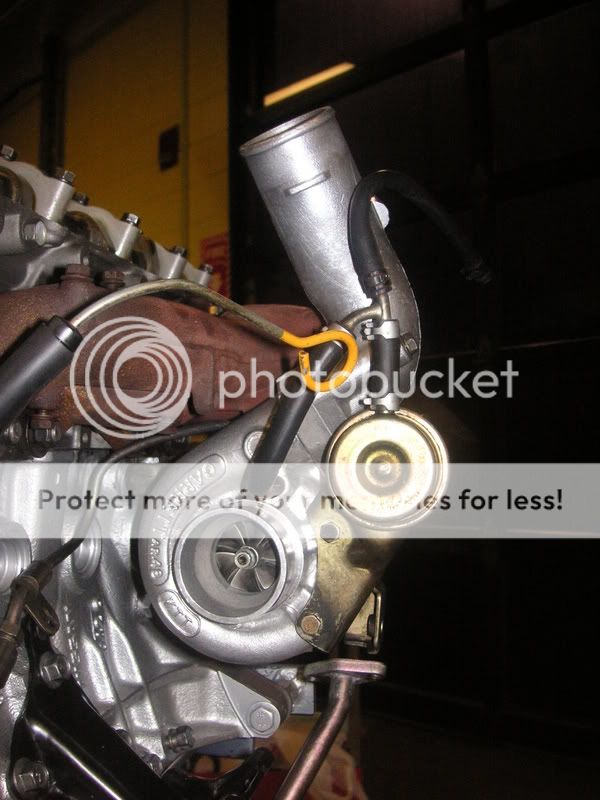 It definately looks a lot better now and i feel confident of the work i did. I hope all goes well and it can have some fun with this rebuilt turbo. 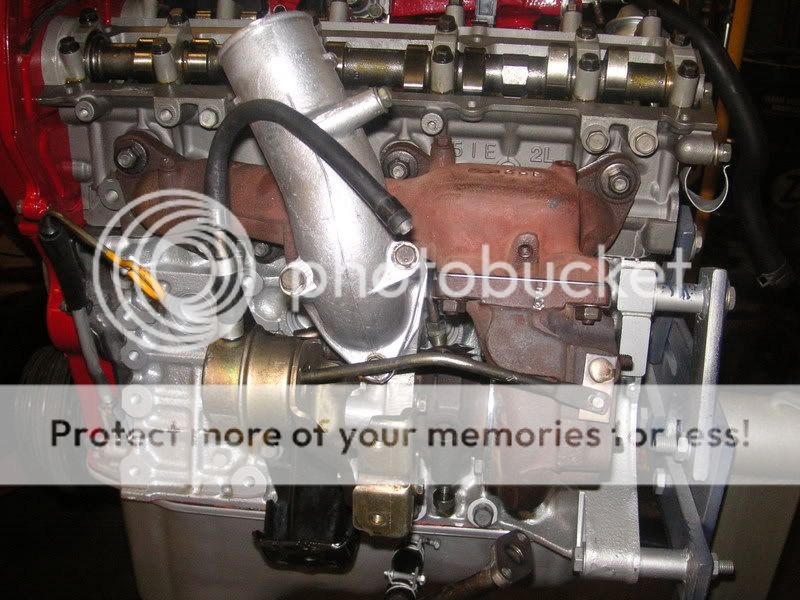 Heres a good look at the exhaust side wheel on the turbo. Im waiting on a downpipe. 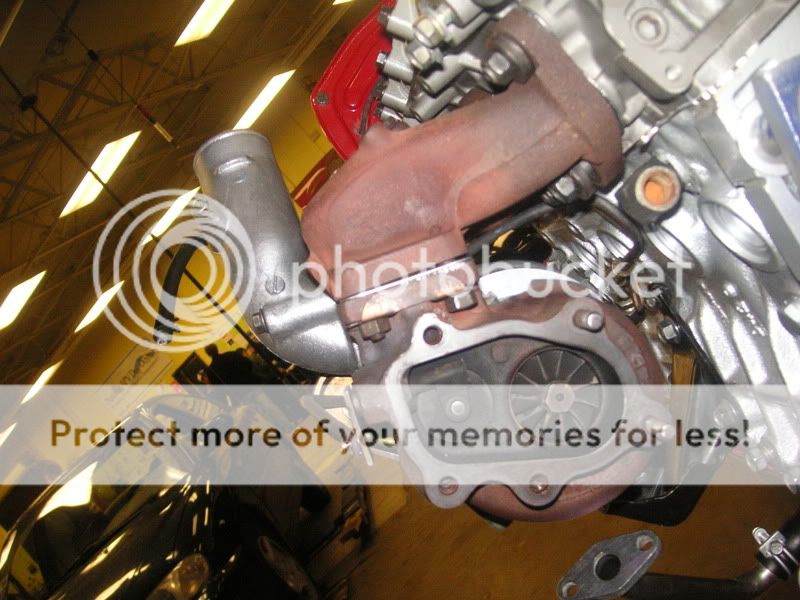 This didnt cost me a whole lot and i did learn something. Not to mention it was fun seeing how this thing worked. I feel like im getting somewhere i want to find out. I like doing things like this so others can either learn from what ive done and even correcting my mistakes. This is my way of giving back to the CA community as it has given to me and continues to give and grow. My engine swap project is nearing closer and closer so its hard not to be excited. Theres more to come and stay tuned! Modified by davidricardo86 at 8:35 PM 4/9/2007Modified by davidricardo86 at 11:21 PM 4/12/2007 | |
| | | | davidricardo86
Light Duty Poster
Number of posts : 160
Age : 37
Location : Chicago
Vehicle : 92 S13 SE Coupe
Reputation : 0
| | Subject: Re: David's CA18DET build-up thread! April 24th 2007, 11:55 am | |
| I've been really busy trying to get the last things to finish this project but its almost done so im happy. Hopefully ill have it running this month. Its tough when you've got school, insurance, phone and other bills to pay for too. Working part-time with little pay and tuning a car can be a slow process. | |
| | | | davidricardo86
Light Duty Poster
Number of posts : 160
Age : 37
Location : Chicago
Vehicle : 92 S13 SE Coupe
Reputation : 0
| | Subject: Re: David's CA18DET build-up thread! April 24th 2007, 11:56 am | |
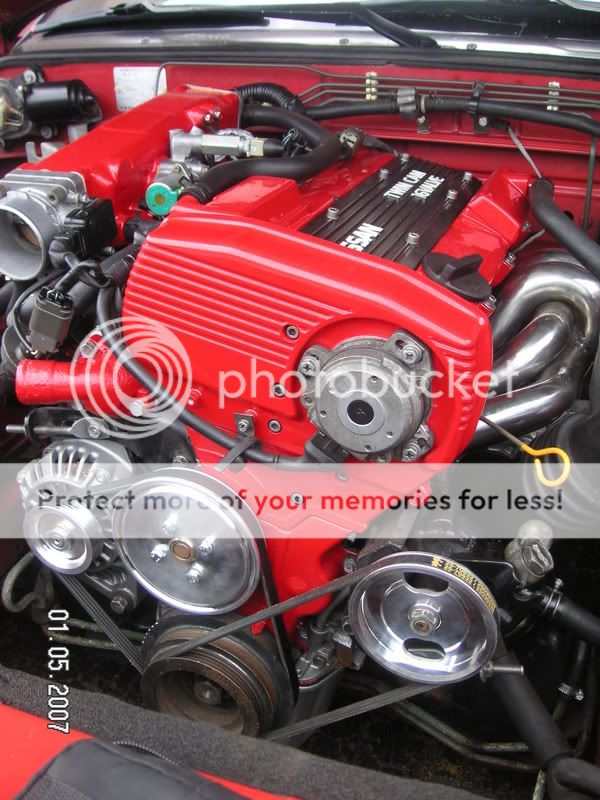
| Here some pictures of the progress. These here are going to show basically the remaining hoses, metal pipes, brackets, etc that were still not on the engine. I bought new hoses and clamps and cleaned up the metal coolant pipes. Everything is almost back the way it originally was and its going great. Coming up soon is the harness and electrical stuff. 4 New NGK BCPR6EIX11-11 Iridium spark plugs pre-gapped and ready to go! 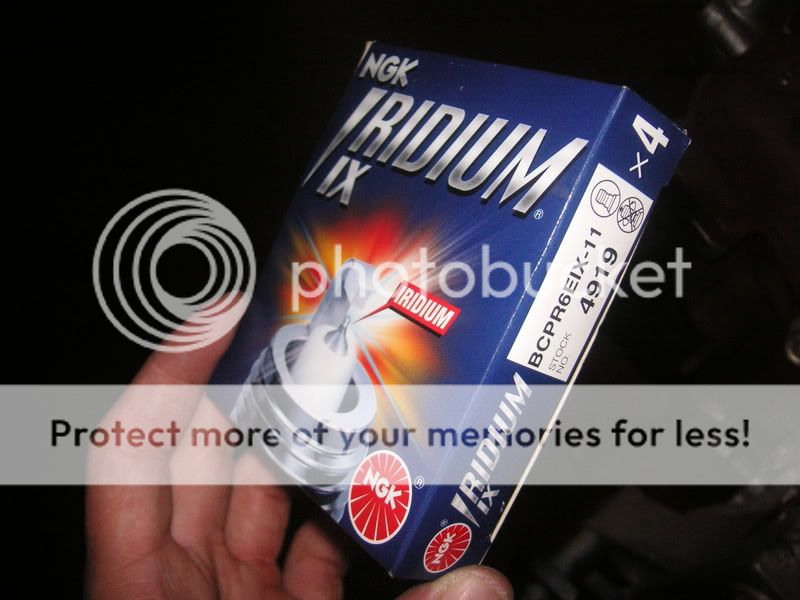 Apply anti-sieze to threads as shown. This will make sure they'll come out again without eating up threads. 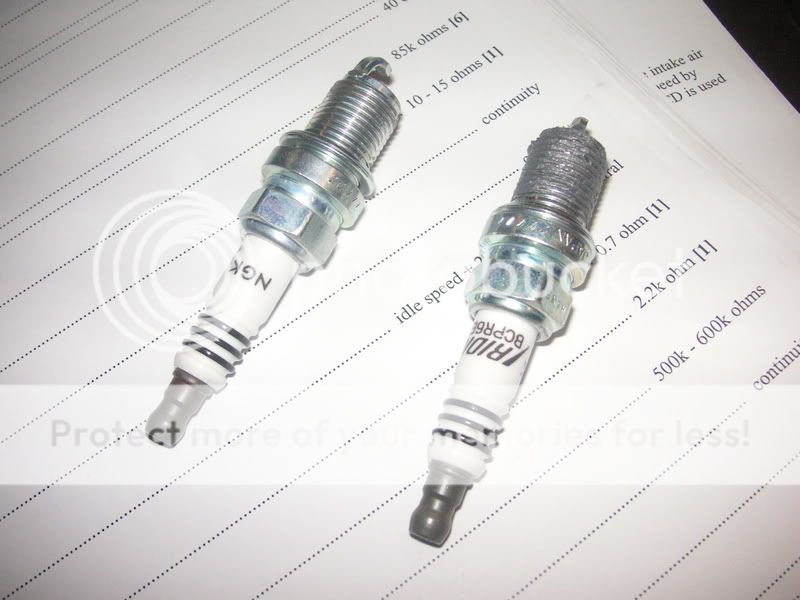 Heres what i used. Any others brand should be sufficient.  Make sure to tighten the plugs to the manufacturers spec, always! IIRC it was no more than 12-15 ft lbs. Every few thousand or so miles, its not a bad idea to take the plugs out just to make sure they dont seize up. 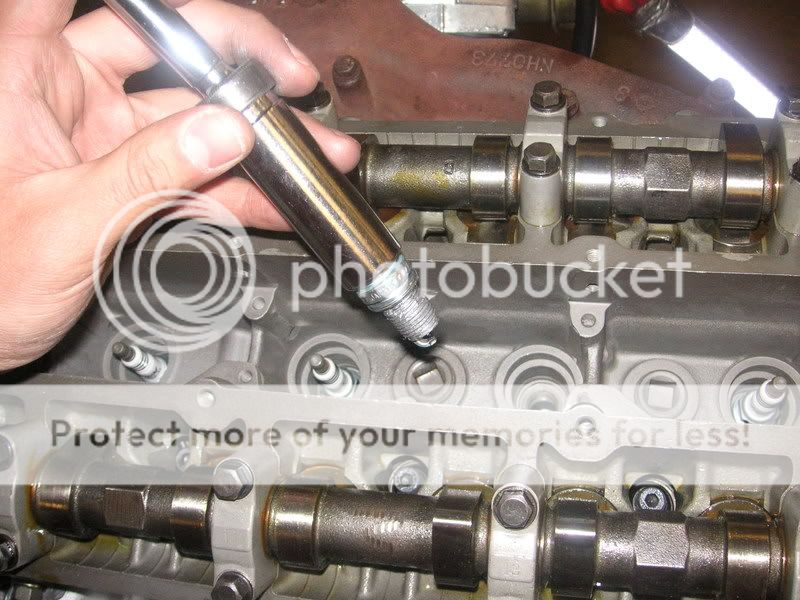 If you want you can toss the crank pulley on. I did and had to get it off soon after to replace the cam gears. I put a little anti-seize on the crank and that will help with corrosion and that damn evil crank sprocket aswell! 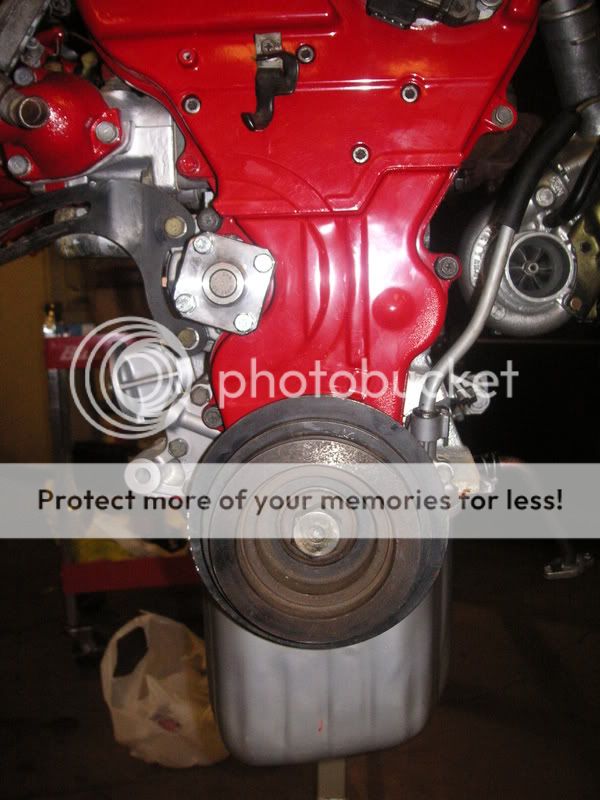 Install this gasket onto the compressor outlet. 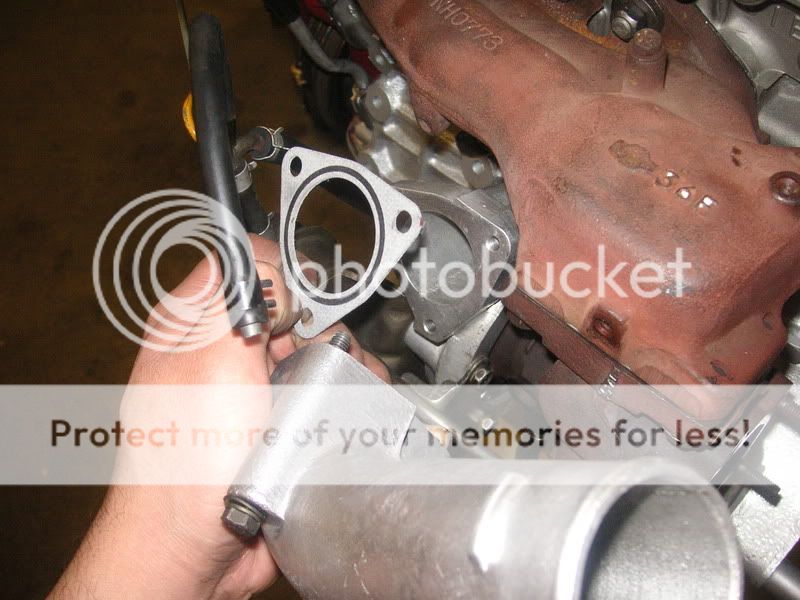 Manifold. 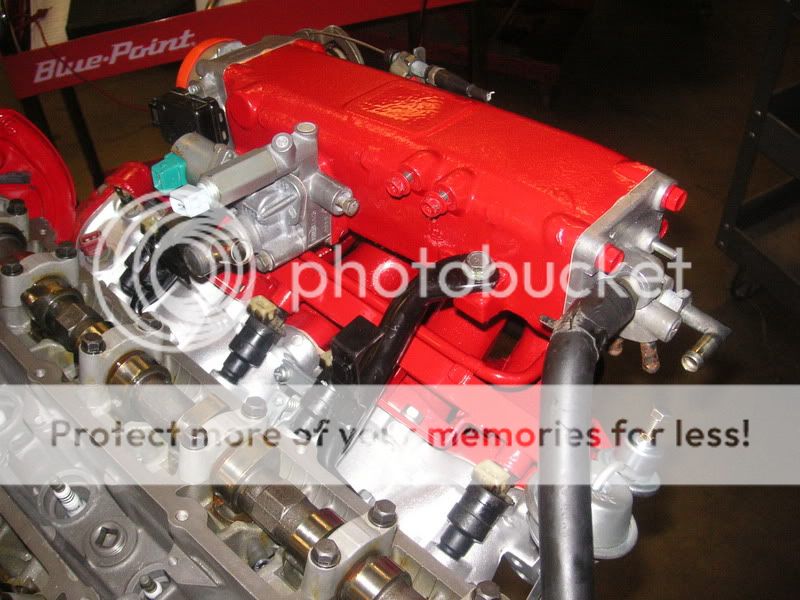 The PCV is on the top left of the collector cover. I replaced this as its not a bad idea to vent the crankcase. 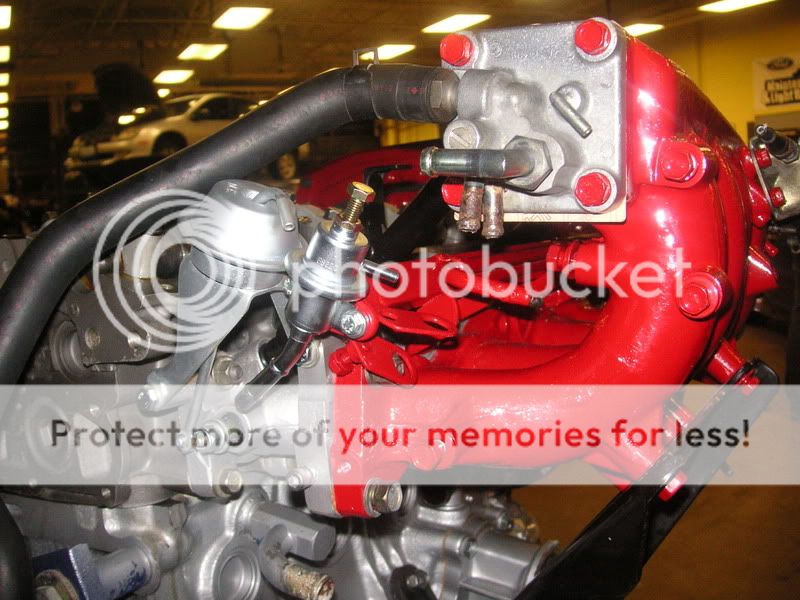 Front side. 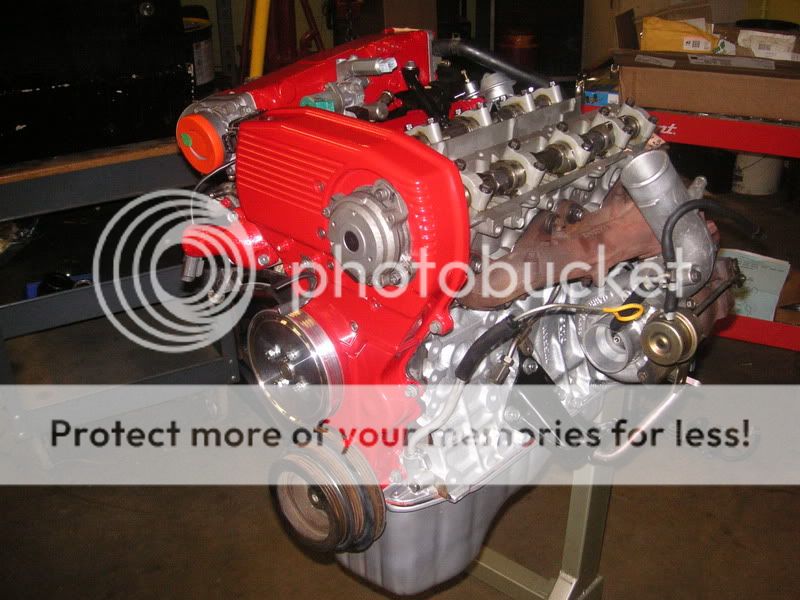 Left side. 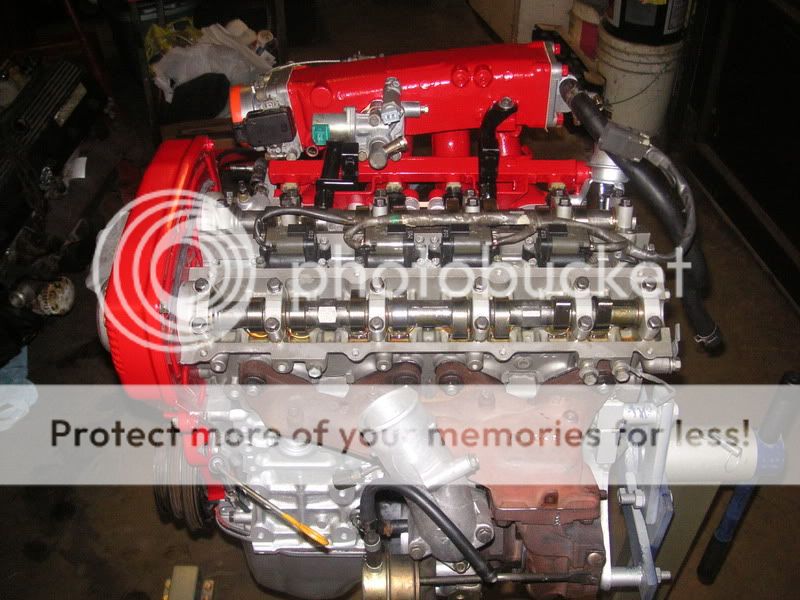 Close up. 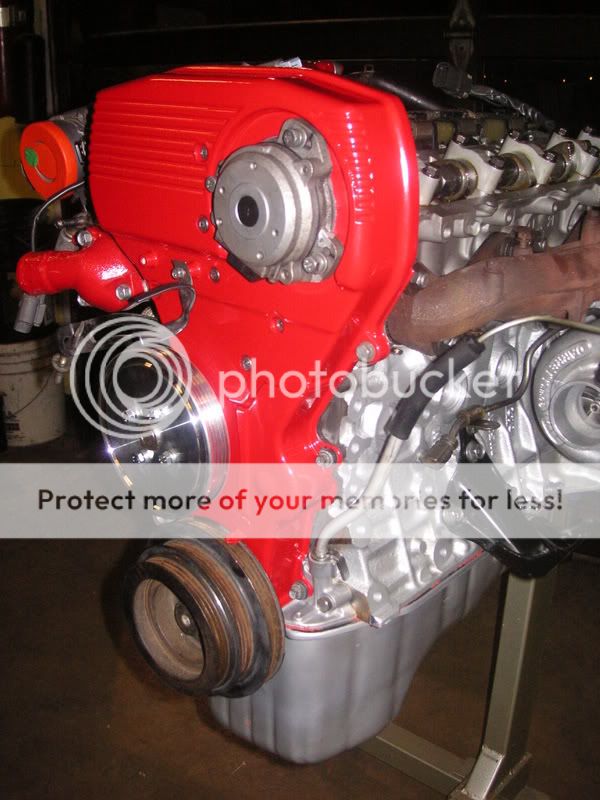 Heres the back, i was trying to figure out how the coolant and oil lines went i did not remember at all. Well just a little but i was lost thats for sure. 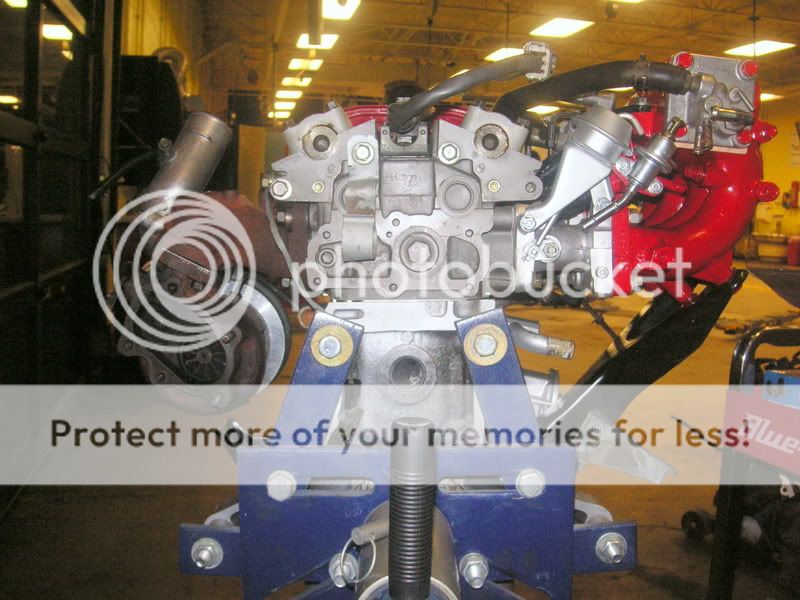 Rebuilt alternator and starter. I also had the pullies put on. 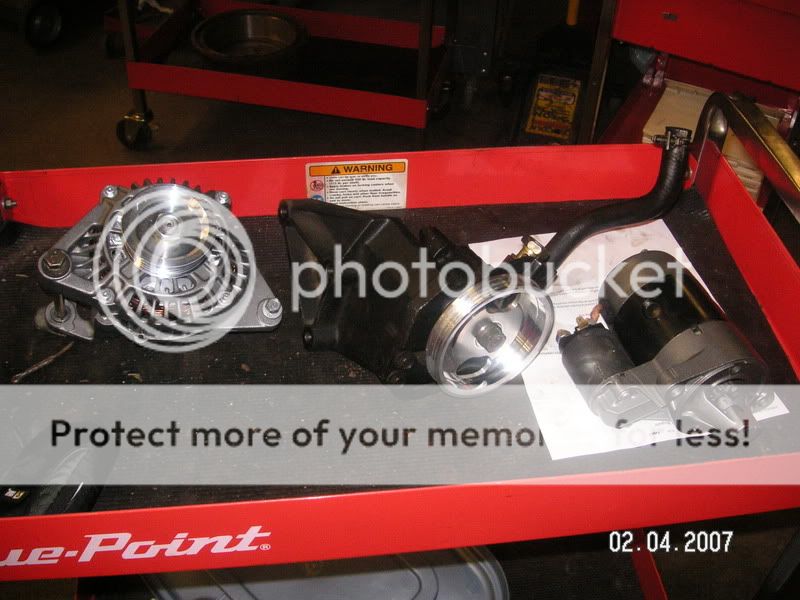 And there they are on the engine. 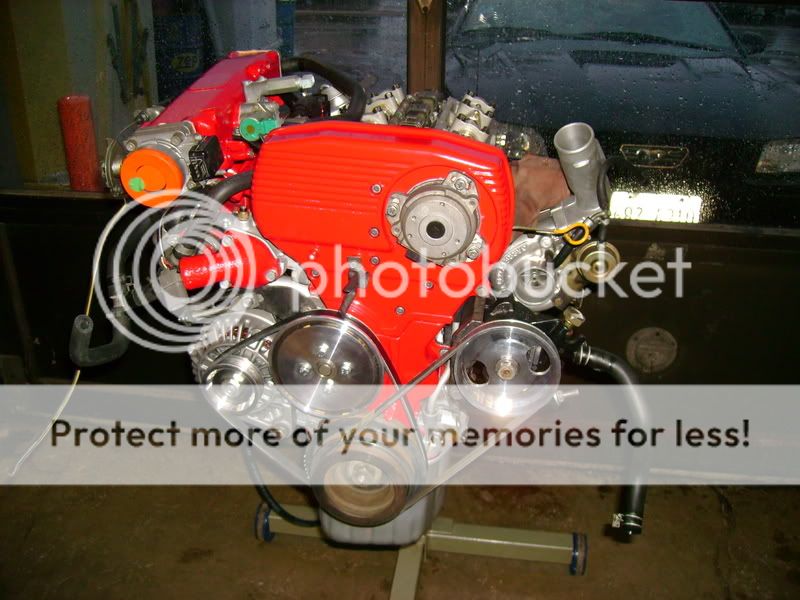 There i am messing around with either cooland, oil or air hoses. I had to use the FSM and Nissan FAST to help me out on this. It wasnt too hard. 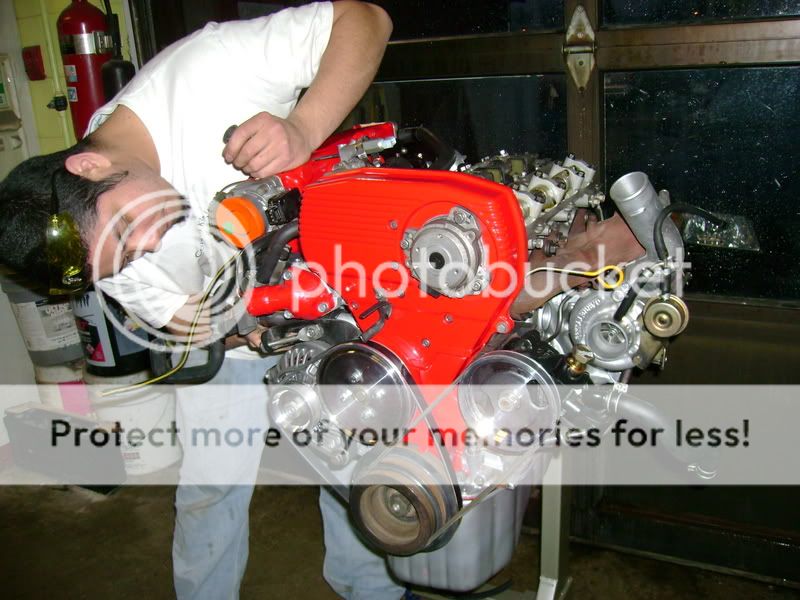 Adjusting something.  I was surprised how many things had to be bolted to the intake manifold. Theres a lot! :looney 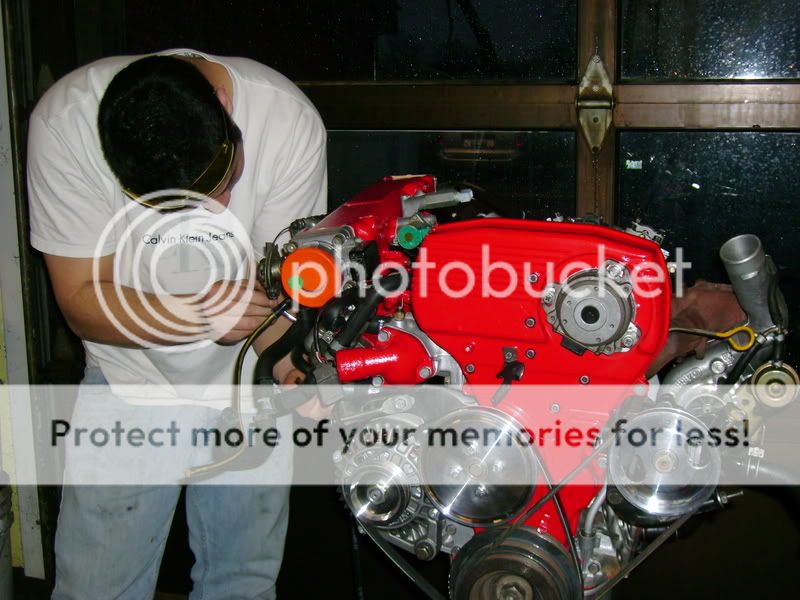 Still waiting on my aftermarket exhaust manifold. 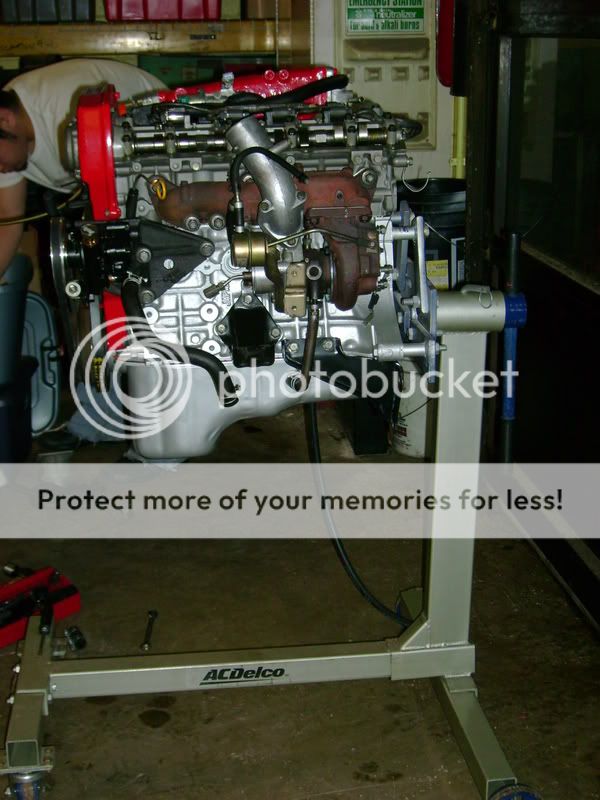 I wont be using the oem exhaust manifold. Ill hold on to it incase anything were to happen. 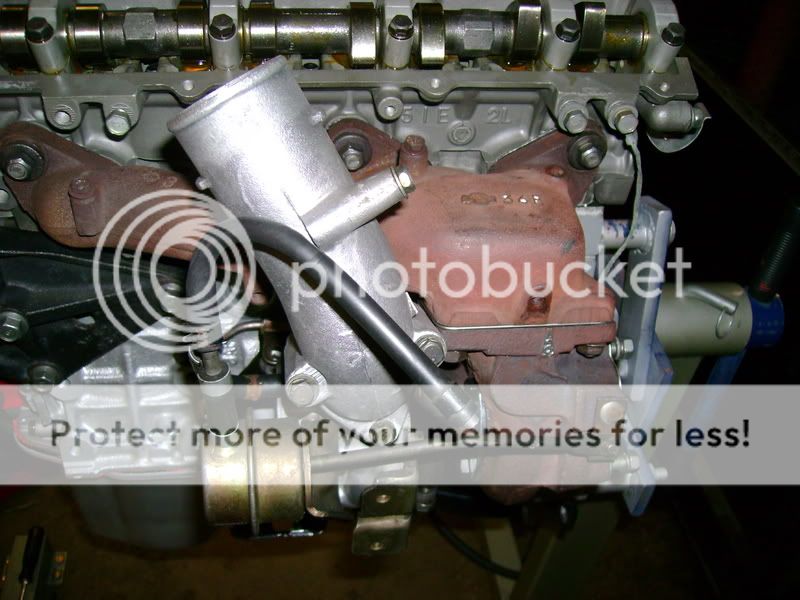 Heres a good shot of the PS pulley and my new belts! :biggrin 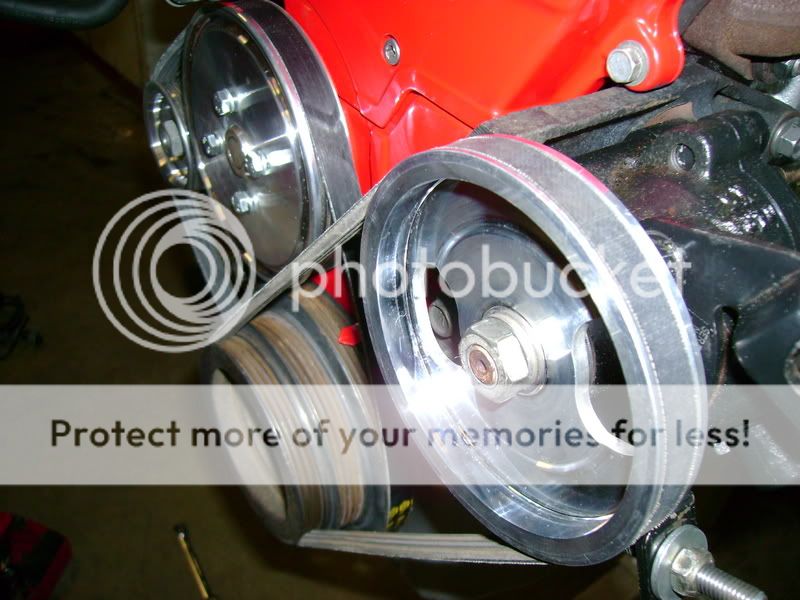 Ooo. 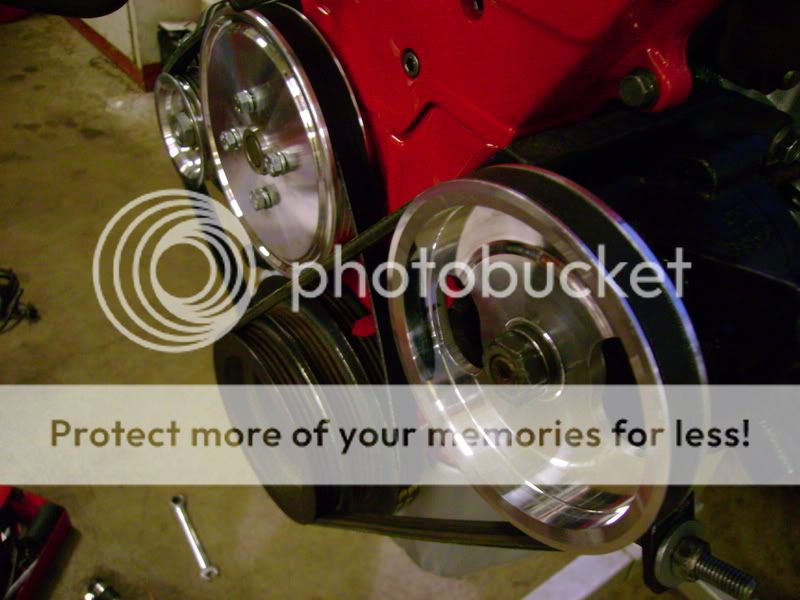 Heres how i started hooking up the lines behind the manifold. These vacuum lines are for my FPR, Power Valve System, and Turbo. 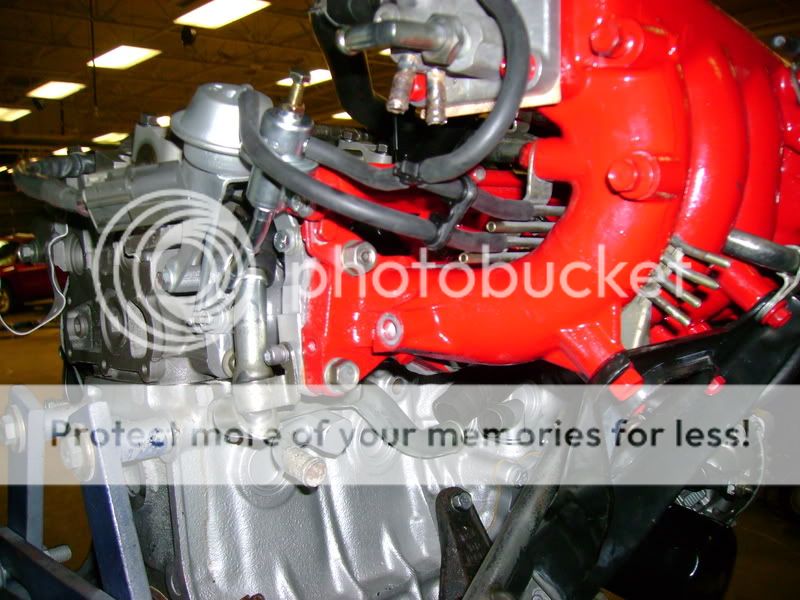 Heres the air regulator and some coolant lines. 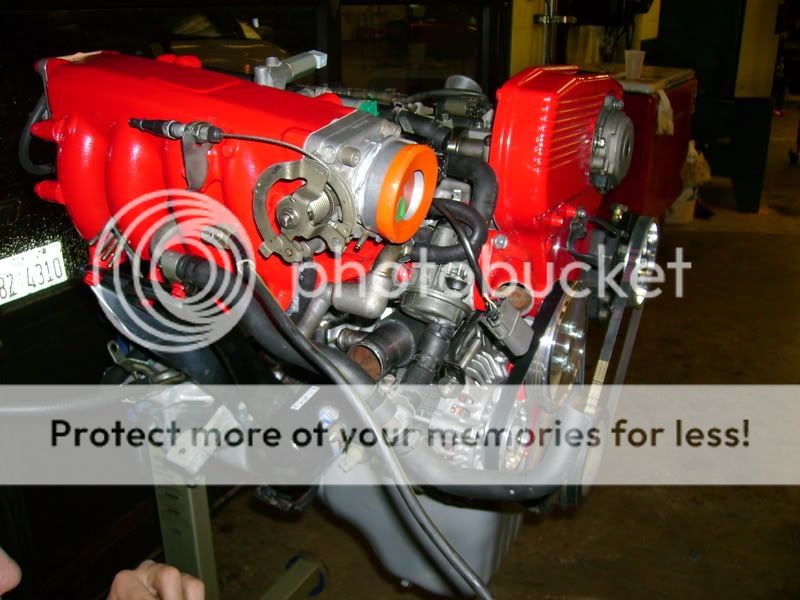 The rebuilt alternator should last a few years. 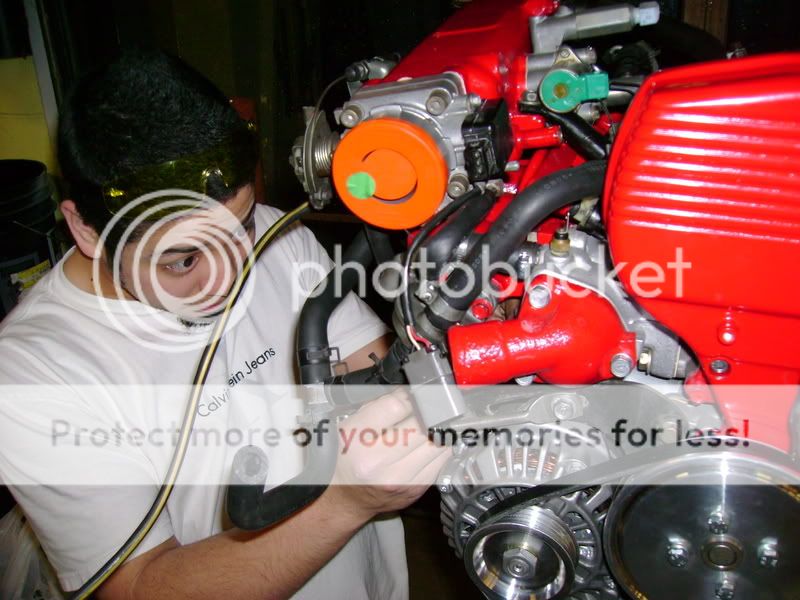 OBX adjustable cam gears for engine model CA18DET. I bought these and figured id give them a shot. Its a cam gear, its not exactly a complicated device. 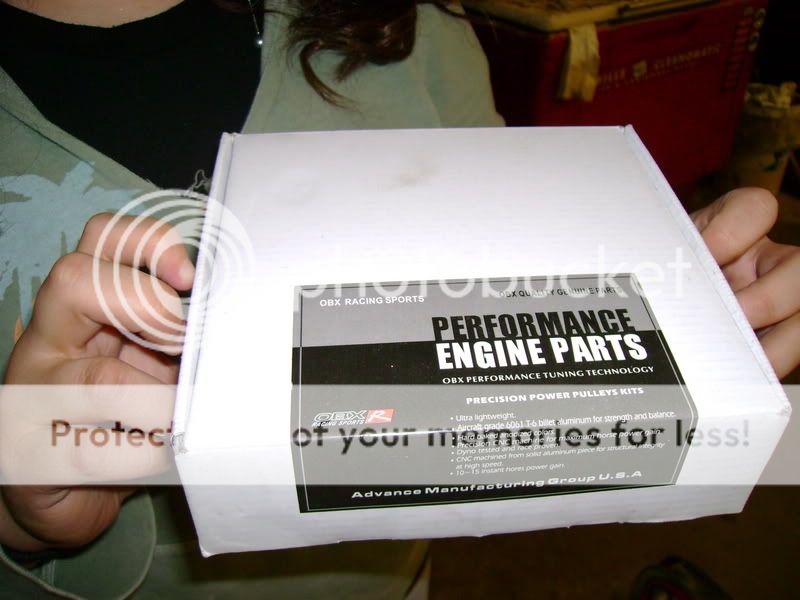 It actually looks very nice in person and i liked how the degree marking are very visible and easy to adjust. 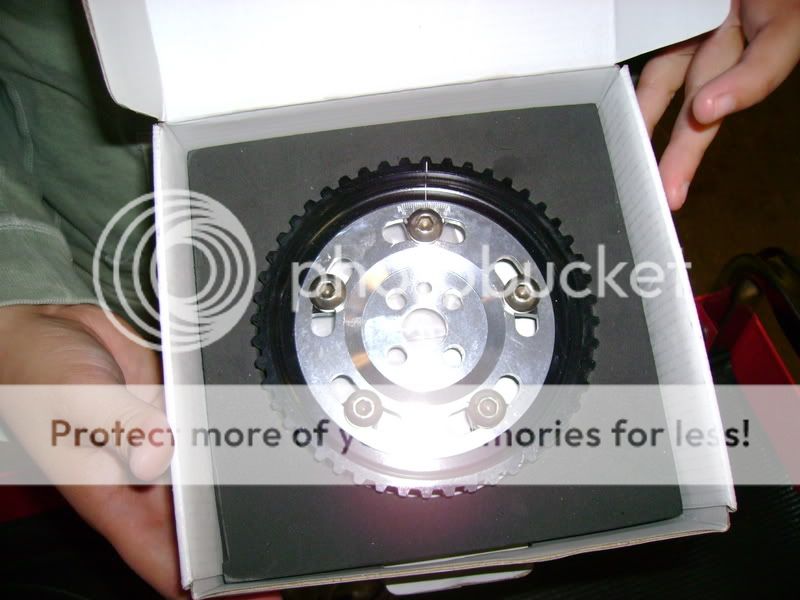 Its not the greatest but itll get the job done. 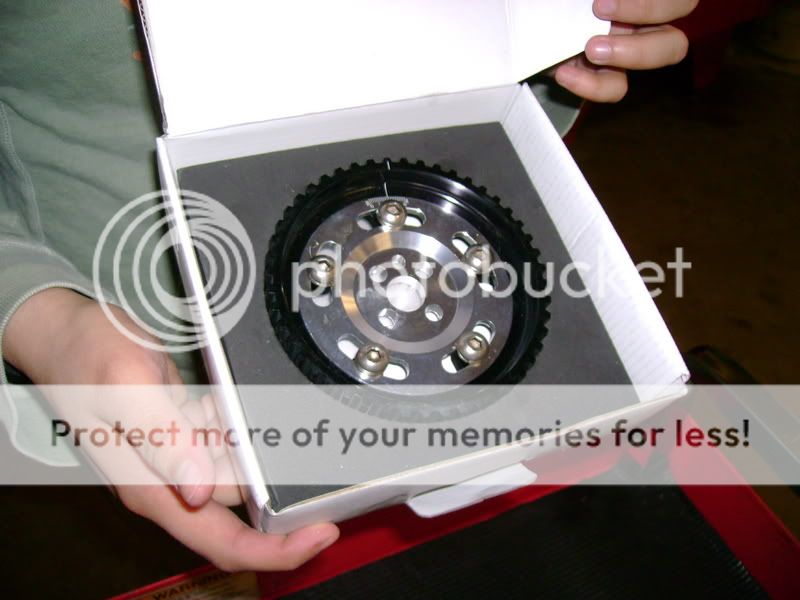 Heres a side-by-side of a "Tomei" style cam gear and the OBX unit. The OBX is aluminum and its very lightweight. The Tomei one is steal and aluminum, still a little bit heavier. 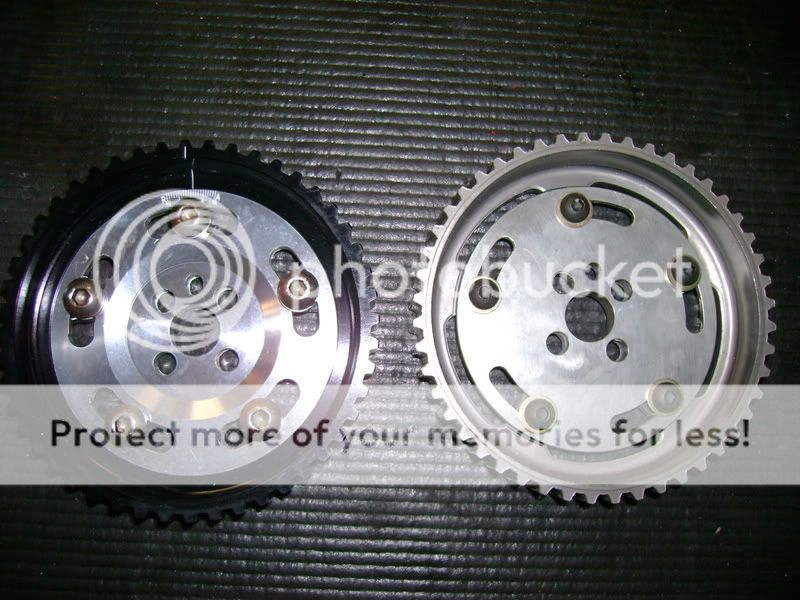 Check this out! The bolts on the OBX ones are thicker and bigger. I see that as an advantage. Both probably lock just fine. Im selling the Tomei cam gears by the way! :pface 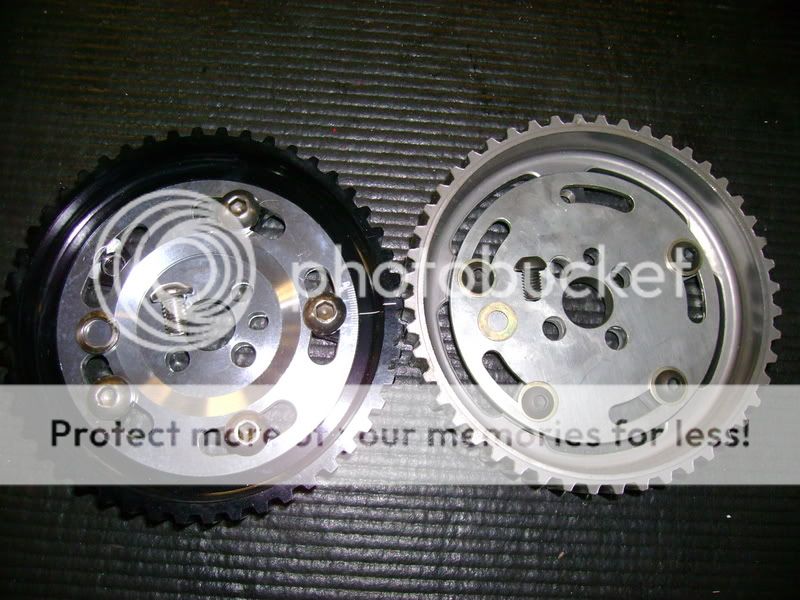 lets install those new cam gears. 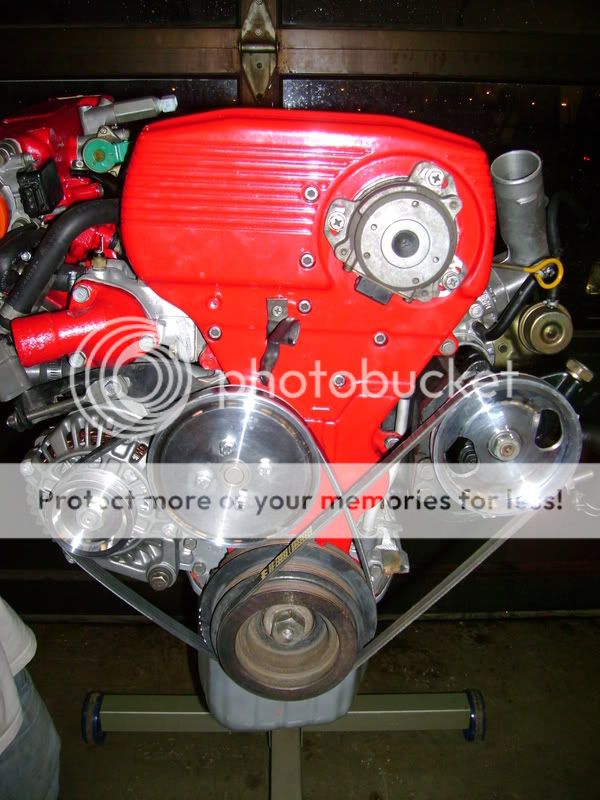 Remove the top timing belt cover. 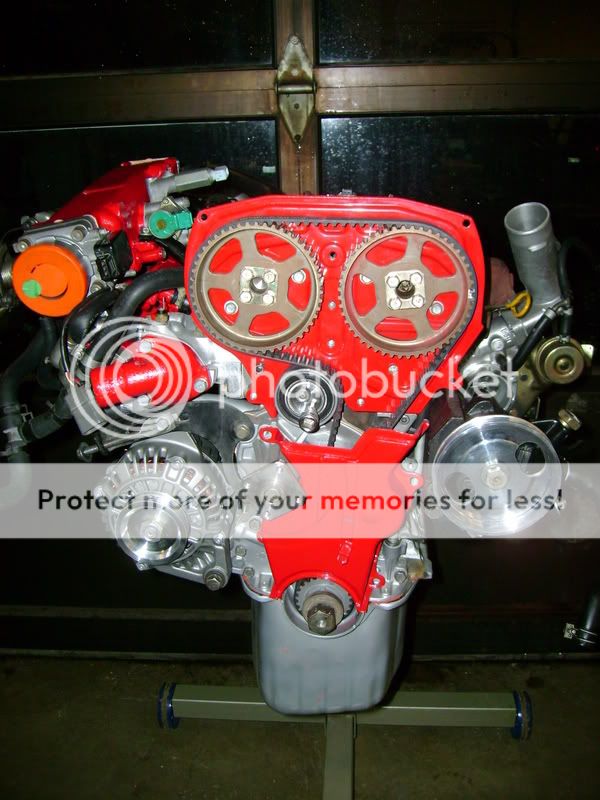 Loosen the tensioner and remove timing belt. 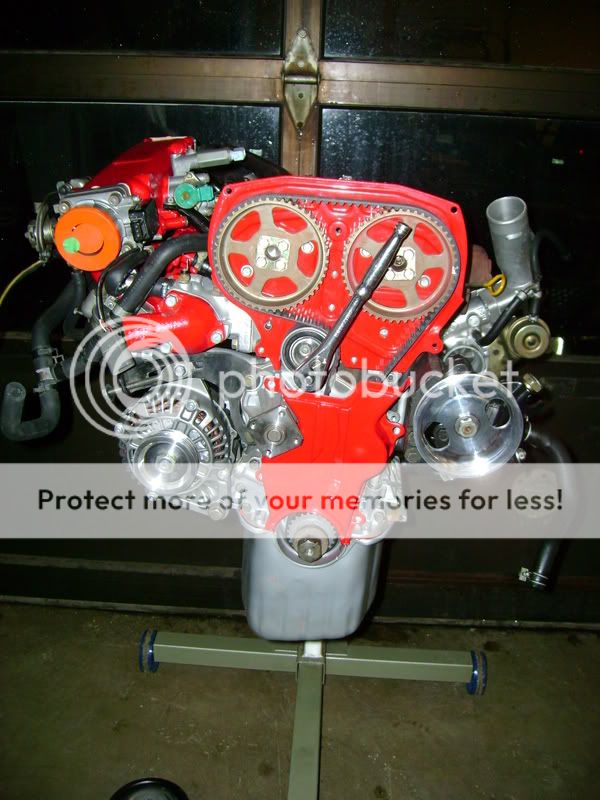 Install cam gears and torque the bolts to spec! 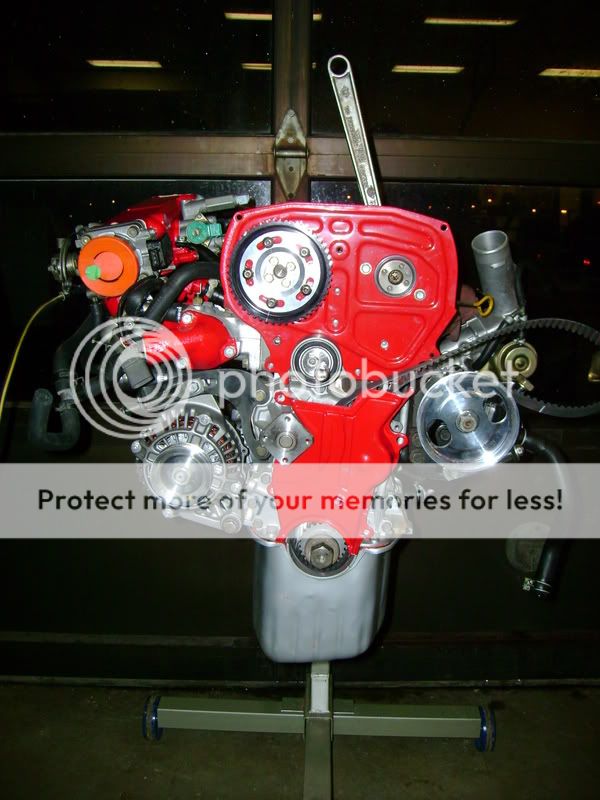 Make sure you set the timing to "0." This will be adjusted later on a dyno. 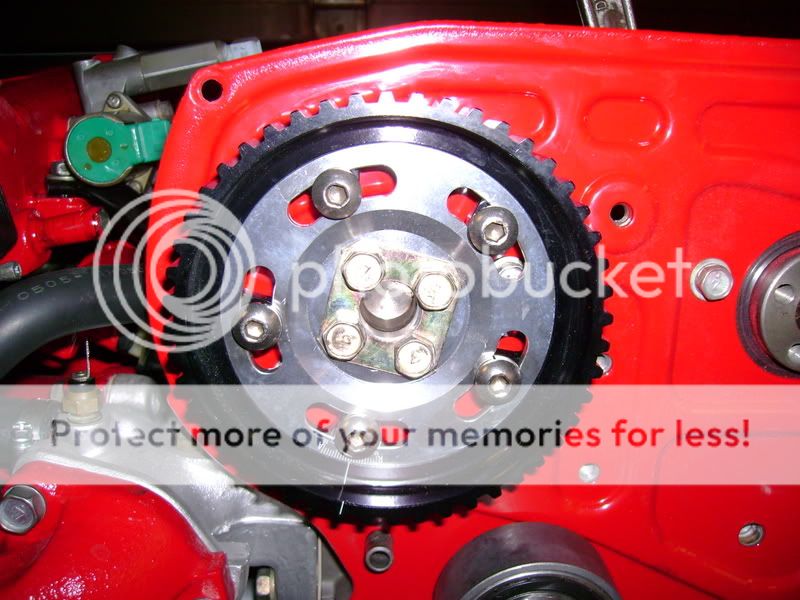 Align the marks on the back plate with the marks on the cam gears and prepare to install belt.  You might have to use an adjustable wrench as shown to hold the cams from moving or to move them in the right spot. 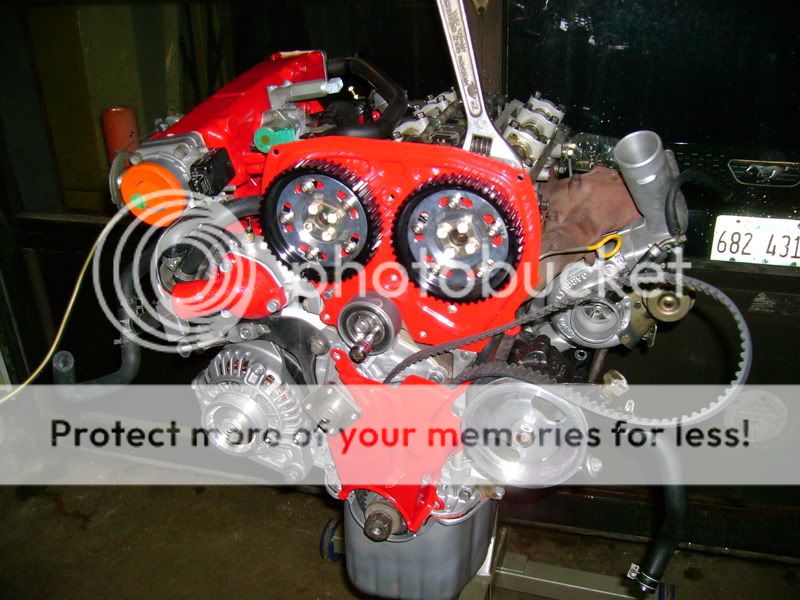 Belt is installed. 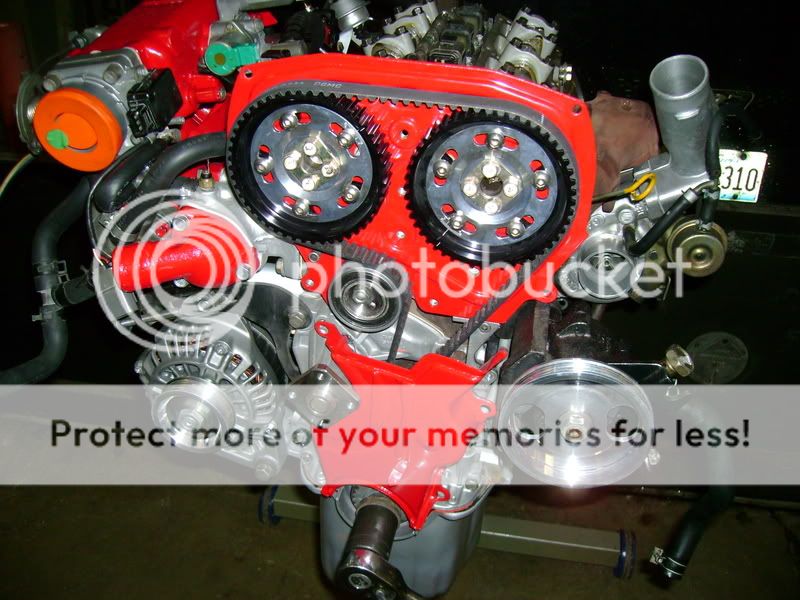 Top cover is installed and tightened down.  Thrown on the Crank Angel Sensor. 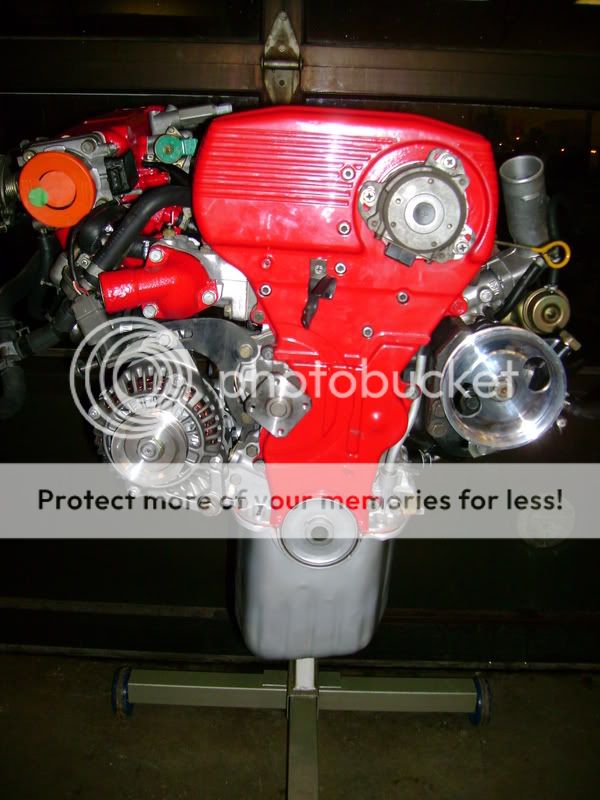 Put on your pulley(s) and belts. 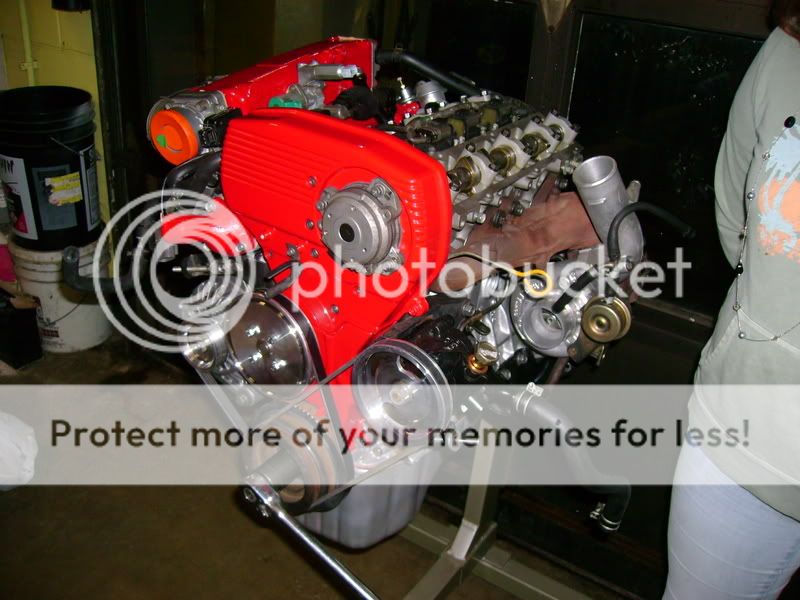 And thats it for right now! 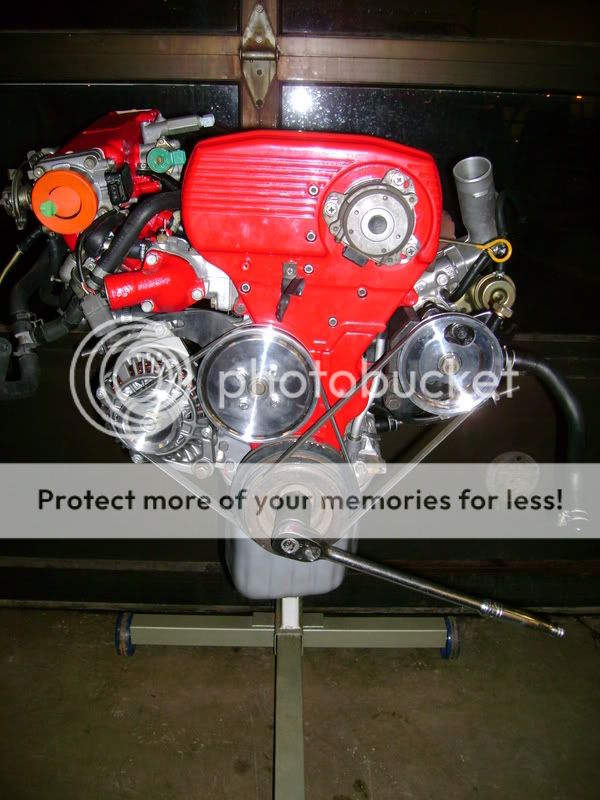 Modified by davidricardo86 at 8:09 PM 4/15/2007Modified by davidricardo86 at 11:06 PM 4/17/2007 Modified by davidricardo86 at 8:09 PM 4/15/2007Modified by davidricardo86 at 11:06 PM 4/17/2007 | |
| | | | davidricardo86
Light Duty Poster
Number of posts : 160
Age : 37
Location : Chicago
Vehicle : 92 S13 SE Coupe
Reputation : 0
| | Subject: Project Progress: April 13 2007 KA Removal April 24th 2007, 12:01 pm | |
| KA24DE RemovalHeres some pictures of me and a few friends at school removing the old KA. This was on Friday April 13. She was good to me, never gave any problems! I will miss you KA but i fell in love with a new girl, her name is rebuilt CA. Yeah i need a life! But any how, heres whats up with my build. It took us almost 8 hours trying to get this damn thing out! Theres little things here and there that we missed but eventually it came out. It was very dirty but all in all was still running like a champ! I removed everything that belongs to the KA ( harness, coil, evap stuff, etc.) and will be selling it very soon. If anyone needs a used KA24DE in good mechanical condition, hit me up. I recommend rebuilding it as the odometer read 108k when this thing came out. I will make an official "KA Sell Thread" sometime soon. Heres my car ready to be disected. Using this type of lift, air tools and the help from others made this job that much easier. 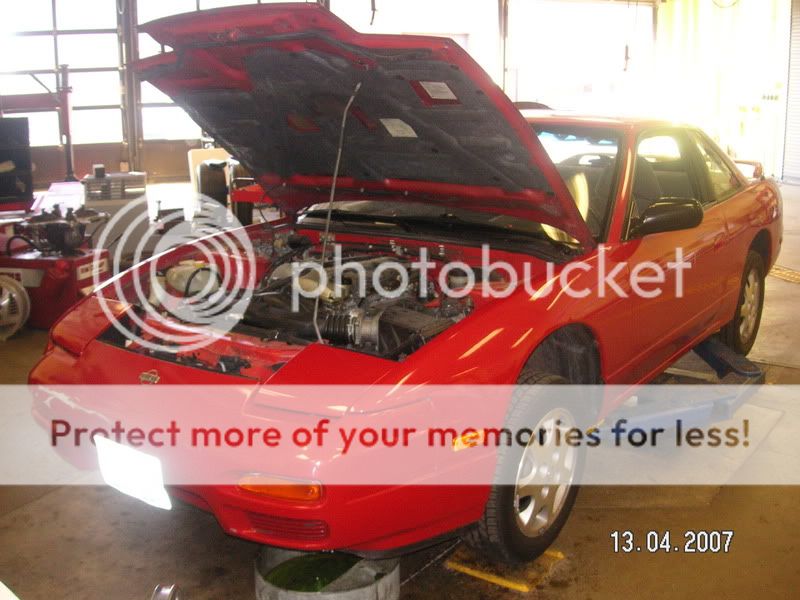 Theres one of the dudes that helped me out. Here were just removing and disconnecting stuff. 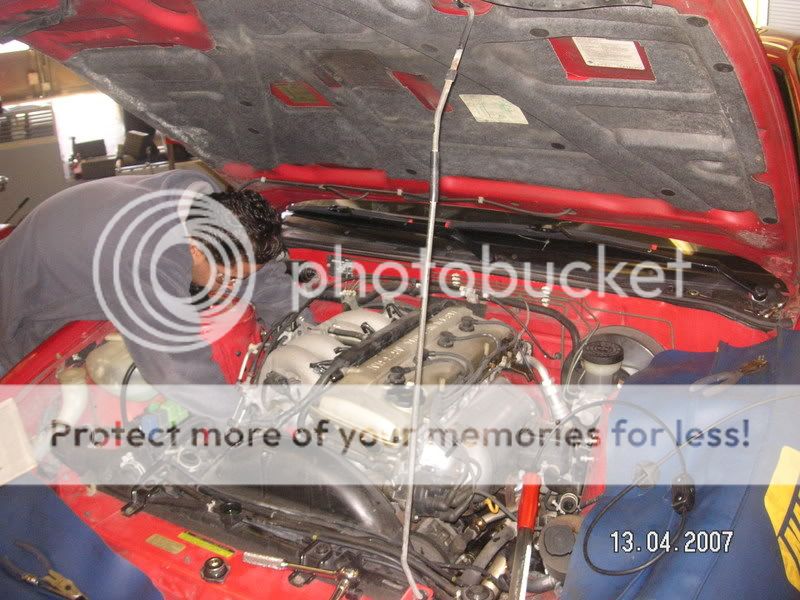 Underbody. Remove the radiator, clutch fan, fan shroud, clutch slave line, and loosen the motor and trans mounts. 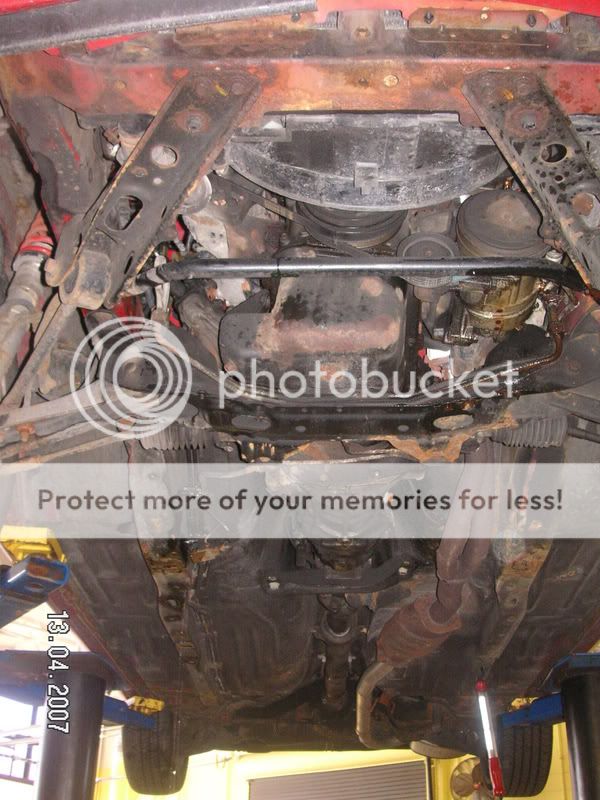 The exhaust must be removed. I cut this off as it wont help me with the CA. 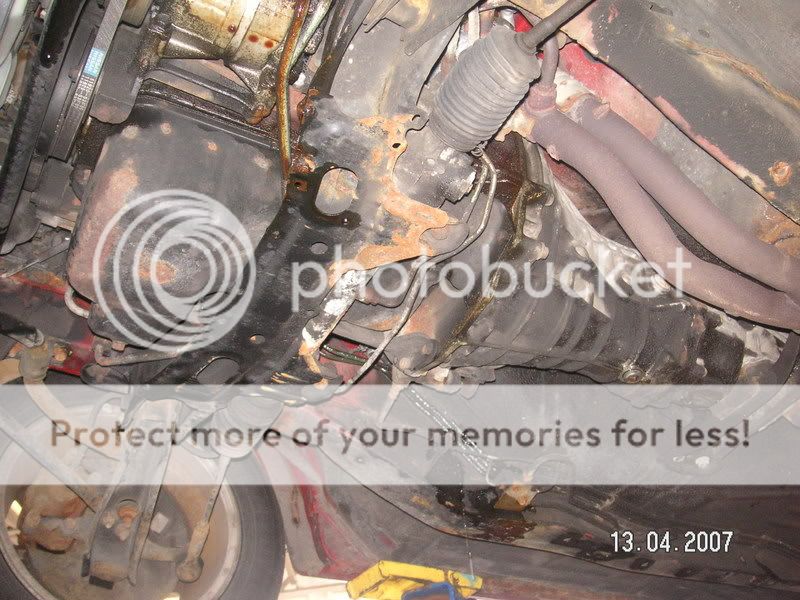 Before unbolting the driveshaft make referrence marks on the drive shaft and its original bolted location. This will maintain original balance. Unbolt the driveshaft at the rear where it bolts to the rear differential. Unbolt the center bearing aswell and take this off as one piece. Pull and slide the driveshaft out of the transmission. If you did not drain the trans, youre going to get oil everywhere, so drain it beforehand. 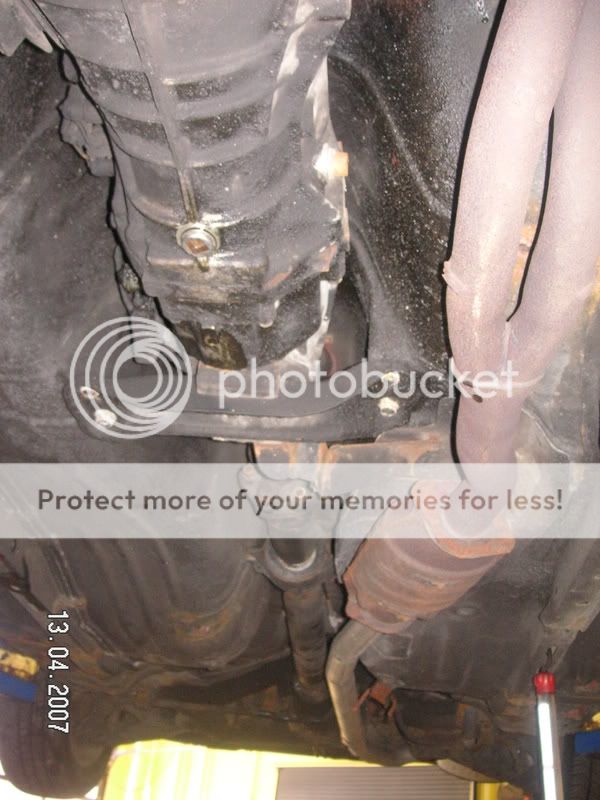 Here is the driveshaft! It fits on to the CA trans but the dust collar needs to be removed. 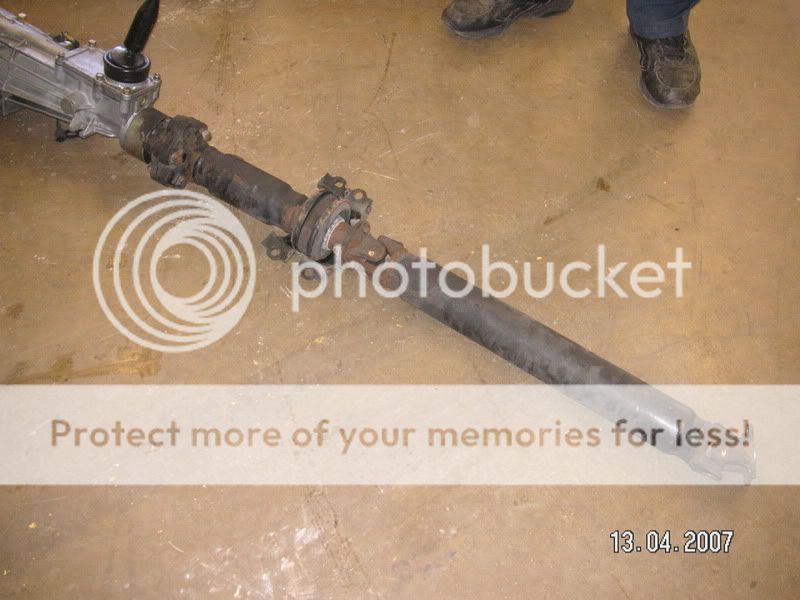 Yeah were kind of a bunch of wierdo technicians. :gapteeth 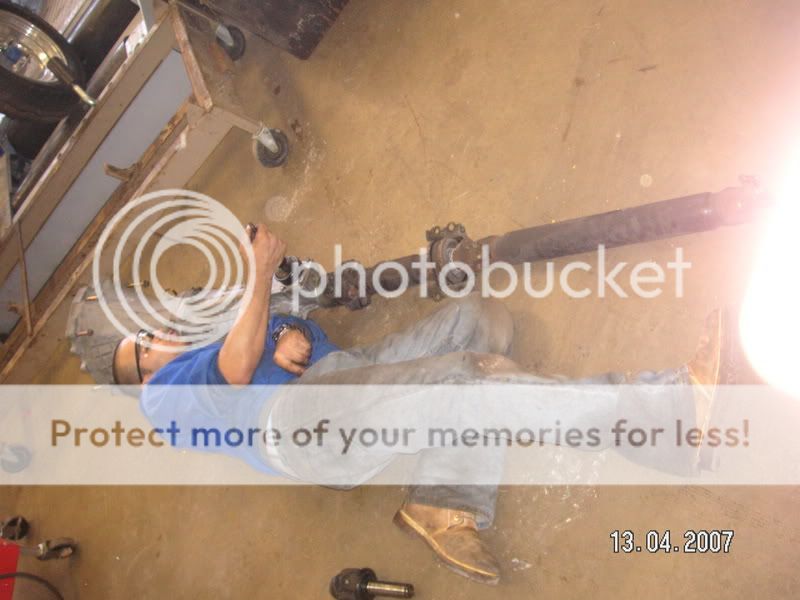 Wow it actually looks roomy now! 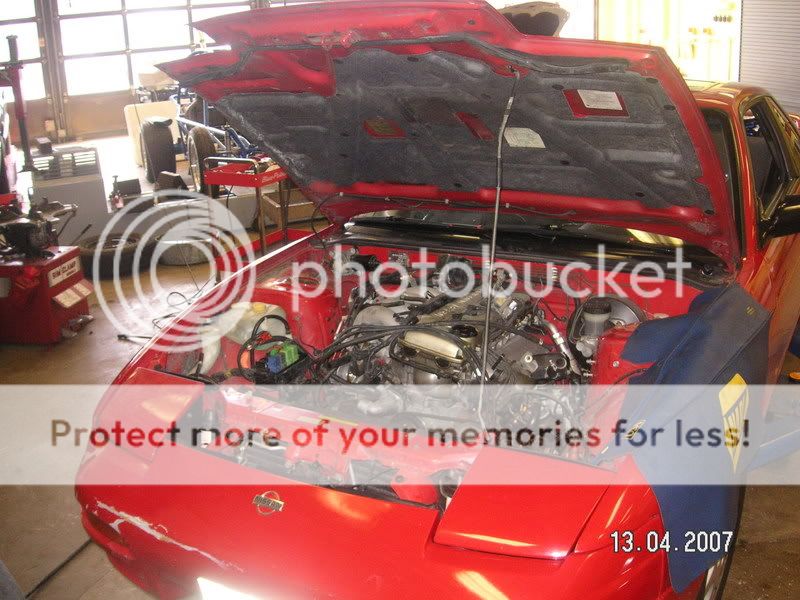 Heres a good shot of the KAs exterior condition. Internally this thing is still good. I recently compression and leakage tested it and its still within manufacturers spec! I would rebuild it anyways though. :rolleyez 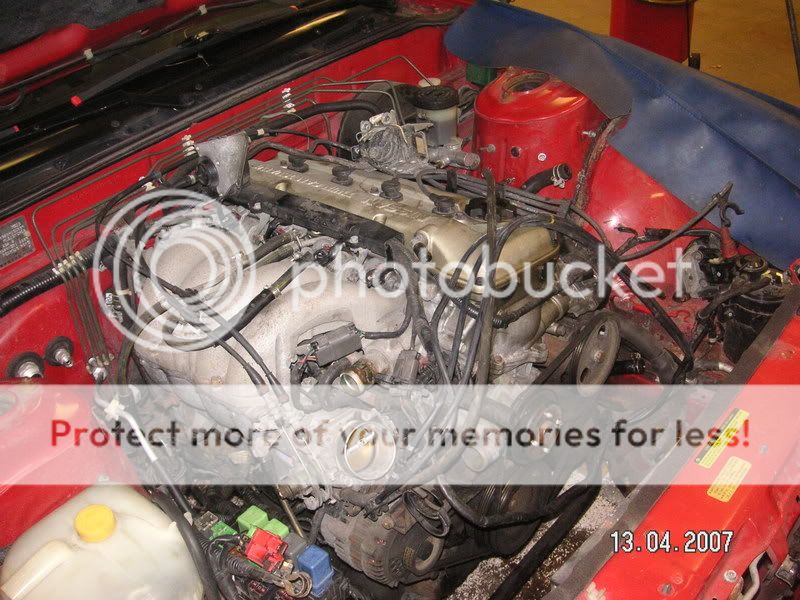 I want to include EVERYTHING in my sale (although i might need a few things). This way i can sell it for more and the buyer will be happy he gets all the necessary parts. :yesnod  Oh here comes the hoist! Almost out?! 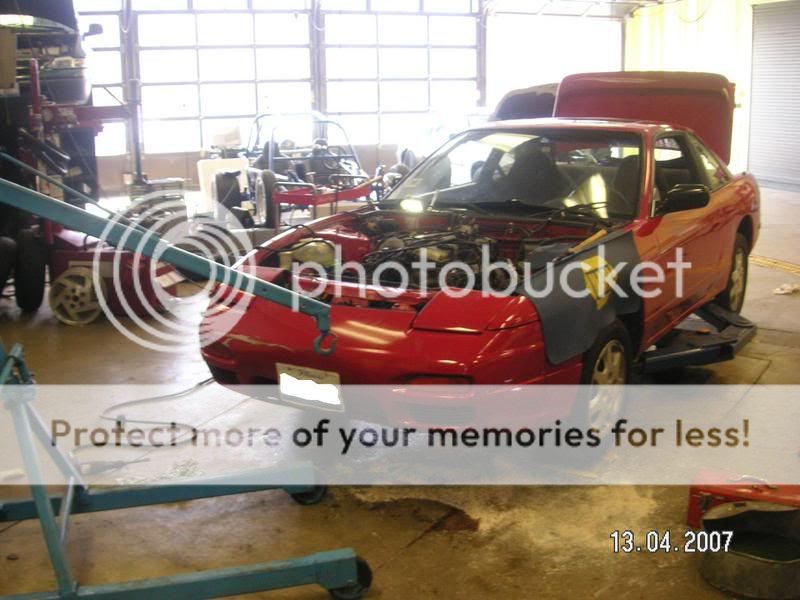 Find some good spots to chain it up. I used my exhaust manifold bolt and number one intake manifold runner with bolts, nuts and washers. 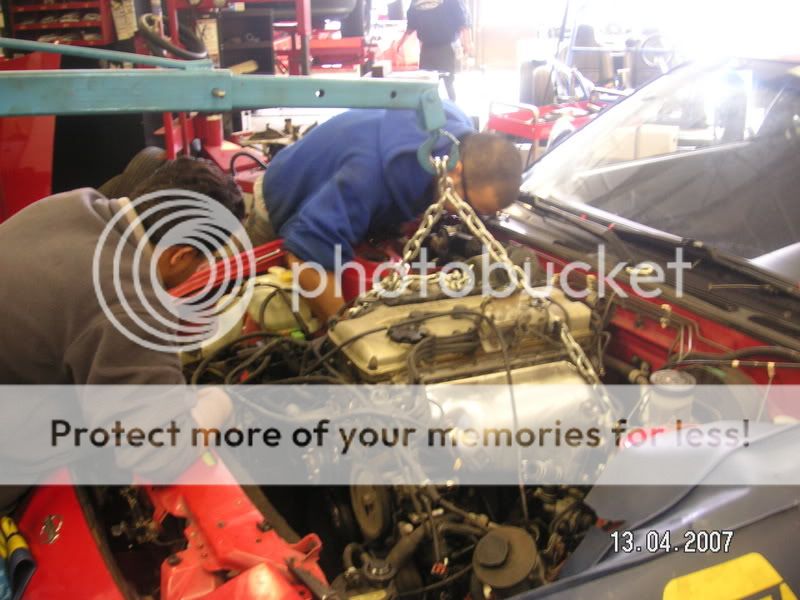 Check to make sure its going to be secure and safe to pull it out. 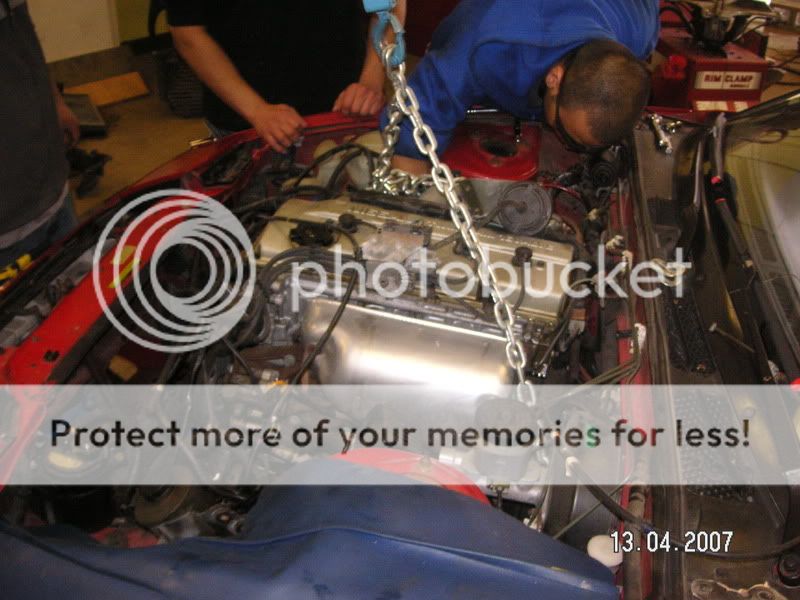 By this time you should have unbolted all the mounts, electrical connections, coolant connections and anything else that would prevent the engine from coming out. We missed a few things so it took a little bit of work. :eek Just slide it out in one piece. It makes it a little easier and less work. 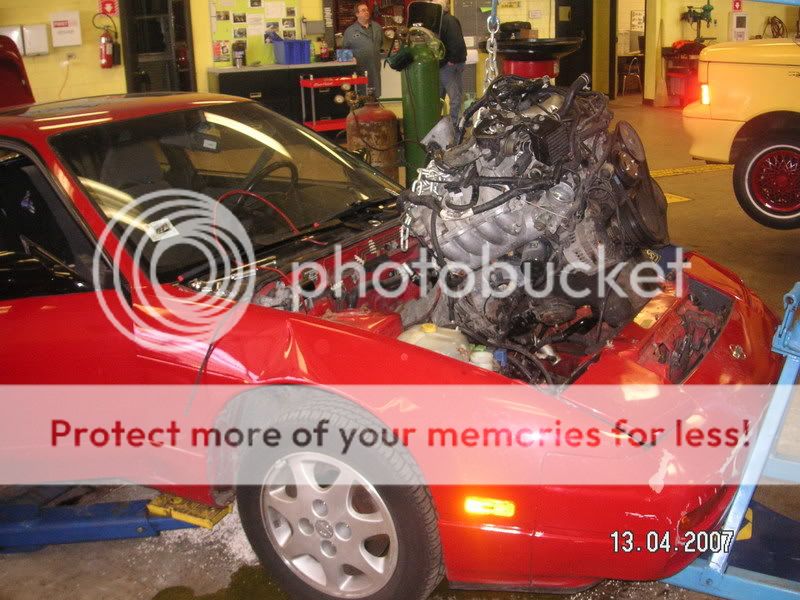 Almost out... 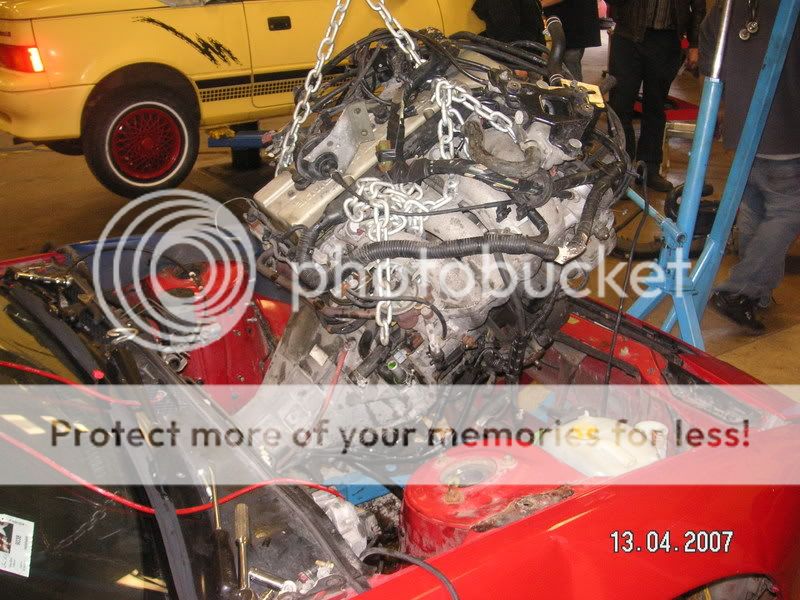 Daaaamn this things big. I forgot to remove the shifter so the engine was getting snagged down by the trans tunnel. Make sure to remove it! You'll be glad you did! 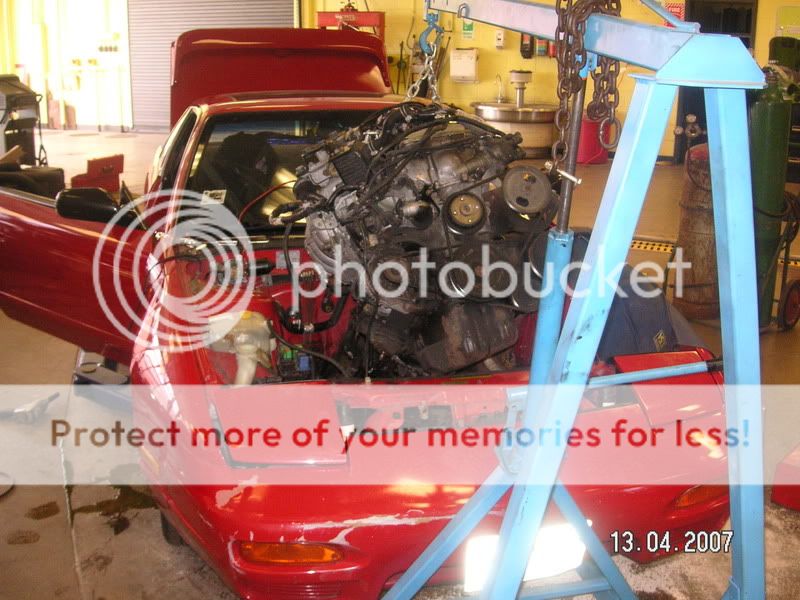 And its out! Booooo yeeeeah! My first succesful KA removal! 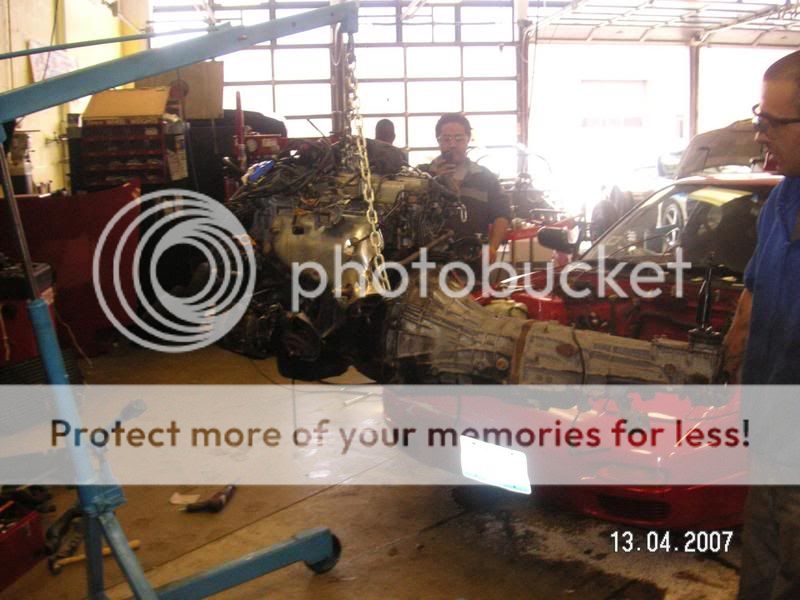 Yeah i dont know what this means but atleast the engine is out. :biggrin 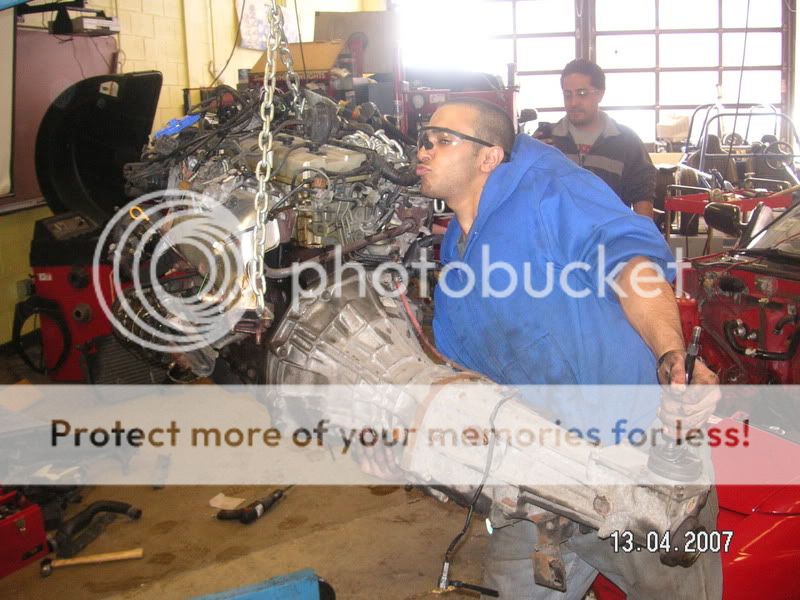 Man the bay was dirty as hell. Thats what years of use and abuse will do to our cars. 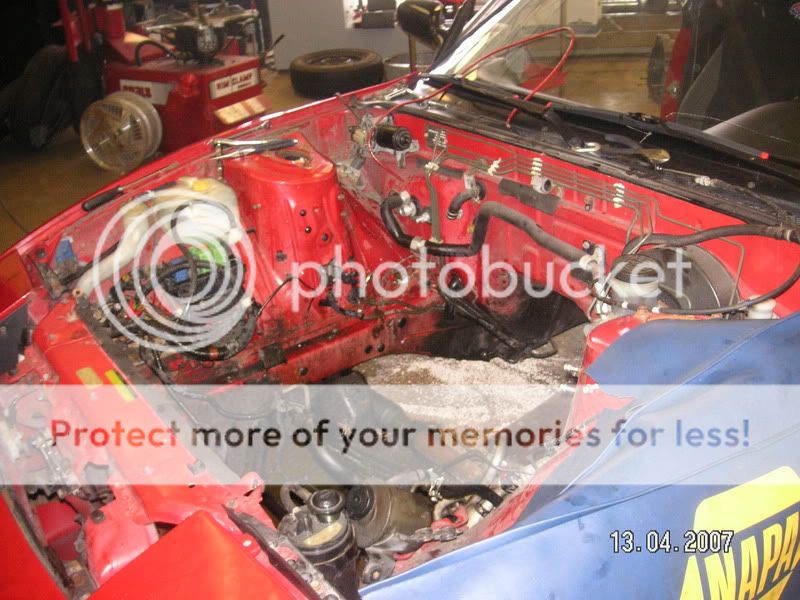 When i get rid out it, i can help the buyer put it on to a truck, bed, etc. using a hoist at school. 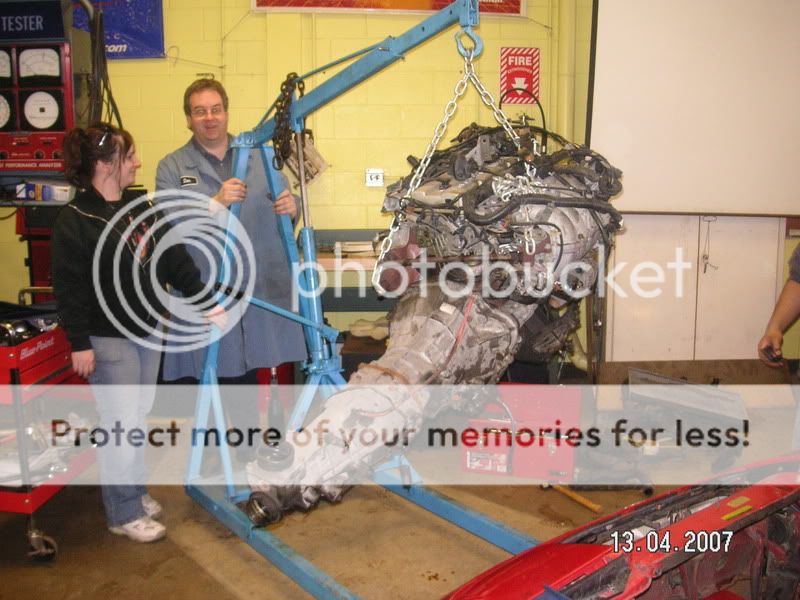 Engine bay. 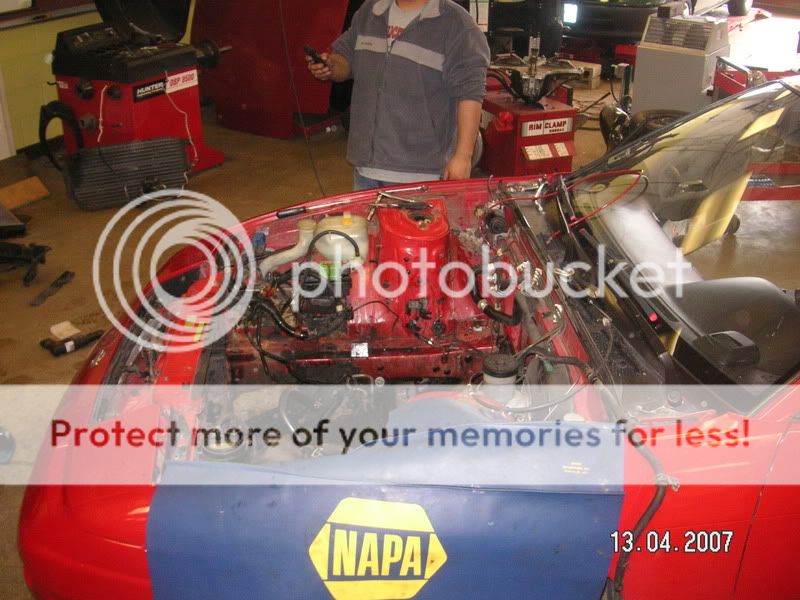 Man im glad i got this done today! My goal was to have the engine out by the end of class and i succeeded! 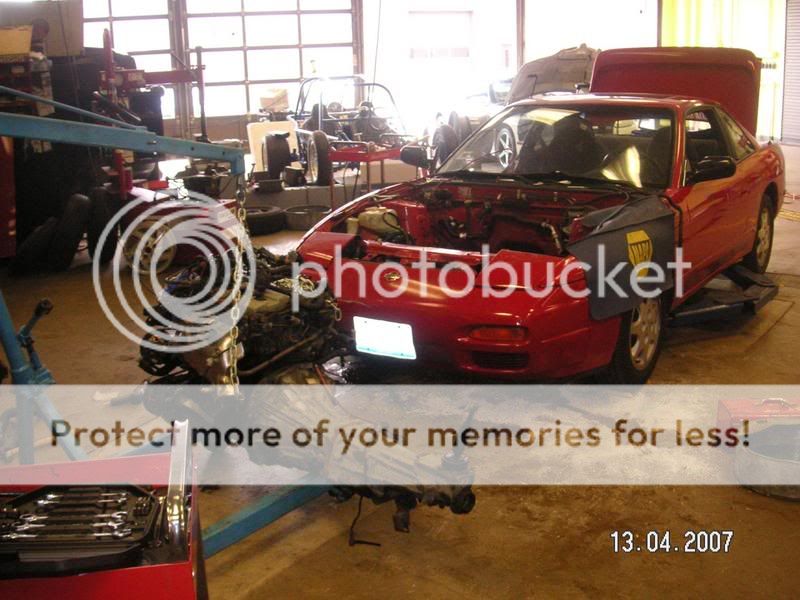 I gotta wash and degrease this!!! 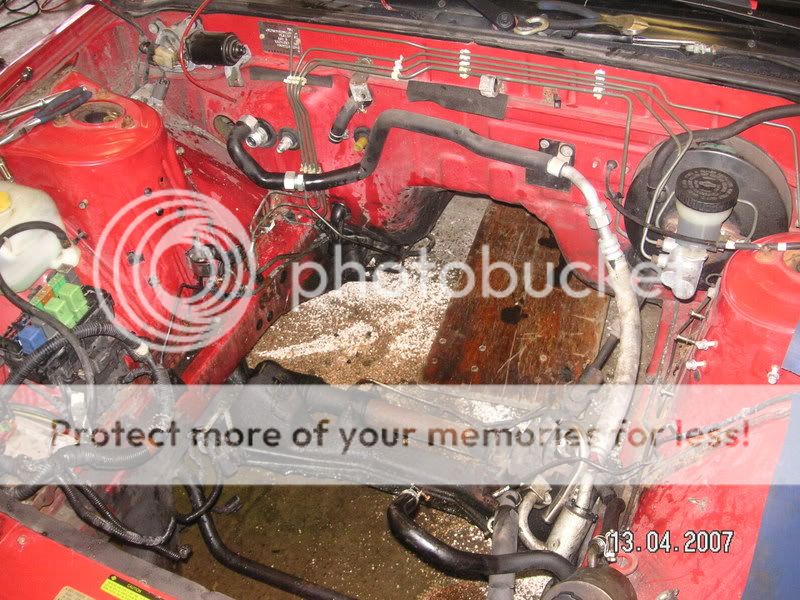 Damn that is dirty. 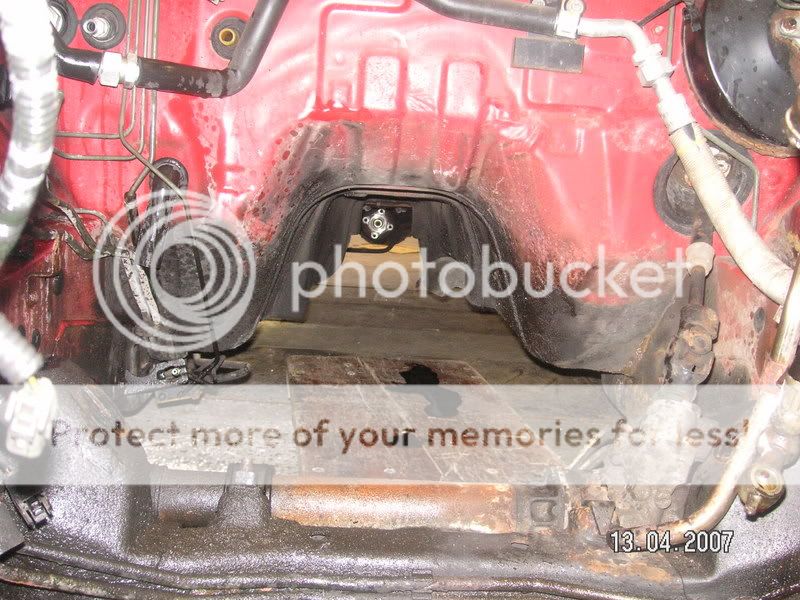 Another engine bay shot. 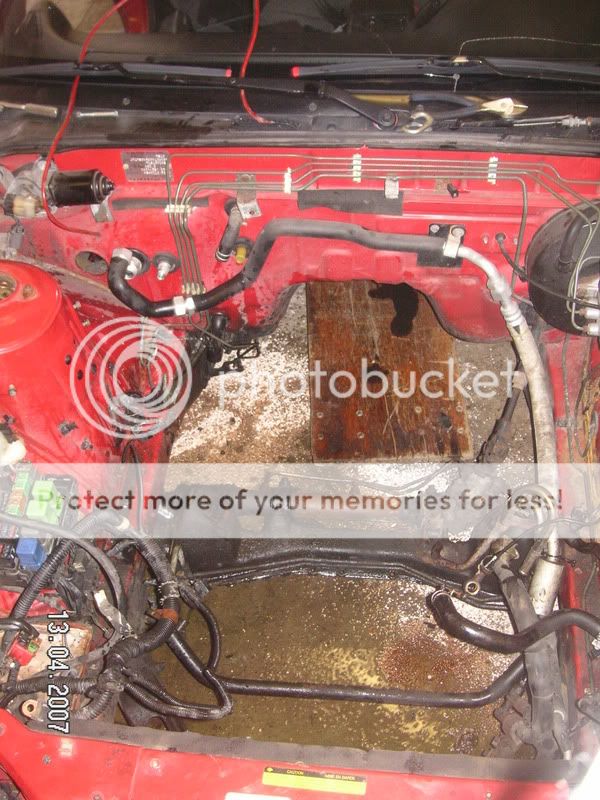 I'll post pics after i clean up this mess. I wish i could paint it but that would've taken too long. Im on a time schedule and this things gotta get done! :poke 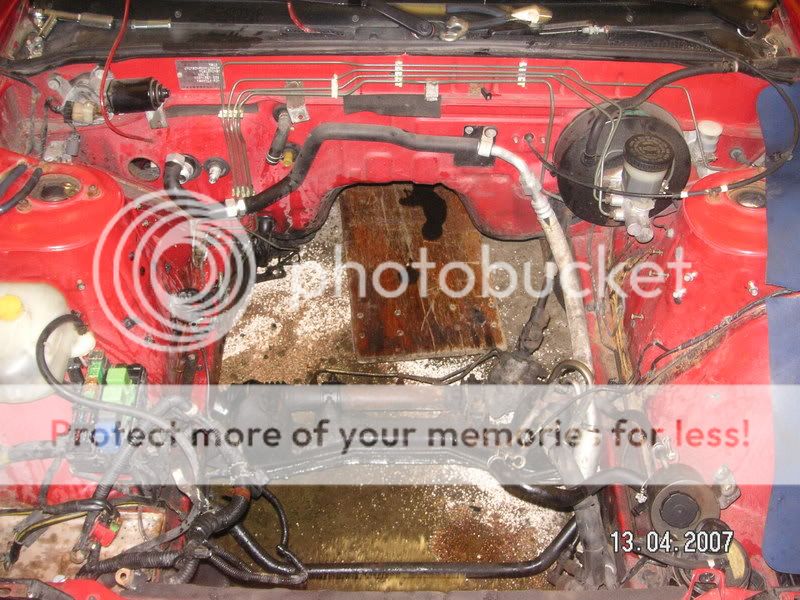 Mug shot. 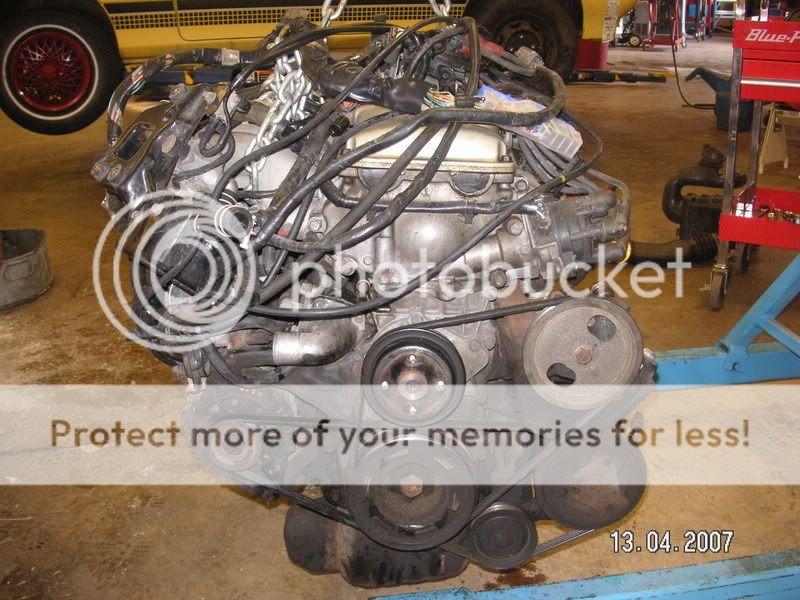 Hang out. 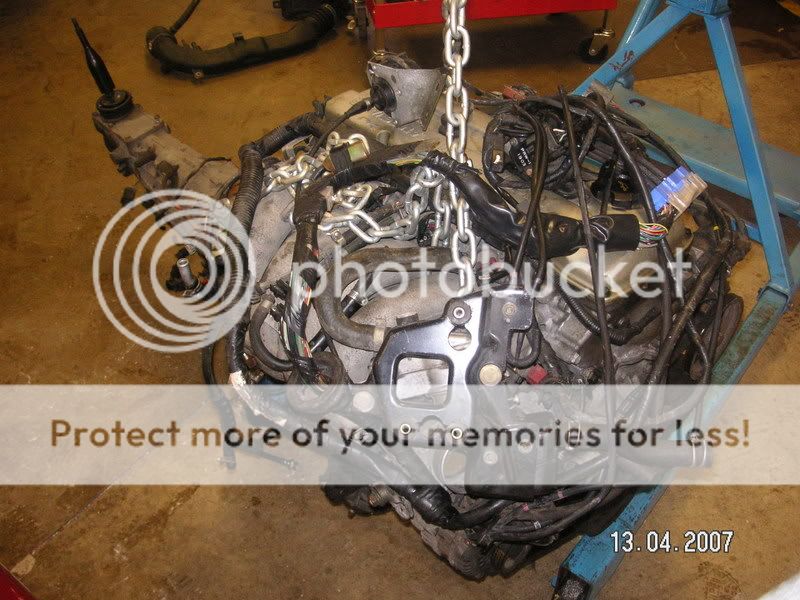 What you see is what you might possibly get! 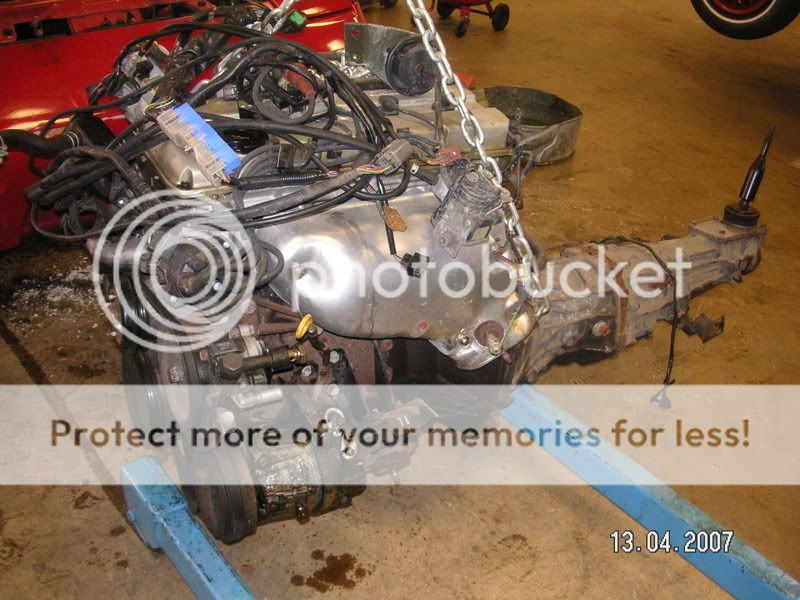 I wish i coud've kept this engine, rebuilt it, and put it to good use but i barely have funds to make my CA project happen. Im just going to concentrate on the CA for now and maybe later down the road build up a KA. 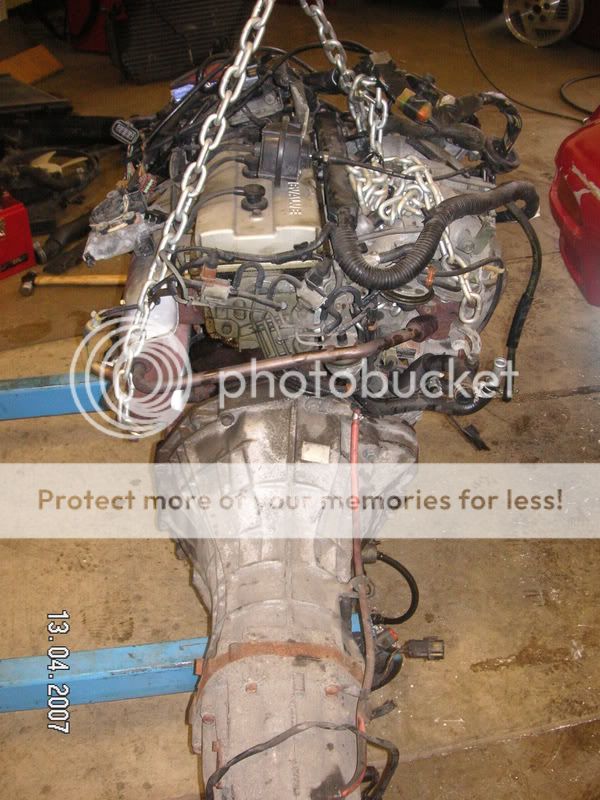 There it is. Engine is out, CA is about to go in, and im that much closer to my CA powered sports car! :bigthumb | |
| | | | Rated240R
Official Chef
Number of posts : 666
Age : 51
Location : Chi-town
Vehicle : 1991 Nissan 240sx
Reputation : 2
| | Subject: Re: David's CA18DET build-up thread! April 24th 2007, 12:55 pm | |
| Daaaamn! You are a pic whore! Lol!
Very nice write up so far! Too bad Nackers won't be able to see this! 56K! Lol!
I especially like the part on the turbo rebuild! | |
| | | | Dirty Dee
Post Whore

Number of posts : 3781
Age : 37
Location : Chicago
Vehicle : 2012 WRX
Reputation : 25
| | Subject: Re: David's CA18DET build-up thread! April 24th 2007, 2:15 pm | |
| Cant wait to see your car in action. | |
| | | | D*S Dstar
*********
Number of posts : 11246
Age : 37
Location : Mission Control, motherfucker.
Vehicle : RED SHARK V1-5, MOBY DICK.
Reputation : 128
| | Subject: Re: David's CA18DET build-up thread! April 24th 2007, 7:30 pm | |
| All this shit and the cheapest motor oil money can buy? | |
| | | | chitown240SX
Light Duty Poster
Number of posts : 192
Age : 42
Location : Chicago
Vehicle : S14
Reputation : 0
| | Subject: Re: David's CA18DET build-up thread! April 24th 2007, 9:56 pm | |
| Looks good whene can I see in person? Oh sorry for leaving early on Sat. wish we could have stayed at the meet a little longer. | |
| | | | davidricardo86
Light Duty Poster
Number of posts : 160
Age : 37
Location : Chicago
Vehicle : 92 S13 SE Coupe
Reputation : 0
| | Subject: Re: David's CA18DET build-up thread! April 24th 2007, 11:23 pm | |
| - Rated240R wrote:
- Daaaamn! You are a pic whore! Lol!
Very nice write up so far! Too bad Nackers won't be able to see this! 56K! Lol!
I especially like the part on the turbo rebuild! Thanks dude! Its almost done and i cant wait till i get to ride around with it! Yeah i really like doing the whole write-up style and documenting almost everything just so others might use it later as one of their sources. I wasnt even aware that some people are still using 56K!? Sorry to those people...  - Dirty Dee wrote:
- Cant wait to see your car in action.
Dude me too! Im almost coming up to the one year mark and ive yet to fire this engine up. It'll be worth the wait! - D*star wrote:
- All this shit and the cheapest motor oil money can buy?
Hahaha... Yeah thats the only oil i had lieing around when i was putting the turbo together! When i fill up the engine with new oil, ill be sure to get a high quality oil. Any recommendations guys? | |
| | | | davidricardo86
Light Duty Poster
Number of posts : 160
Age : 37
Location : Chicago
Vehicle : 92 S13 SE Coupe
Reputation : 0
| | Subject: Droppin the CA in... July 20th 2007, 3:03 am | |
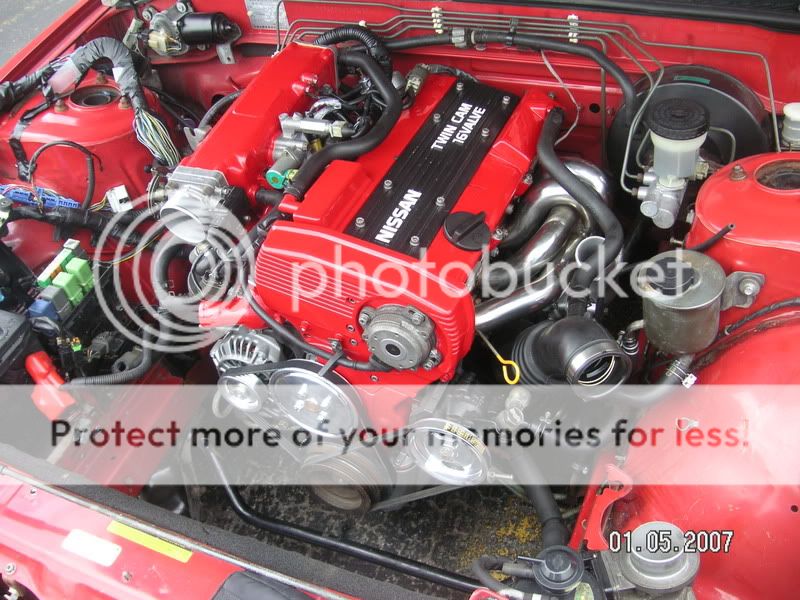
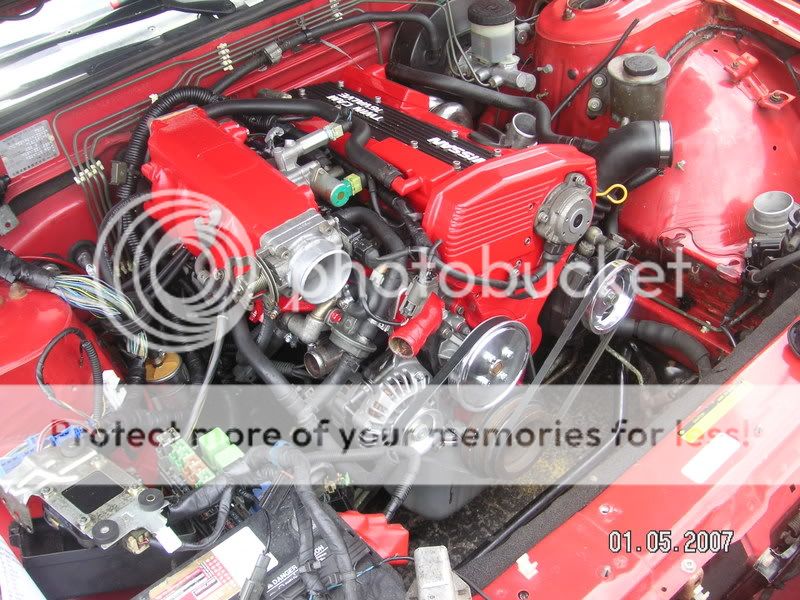
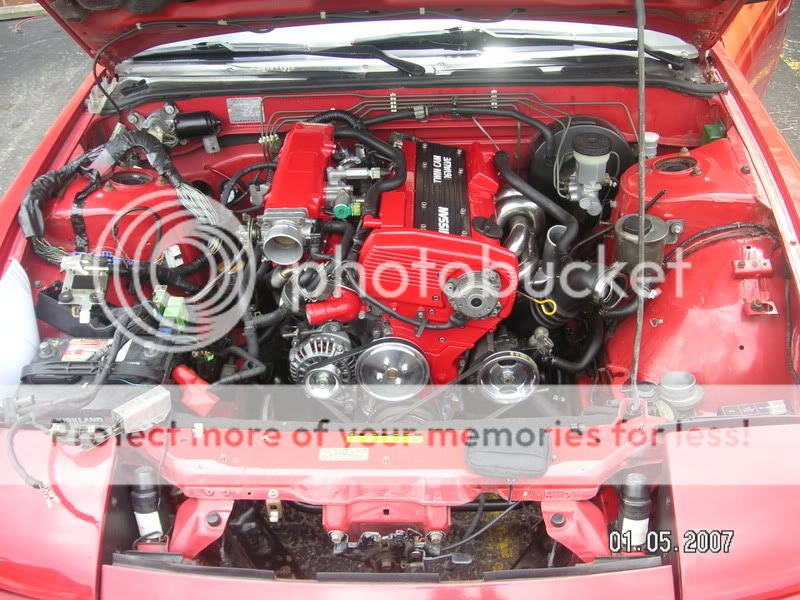
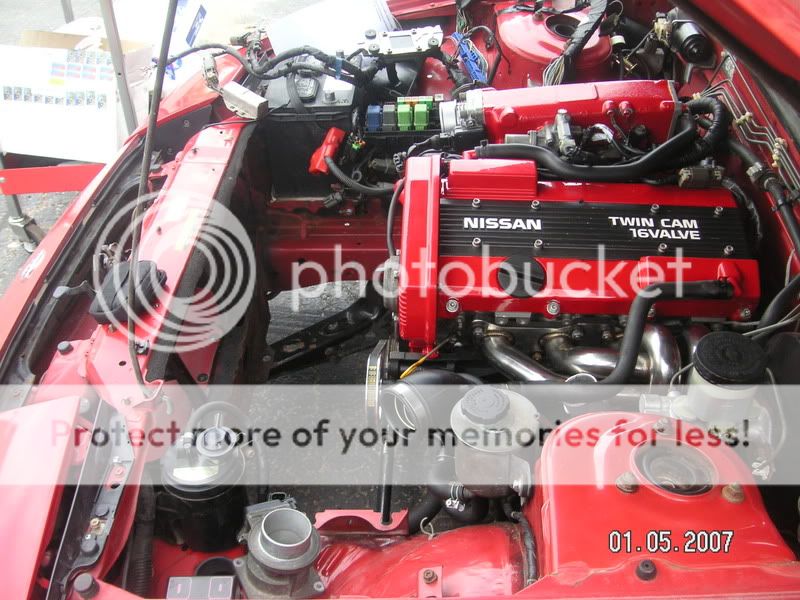
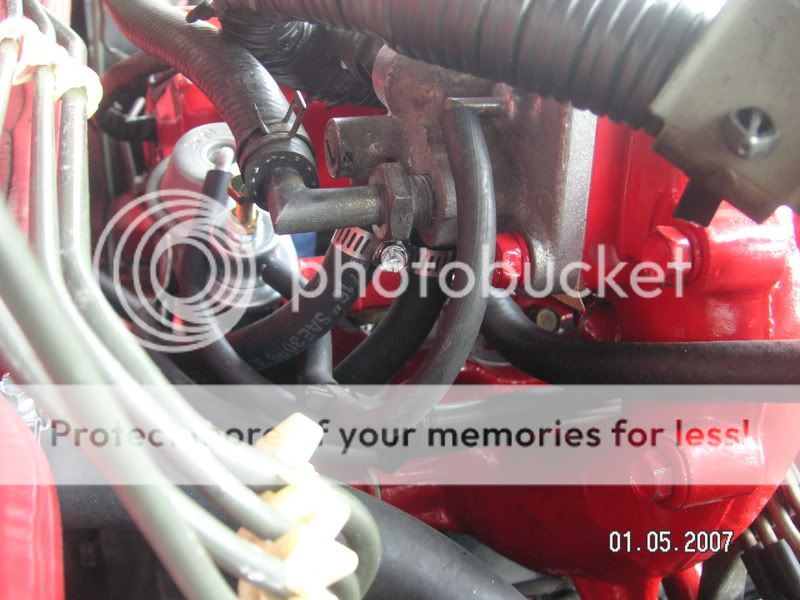
| Haven't posted in a while on this thread but here are some old progress pics anyways: Here is a back shot of the head and the coolant line and vacuum line for the turbo boost solenoid. You can also see how i've hooked up some of my vacuum lines for the Nismo FPR and Power Valve Actuator aka butterfly vacuum pot. I used the picture/diagram from Nissan FAST. Actually i insist you get the FAST sections on coolant lines and hoses. Also theres Air and vacuum lines in different sections. 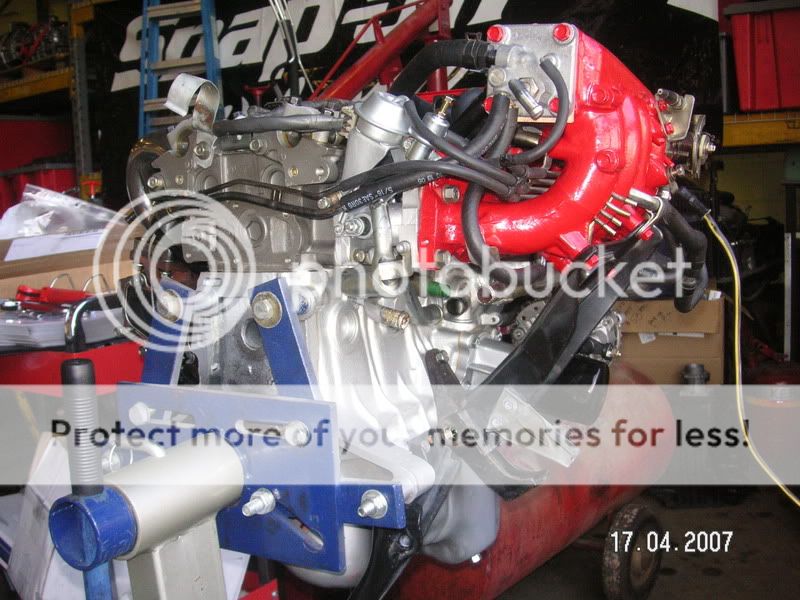 Again.  Heres the new exhaust manifold. I got this from Austrailia. The welds look great and the piping isnt too thin or of crapiness. I guess its a decent upgrade. Its not that bad of craftsmanship. 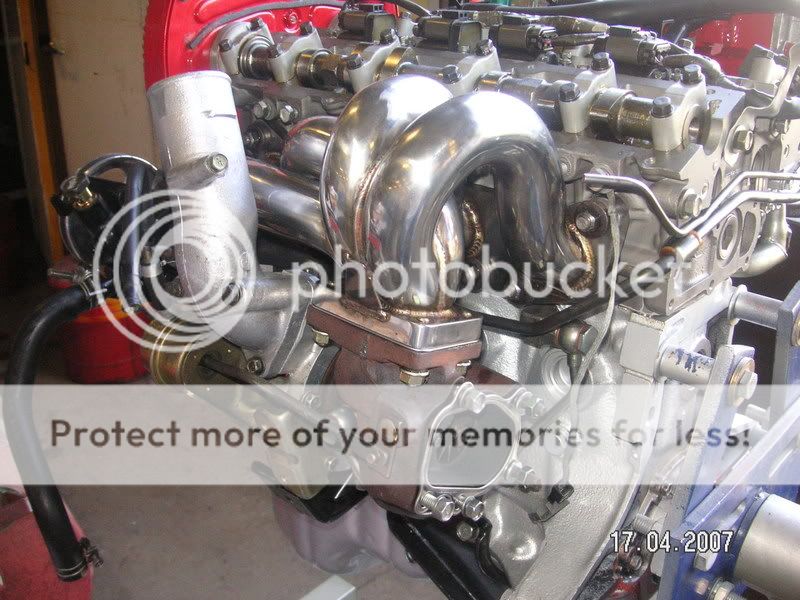 Oil and coolant hard lines for turbocharger are installed. These were cleaned fist and bent slightly to compensate for the new exhaust manifold's new position.  Ah heres a better shot! I also used Loc-tite on all the studs and nuts. I've heard of too many stories of bolts, nuts, studs, turbos, outlets, you name it coming loose. I should be ok but ill keep a check on them either way! 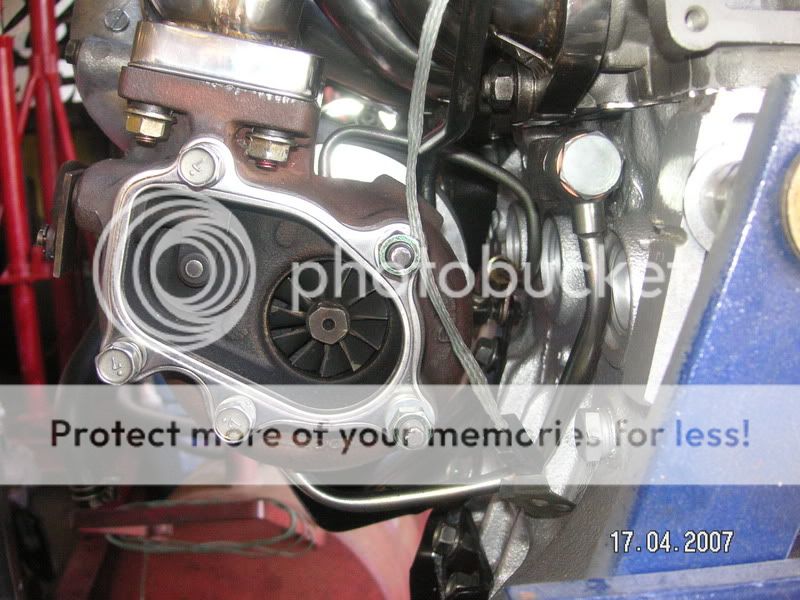 OH YEAH little CA monster!  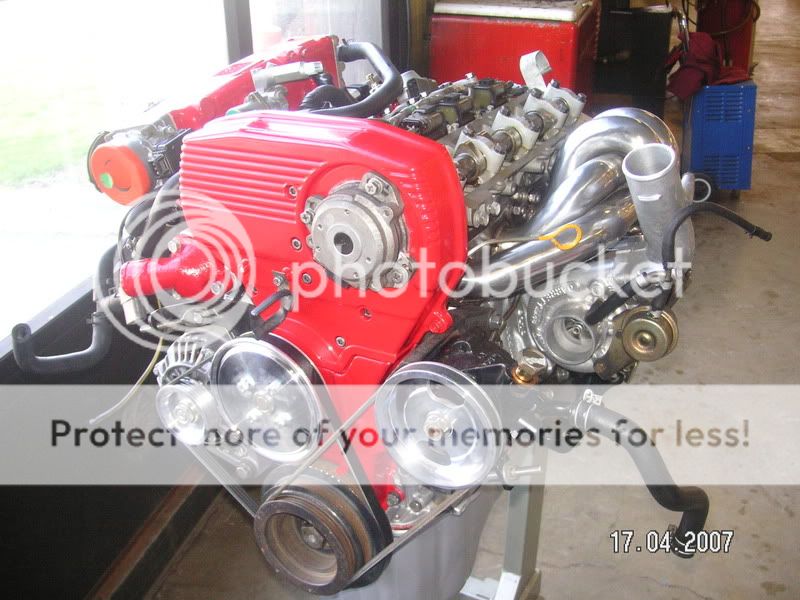 This was the flywheel that came with my motor. Its aftermarket and about 11lbs. It appears to be made of billet steel, maybe. Its a one piece and it was in bad condition when i pulled the trans and clutch off. The original clutch disc was down to the rivets and metal! I was able to salvage this and reuse it atleast one last time. Fingers crossed. Its going to let the engine rev soooo easy cheesy! I cant wait! 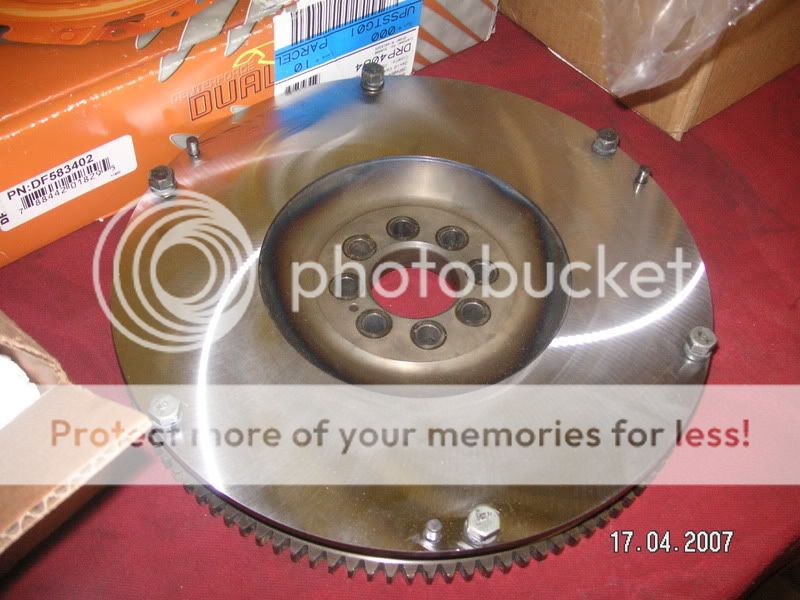 Clutch slave Stainless Steel line and bleeders from SPL parts. 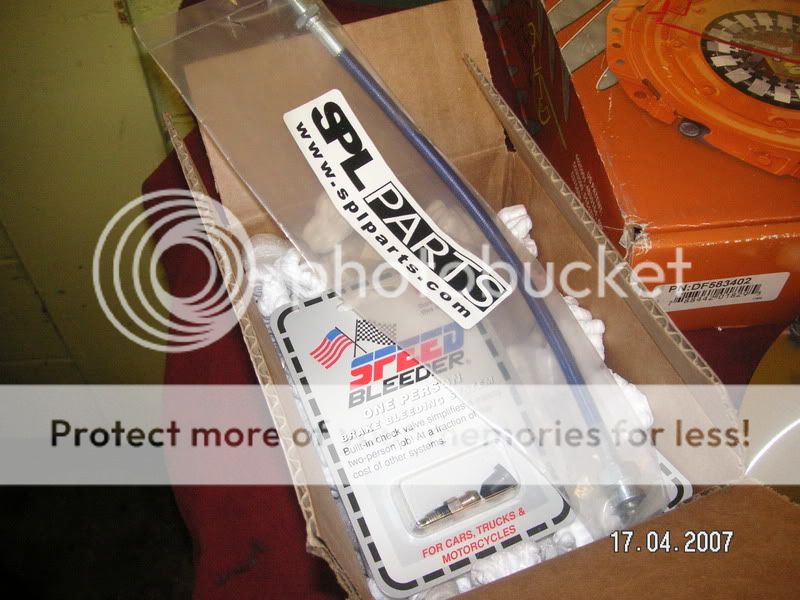 Here the Centerforce Dual Friction clutch kit for 1992 KA24DE 240SX. I dont know how this clutch is going to be like but i hope it holds up to a good amount of abuse! 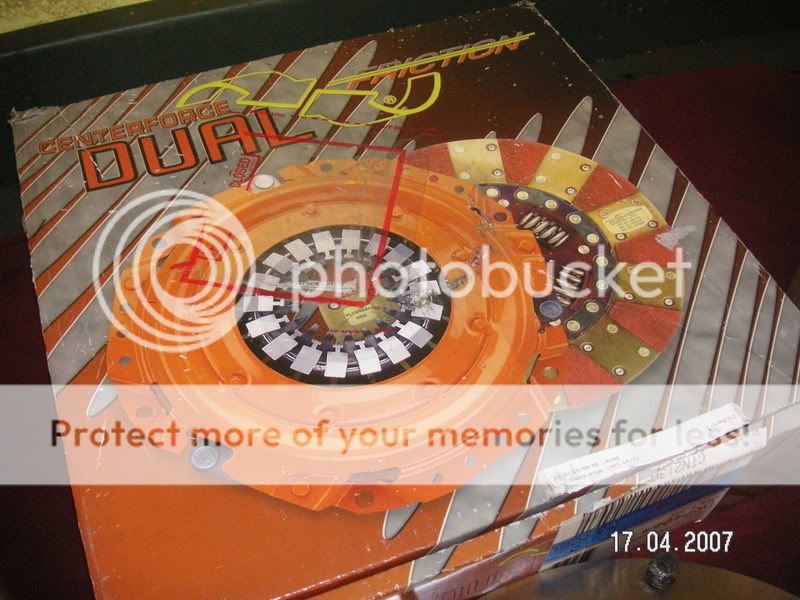 SPL Pivot stud vs OEM stud. 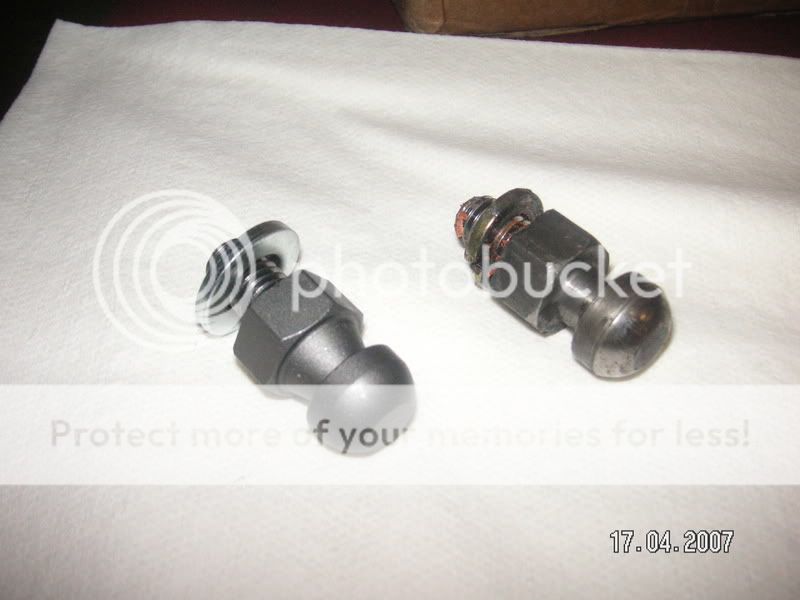 After all the crap was cleaned off, this is what the old fork and throw-out bearing looked like. They look better now! Dont loose the retainer spring either! 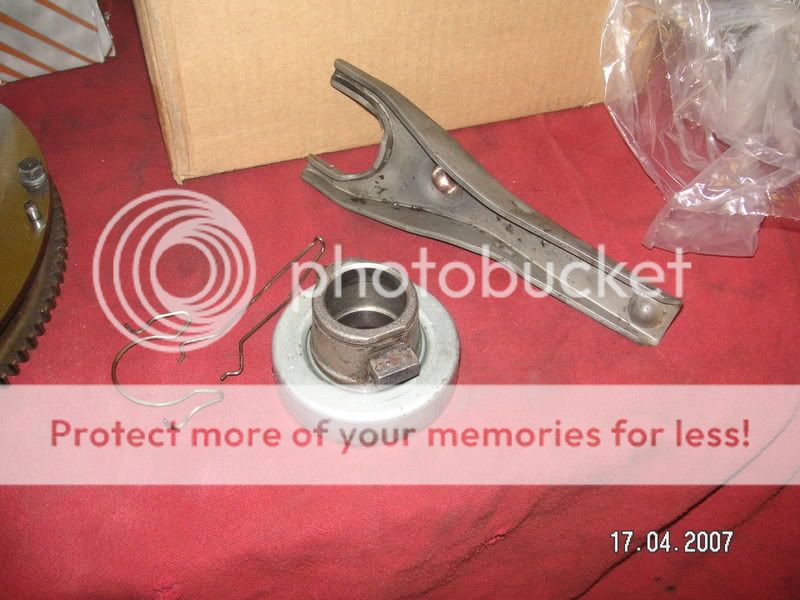 Heres our new bearing! You'll have to pull off the old one and press in the new one. I'm going to leave it up to you to decide on how to take it out. FYI i used a two jaw puller, although id say use a three jaw puller instead! Tap the bearing in with a mallet or dead-blow hammer using a wood block. Or press it in with a machine. Its up to you. 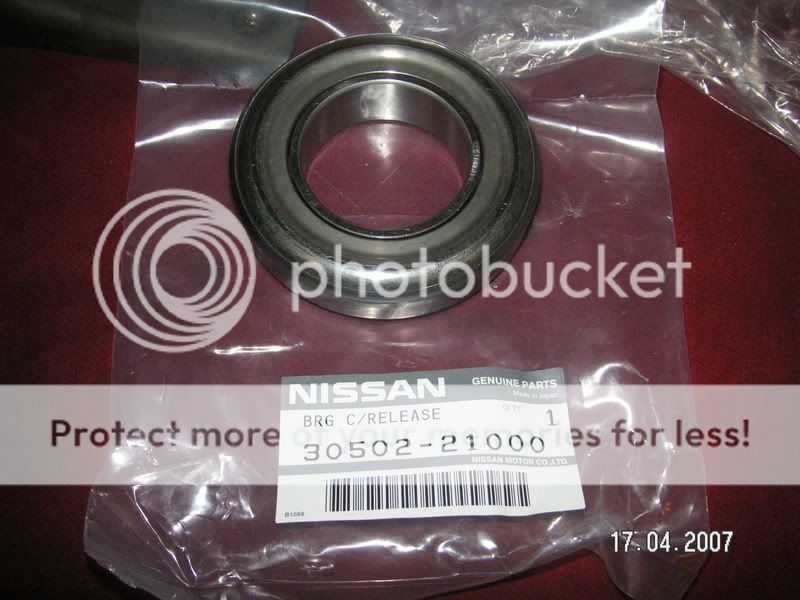 Heres what the bearing and fork installed should look like. Keep using the FSM because theres plenty of good information in there. For somethings, some of these may seem redundent. 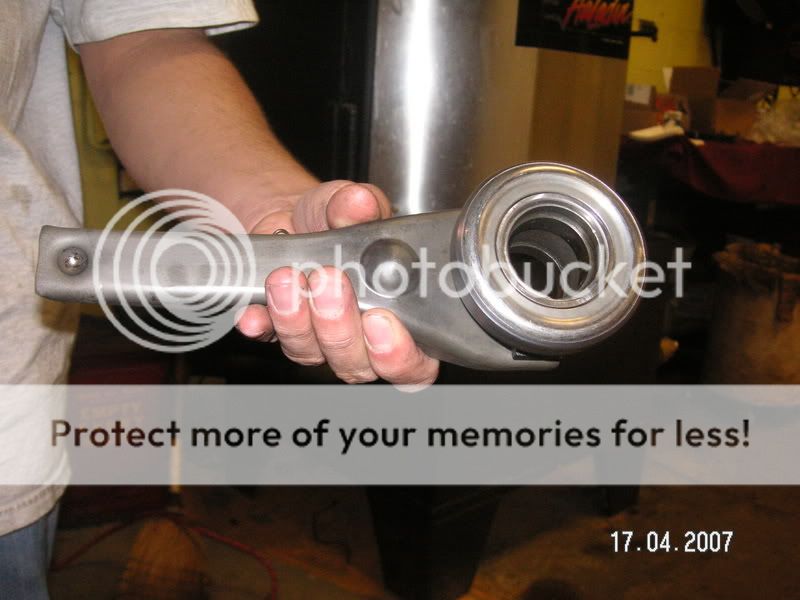 Put a few dabs of grease on the pivot stud and on the clutch disc splined shaft. Do not overdo it! 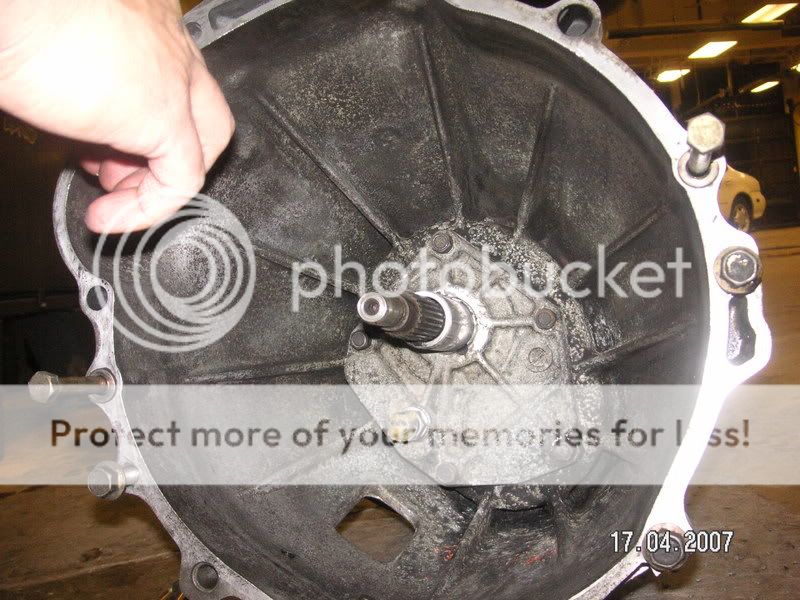 Install the retainer spring. You should be able to lock it onto the pivot stud. If not, remove one side of the retainer spring, place pivot stud into spot on the fock, and lock the retainer spring in place. 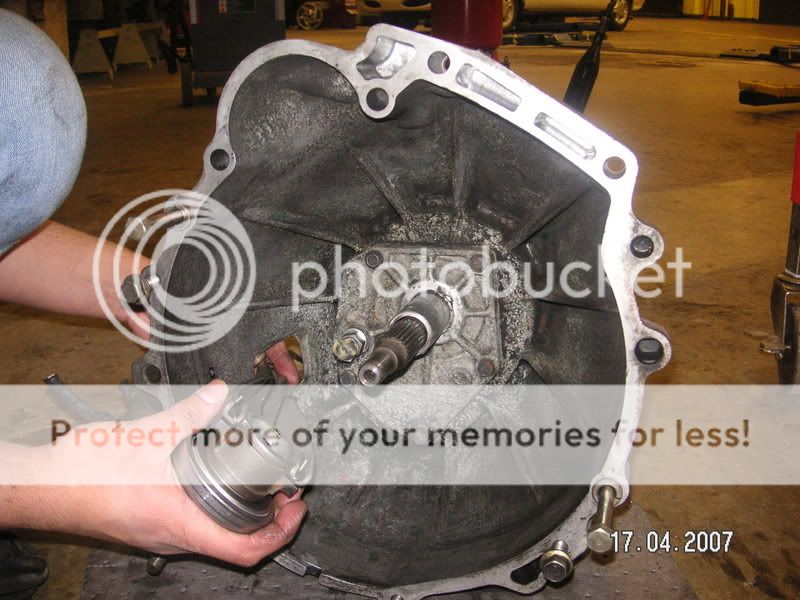 Here my CA's factory coil on plug setup. It used a distributorless ignition system and uses a proven drivetrain and bottom end designs similar to the RB serious engine! Internally the motor uses beefy rods, low compression and a quick spooling turbo. Although its not the fastest car on the road, for me its a good step in the right direction. 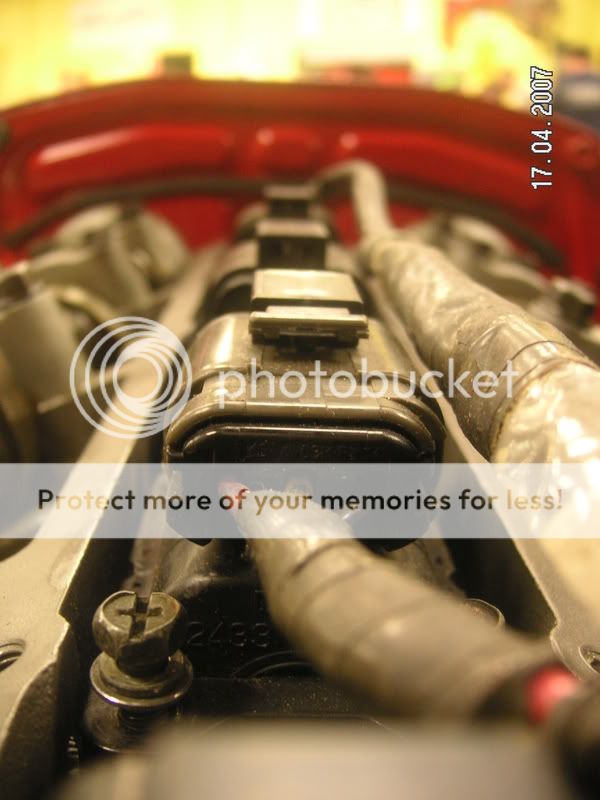 We chained up the CA with four bolts on the head and lifted the engine off the stand. Un-bolt your stand and set aside. Prepare for flywheel, clutch and any other parts that might relate to what you are working on! 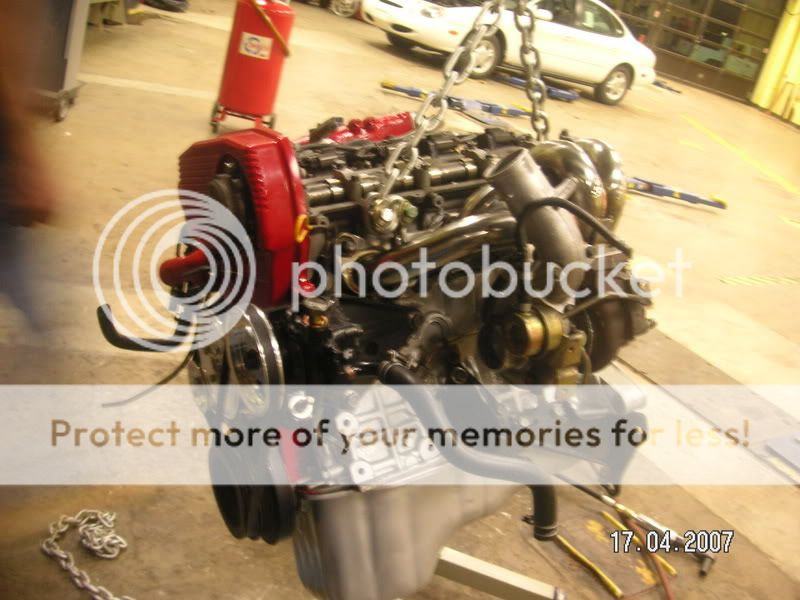 Here it is chained. Wow that looks good! I love this little monster engine! I want to drive it so damn bad! 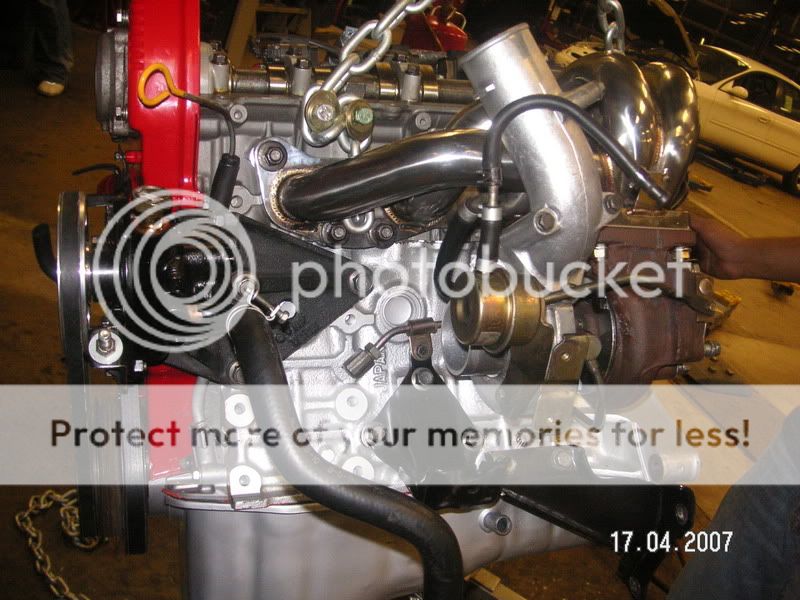 Moving it around. 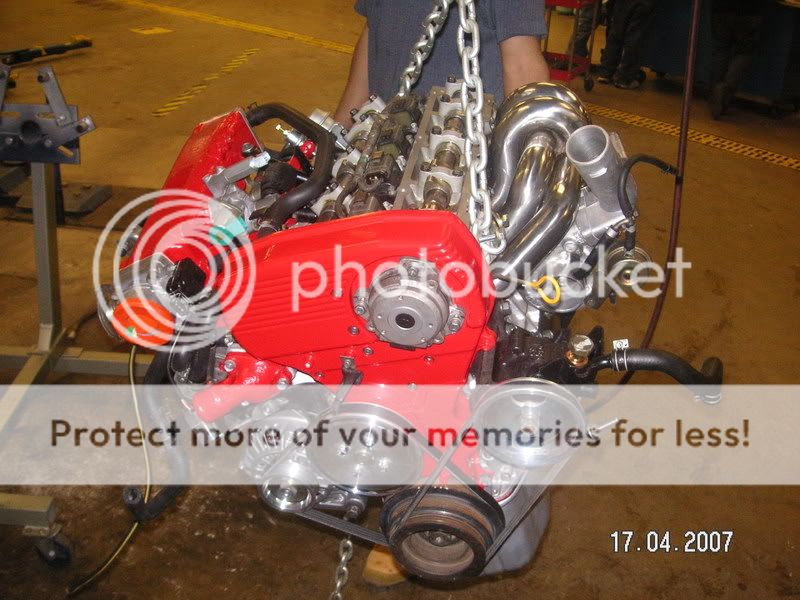 Same. Make sure you are going over everything that can be done while the engine is out of the car! Not doing these things now will only make them a harder later once the engine is in the car. Double check, triple check to see that you're doing as much as possible. 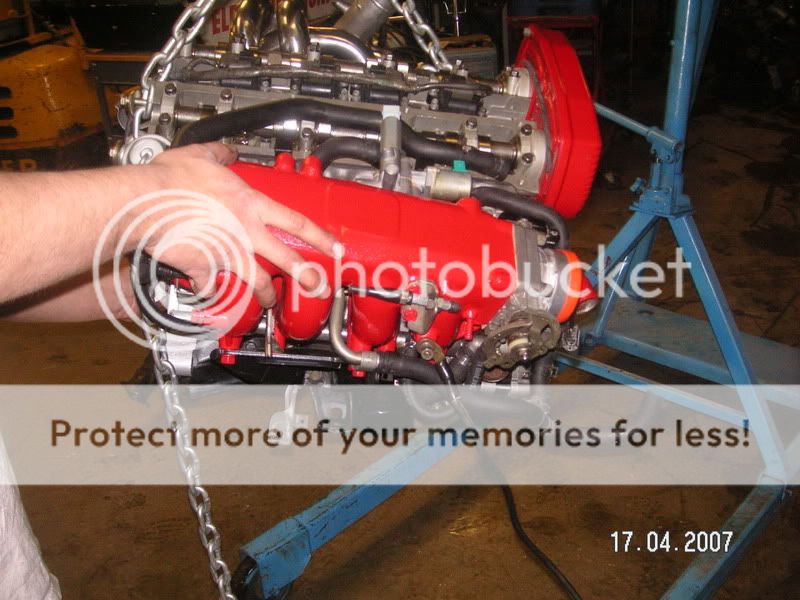 Make sure you install the rear main seal and gasket the correct way! I messed up and forgot to put the gasket behind the metal bolt bracket. I got it done, it wasnt easy, but im so damn glad its done!!! This was huge a pain in the ass!!! 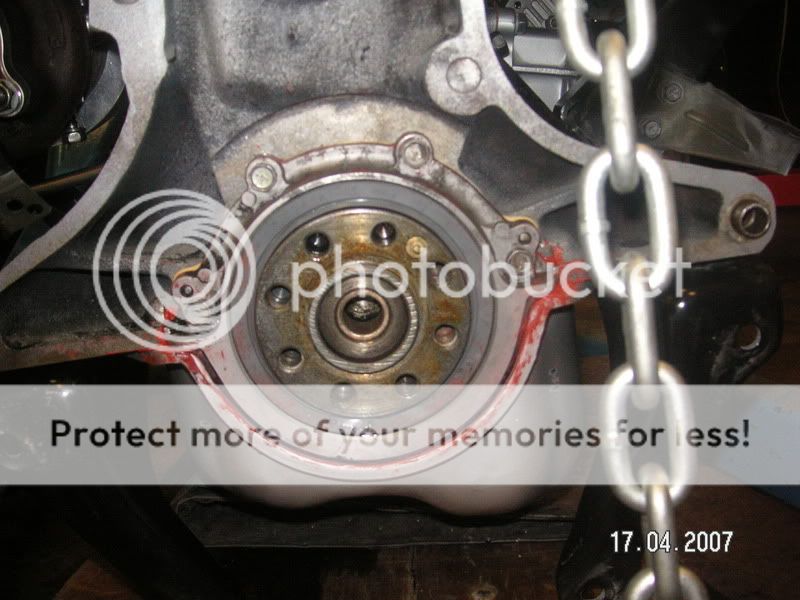 Next you'll have to install the metal plate that goes between the trans and block. The flywheel is next after that which require the eight bolts to be torqued to Nissan's specs. Remember, the FSM is your friend! 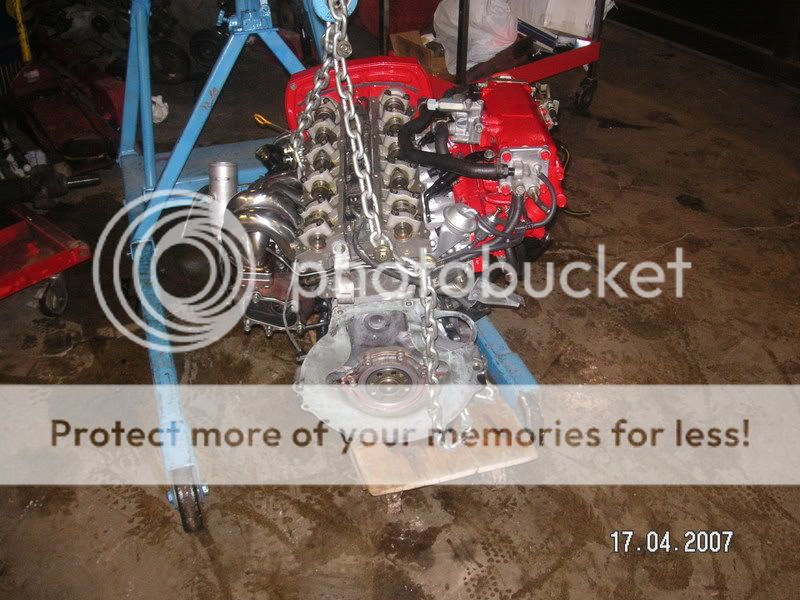 I didnt take pictures of my clutch install because that day i forgot the camera. Doh! I used an alignment tool for the clutch disc and bolted the pressure plate up to the flywheel to spec. Make sure everything is center and bolted done correctly! We'll say i was installing the "clutch" at this time since i dont have any pics of the clutch/flywheel install. 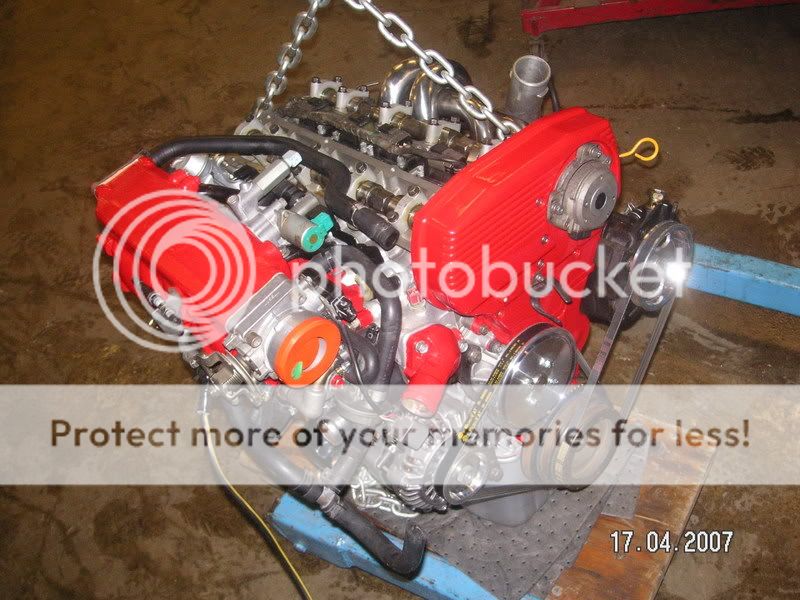 Bolting up the transmission isnt the easiest thing to do but it sure is makes is a hell of a lot easier doing it out side the car! Wiggle it in and after sometime it will go in. Make sure you use the right size bolts for the right size holes! Tighten the bolts on the black brackets too. The last item to install should be your starter, two long bolts and its done!  The engine bay looks way better now! No more dirt, grease, gunk, and shiit all over the place. 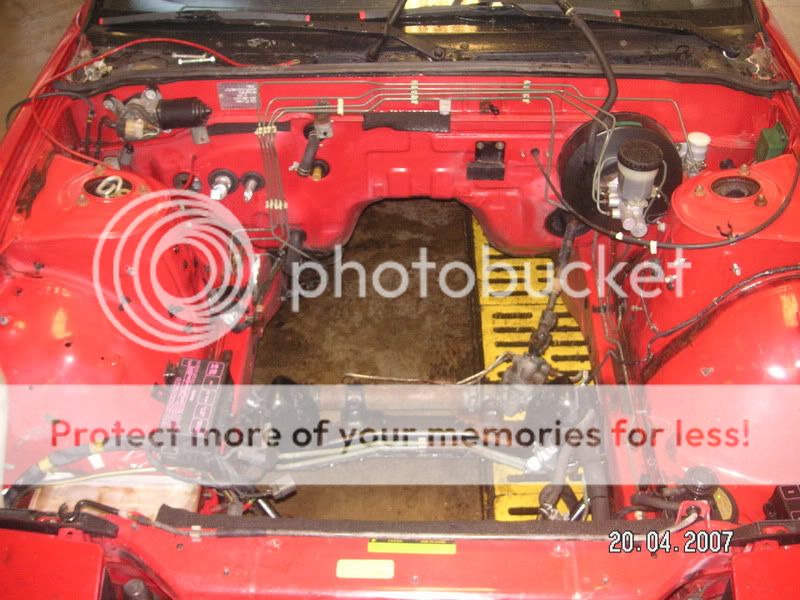 I wanted to sand and get rid of some of the rust then prime and paint it but i didnt have enough time. This can be done later down the road when i have more free time. Still doesnt look too bad though! 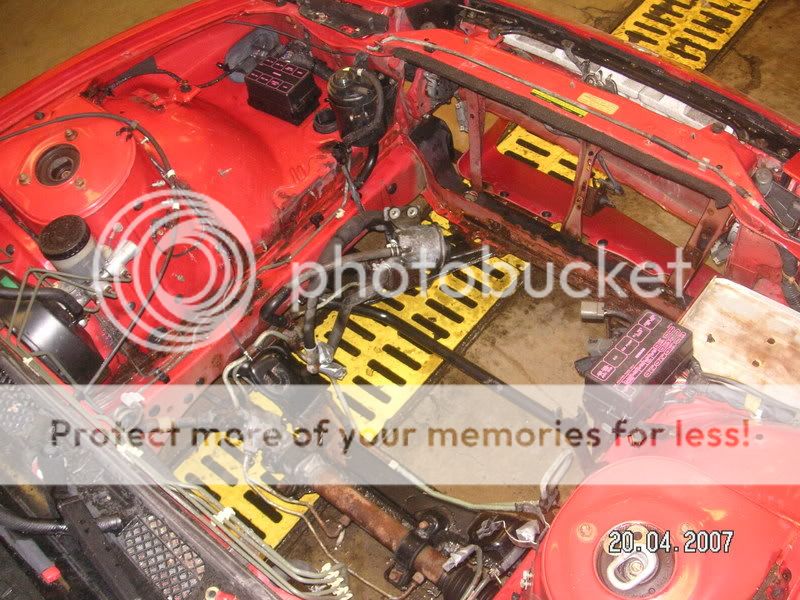 New in the box Nismo engine and tranmission mounts. Heres the part numbers for anyone that wants to get their hands on them. When i removed the KA, the old mounts were toast! The car should feel better once these are in. 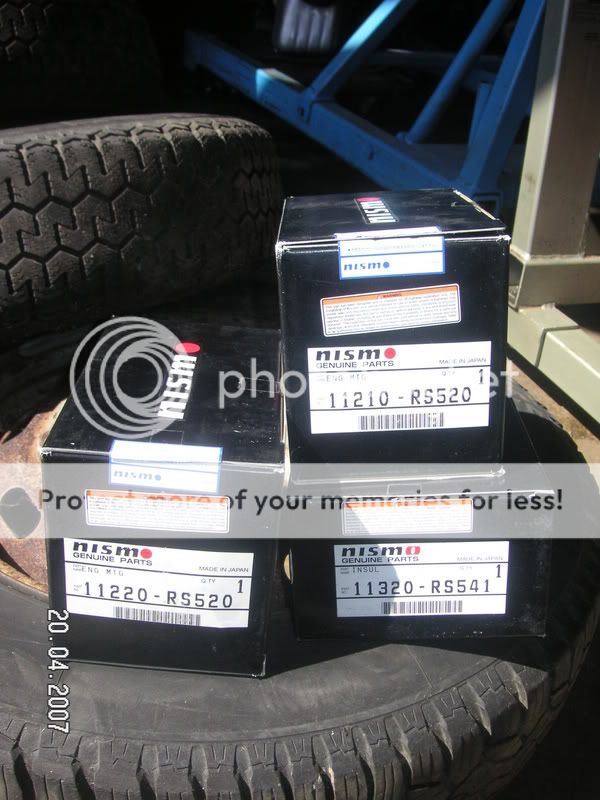 Pay close attention to which mount goes on which side. Number "1" goes on the intake side. 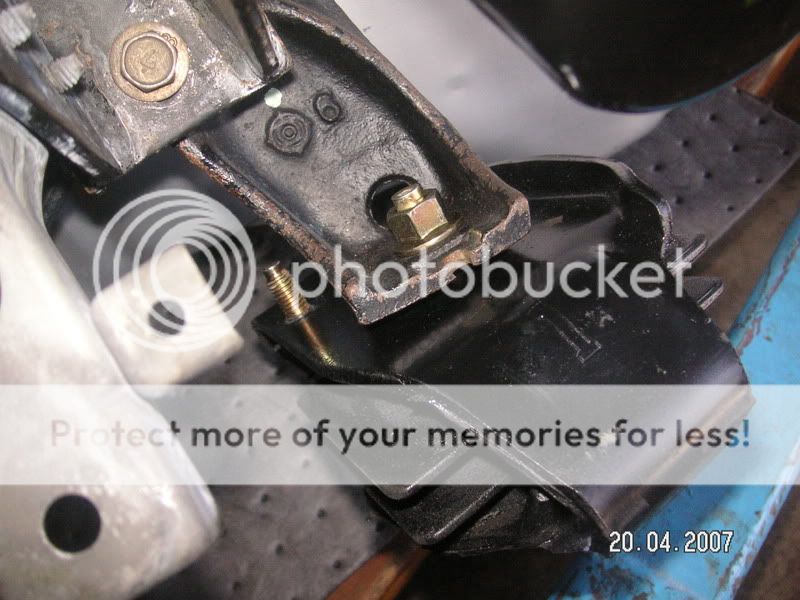 Number "2" goes on the exhuast side. 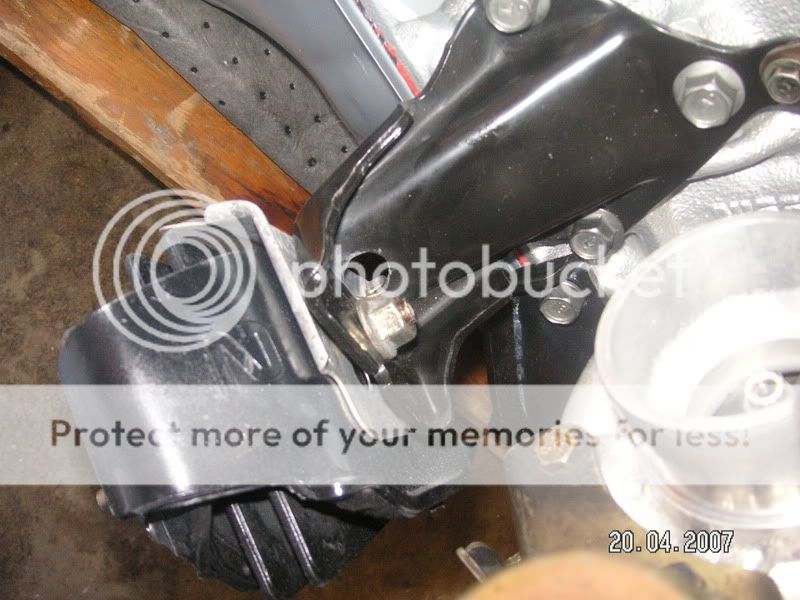 My new SPL Stainless Steel clutch line. I plan on keeping the clutch damper even though its a pain in the asss to bleed!!! 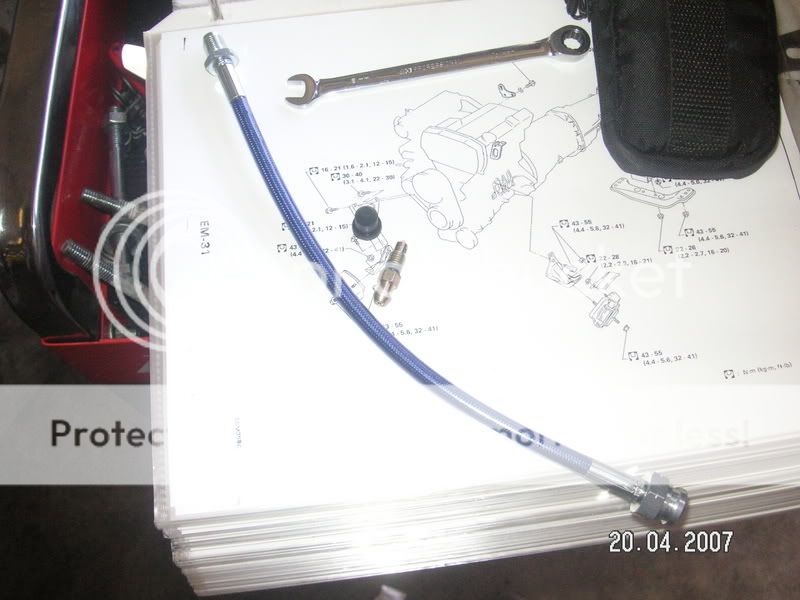 Here we go, one last look at it before it goes in! Remember the thing i said about removing the shift lever. Remove it if you have'nt. 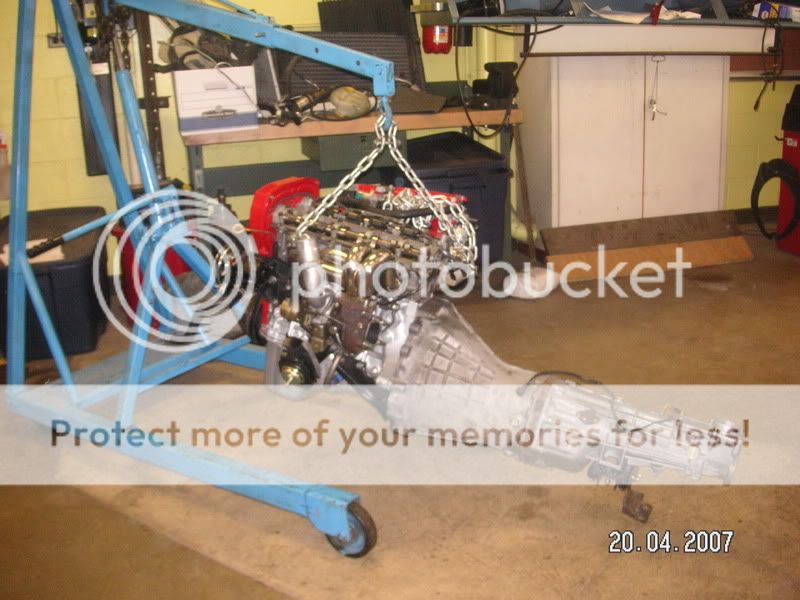 Theres your new home CA! 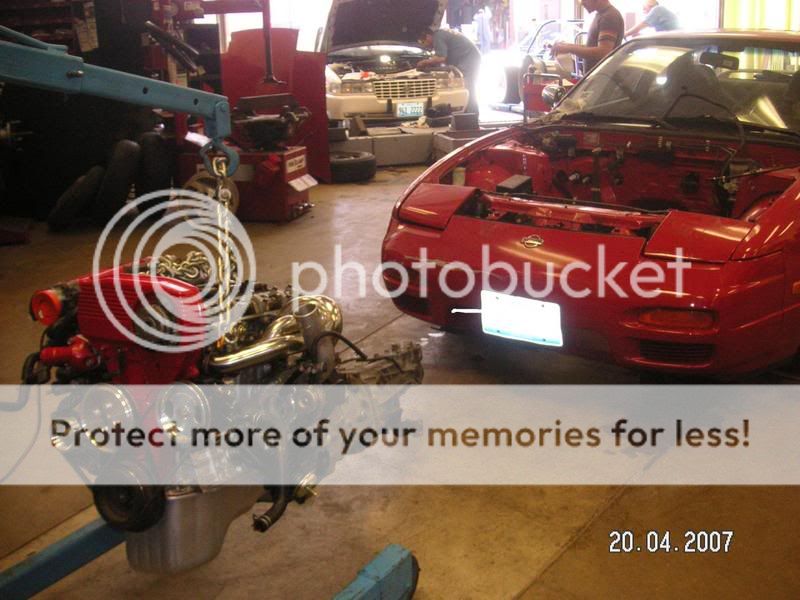 Lets get this thing in! Suprisingly this wasnt as intimidating as i thought at first. Having the right people and tools for the job made it easy. 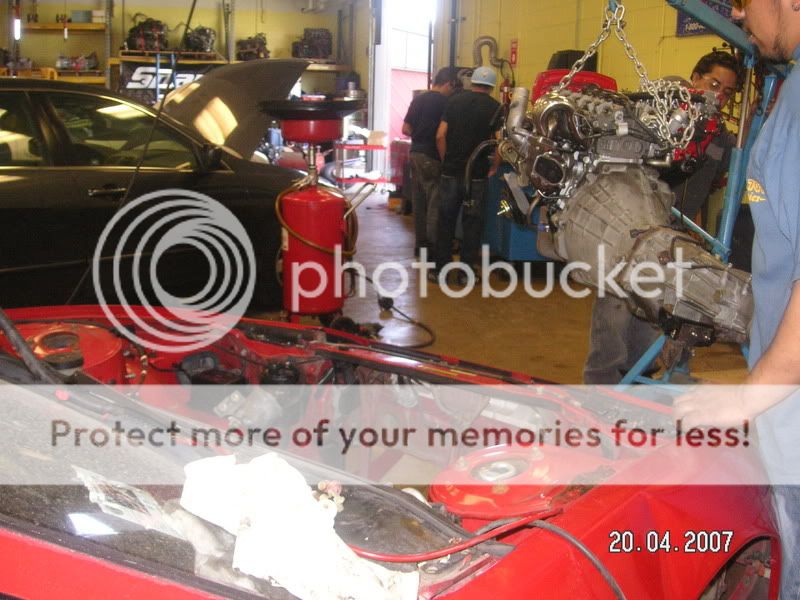 With a little pushing and pulling, the engine and trans will go in. Dont try to rush anything and take it slow. Lower and move the engine around to get it in just right! 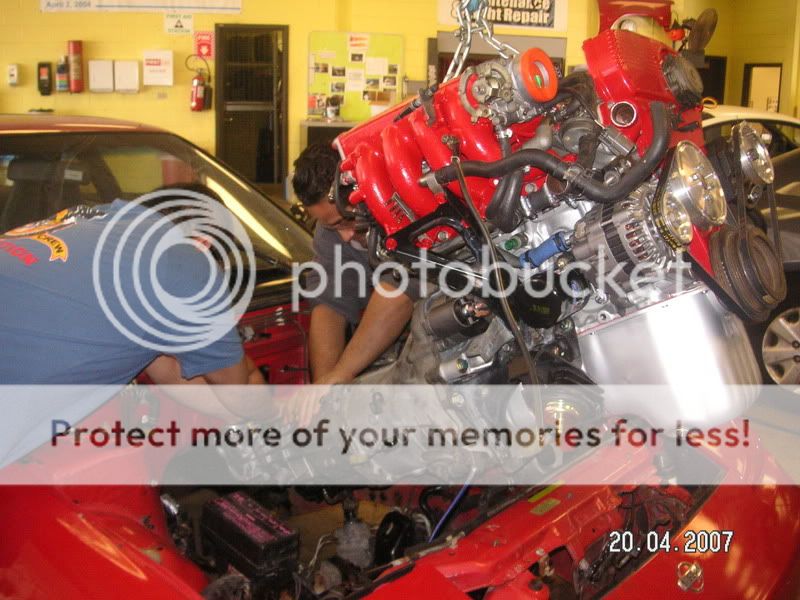 Go easy with hoist. Slowly and steady will provide you great results. 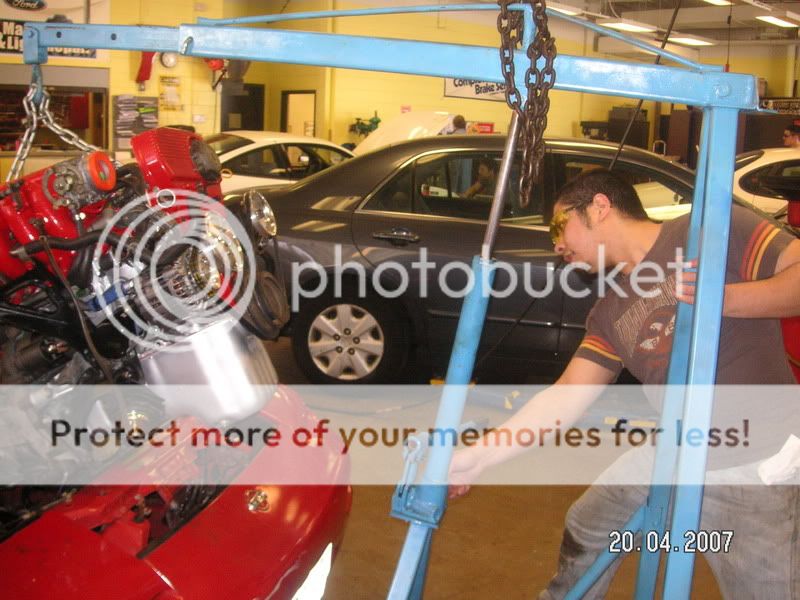 Becareful not to get caught in between the engine and the engine bay walls. This dude did and it barely pinched his skin! I could of done more but luckily it just pinched him. Remember, this thing does weigh around 500 lbs. so be very careful! 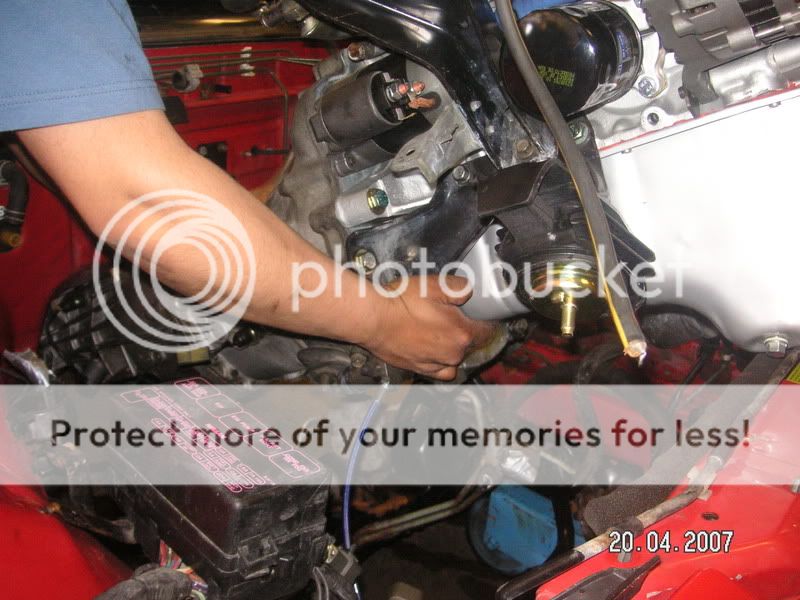 Almost there! 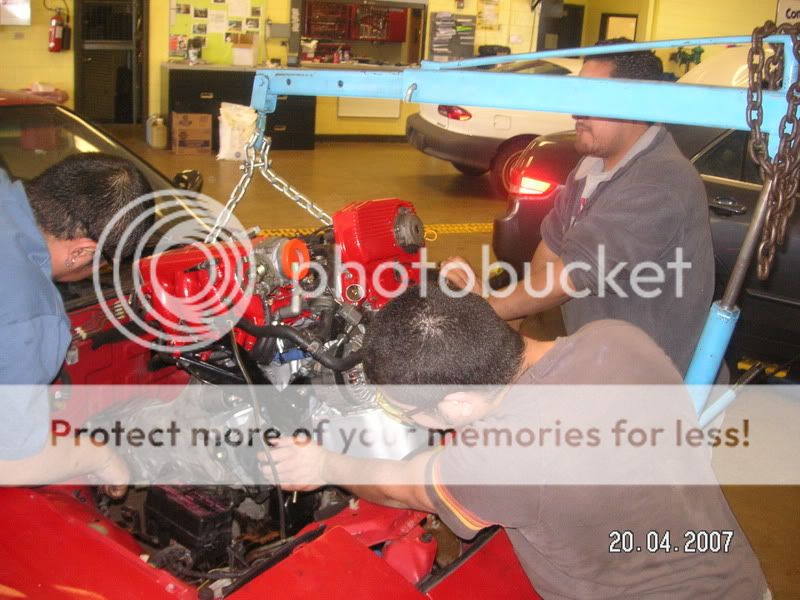 Heres a short clip of CA going in! Booo Yeaaaah!!!  Thats it, its in! 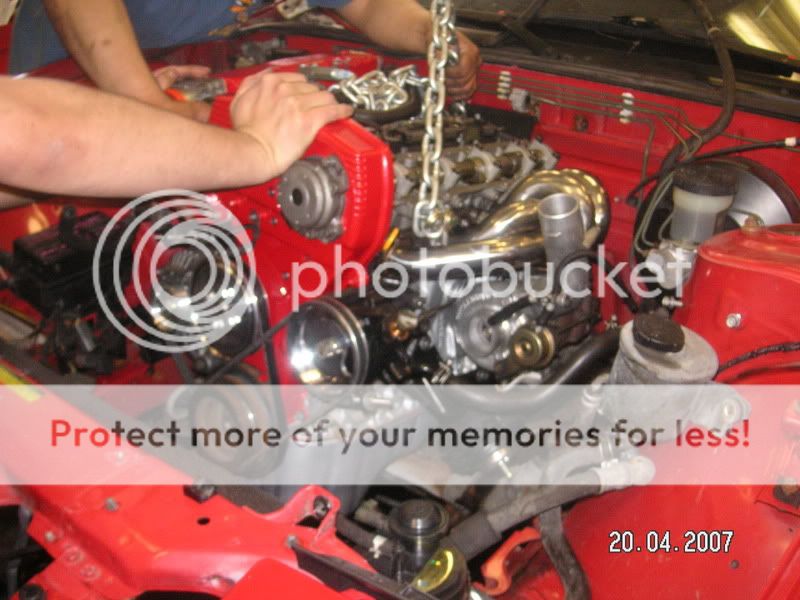 Make sure you get the engine mounts in the cross member's holes. Its hard to miss them so you should'nt have too much of a problem with this. Im glad i didnt have to do all this at home with the car on jack stands. For all the people that have done it at home or with out power tools, more power to you because this obviously isnt an easy task! 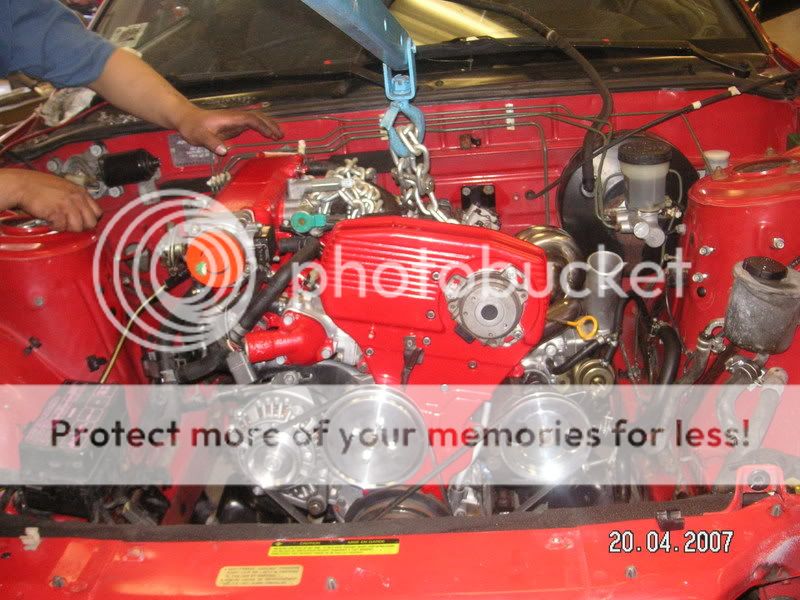 Tighten the mount nuts. 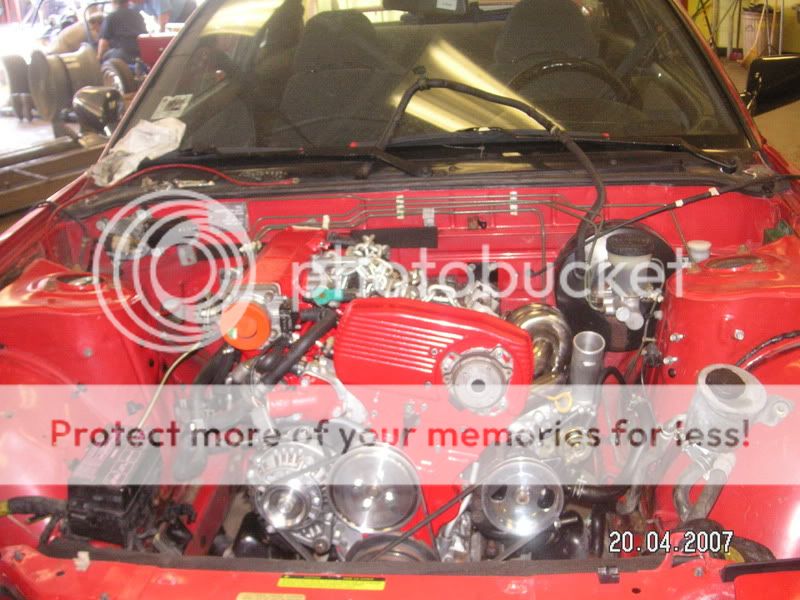 Im in yo face!  Just another shot.  Make sure to get everything underneath. You'll have to install the clutch line, driveshaft, mounts, and any other item lurking underneath. 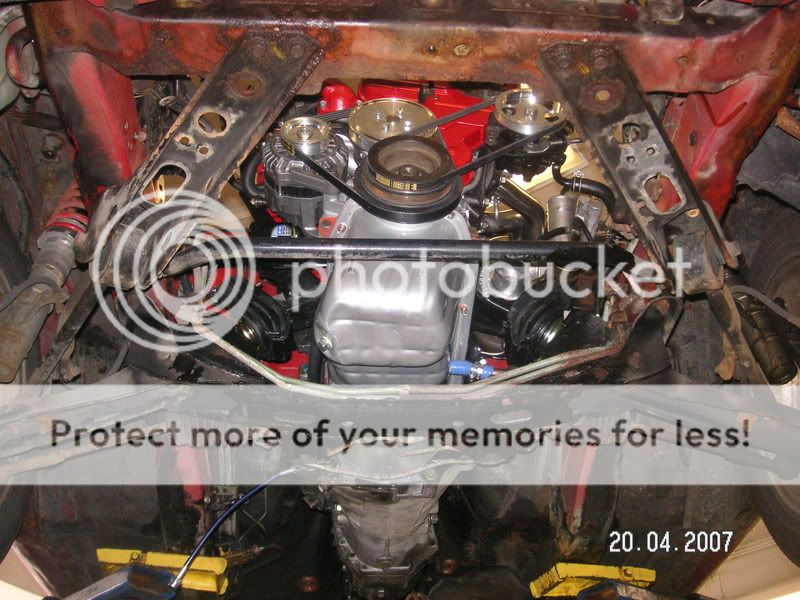 Looks good even from underneath. 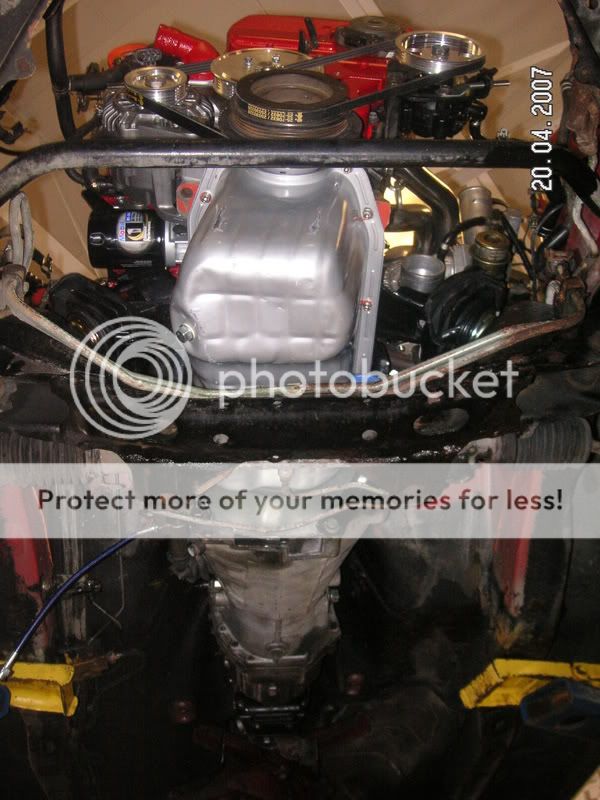 Here we are working on the transmission crossmember. By this point you should have installed your trans mount before you tried putting on the member, atleast thats what seemed to work for me. It was a biitch trying to hold up the trans and tightening the 4 bolts at the same time so get a jack of some sort to help you out. Also if you got a small pry bar about a 1/2" in diameter use it to move the crossmember alittle bit to make the holes for the bolts align easier. I didnt at first and i cross threaded two bolts! I had to fix the threads on the bolts, cleaned up the thread in the chassis, and then finally installed this all together after a few minutes of struggling! 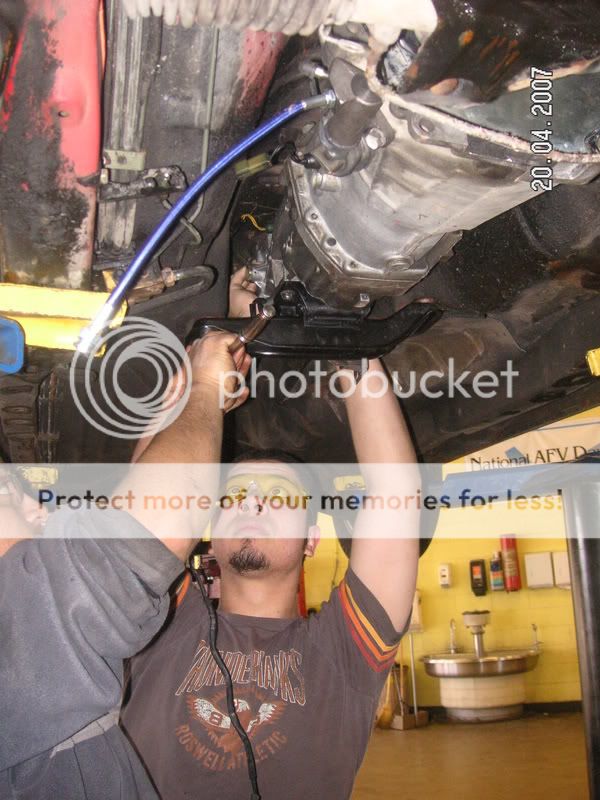 This was a great day for me! So far everything is going smoothly and there really wasnt anything too difficult with the install. I have to say the new engine looks really hot in there!!! Theres sooo much room and its so easy to get at things for repairs, adjusments, etc. I love it. 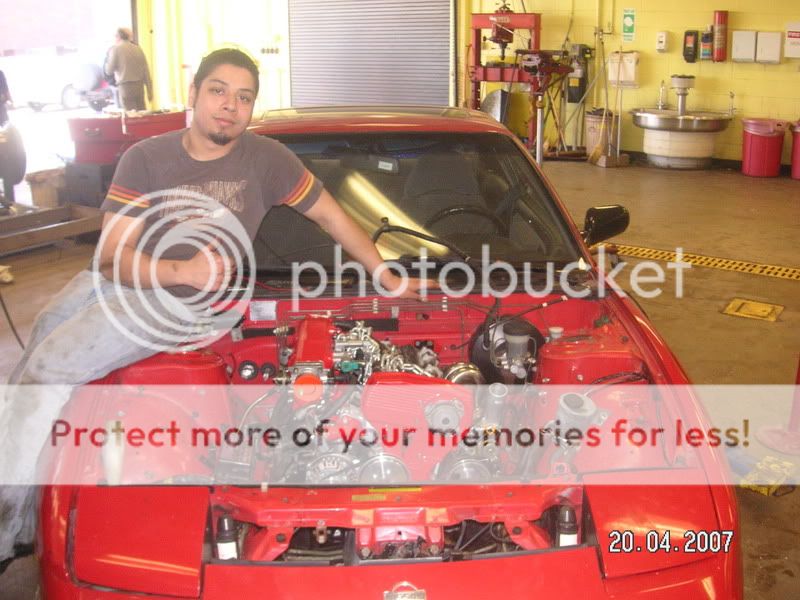 There it is! Atleast its in the car now! Next ive got to move onto the wiring, hoses, and vacuum lines that remain. I also have to put on the cam covers and start figuring out what goes where. 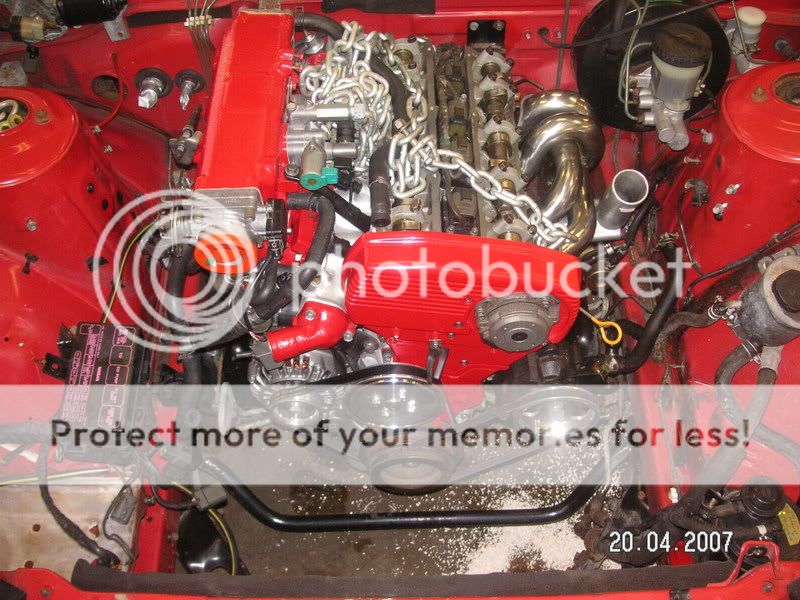 Under construction...:thumbsup | |
| | | | davidricardo86
Light Duty Poster
Number of posts : 160
Age : 37
Location : Chicago
Vehicle : 92 S13 SE Coupe
Reputation : 0
| | | | | davidricardo86
Light Duty Poster
Number of posts : 160
Age : 37
Location : Chicago
Vehicle : 92 S13 SE Coupe
Reputation : 0
| | Subject: Re: David's CA18DET build-up thread! July 20th 2007, 3:11 am | |
| Heres what i did for the exhaust so far: :thumbsup Megan Racing Turbo Outlet i bought from http://www.hopupracing.com. 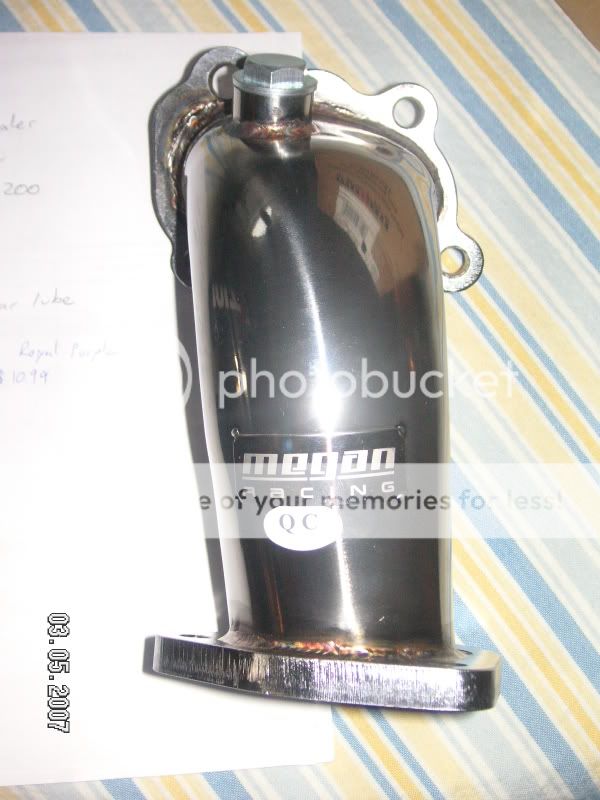 Oooo nice and shiney!!! This piece is much nicer than that heavy cast iron unit. Decent quality too! Nothing too crazy here. 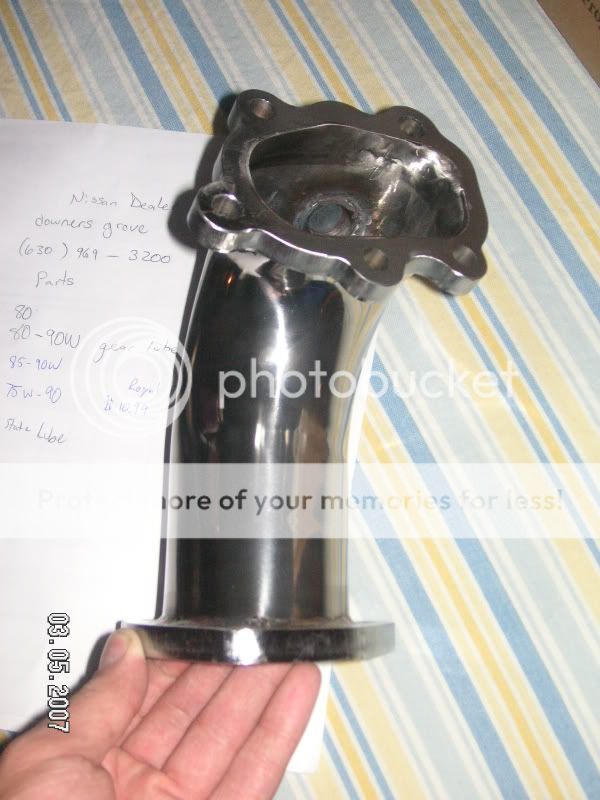 My RSR ExMag Downpipe. This one i got from hopupracing too and it was because of a certain misunderstanding but i ended up keeping it. The quality and craftsmanship is fantastic not to mention its huge and made in JAPAN!!! These few pieces combined with a new 3" catback should yeild some nice deep throaty sounds, and more power! 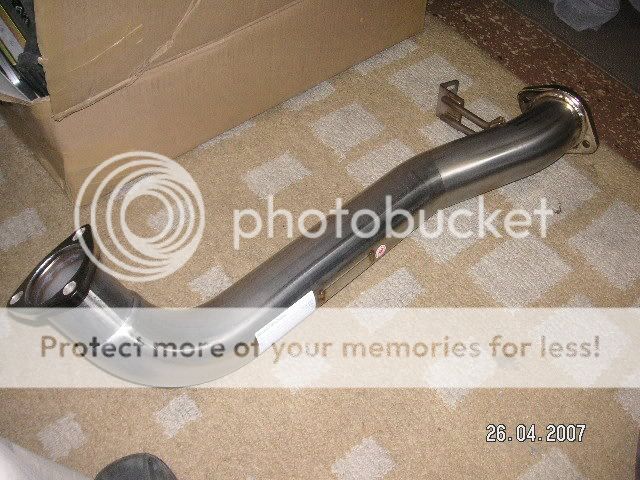 Ok this is what i can afford at the moment. This new exhaust is 100 times better then my old crappola stock exhaust! Starting at the turbo outlet is a turbo outlet pipe from Megan Racing, a new RSR Exmag Downpipe and a Resonator from http://www.intensepower.com. I have been considering many cat-back systems but there are lots of choices! The HKS Hi-Power unit stands out the most! This was a relatively easy setup considering we hade to modify the downpipe bracket. With a cut-off wheel, a bench grinder/wire brush and a mig welder we got this done in a good two hours or so. Not bad at all! 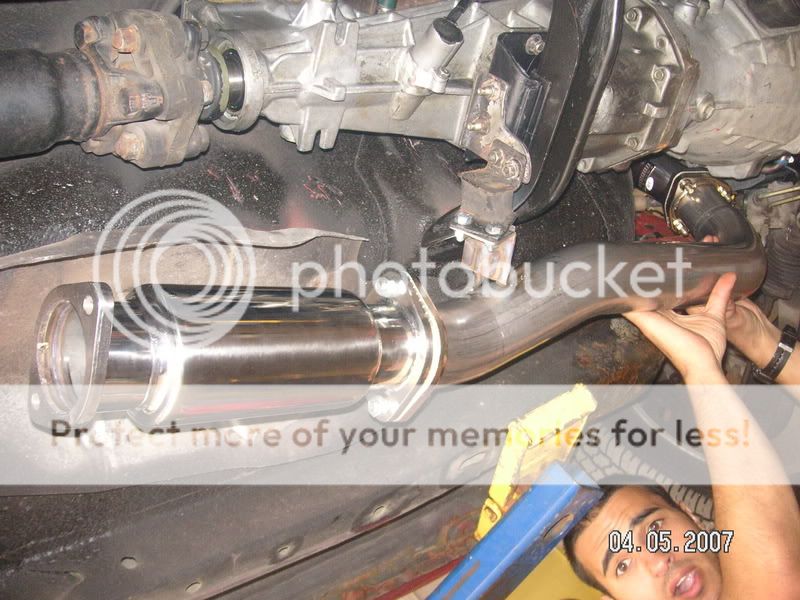 "Made In Japan"  I opted to use a resonator to tone exhaust noise levels down a bit. Later i will change for a high flow cat. 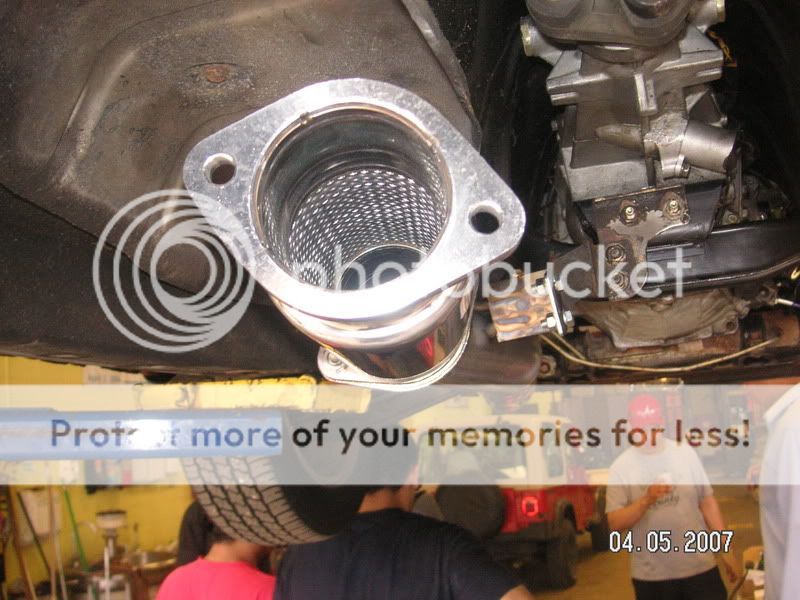 The newly modifyed bracket. Everything fits and is pretty sturdy. This should'nt give me any problems! 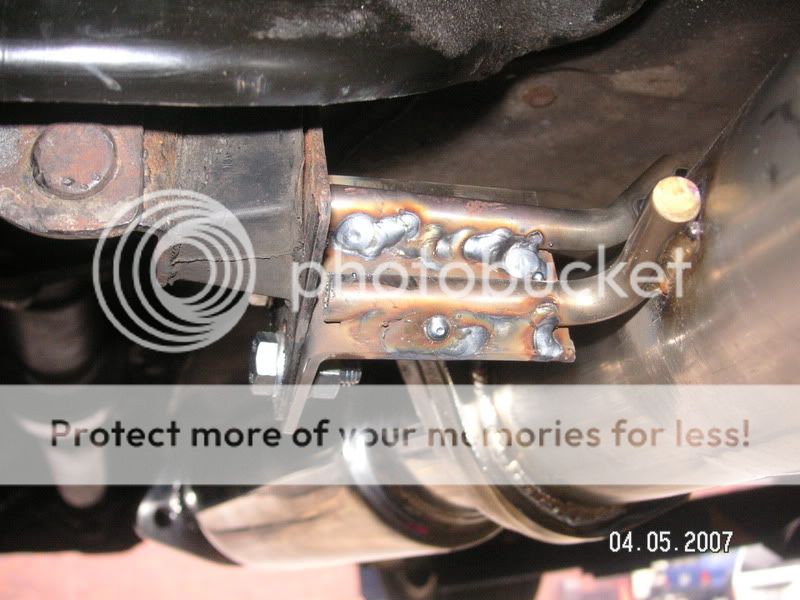 I used Loctite Threadlocker Red on critical nuts and bolts. I dont want anything coming loose because of vibration, and harmonics! 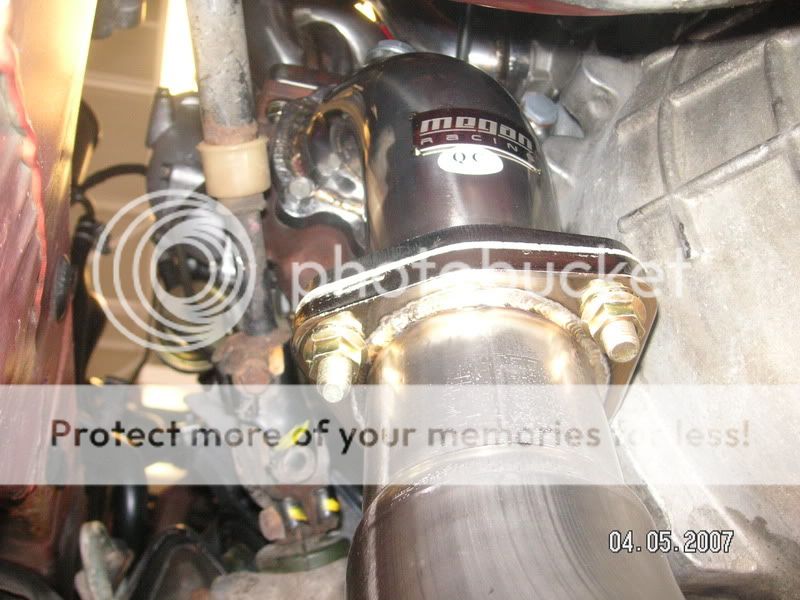 You dont see too many good shots like this out there. Its good for refrence. 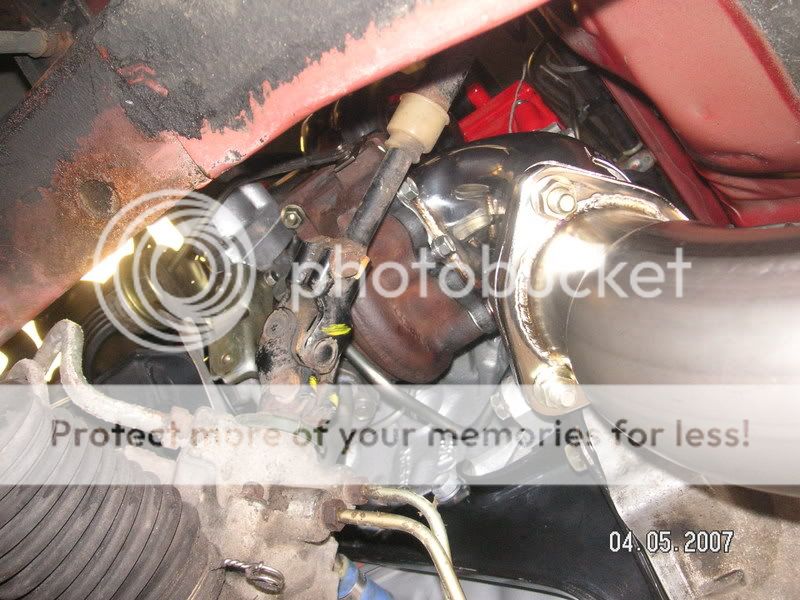 That thing is huge (thats what she said)!!! 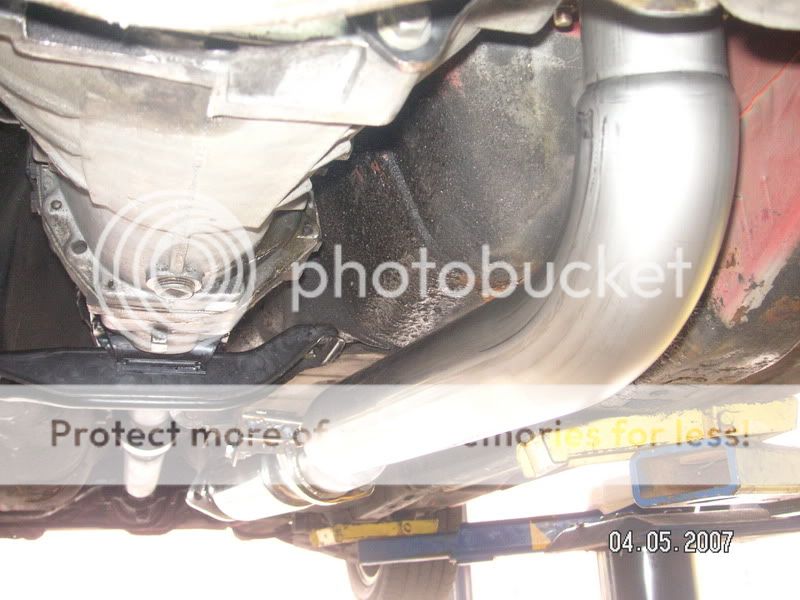 The new fuel pump from Walbro. 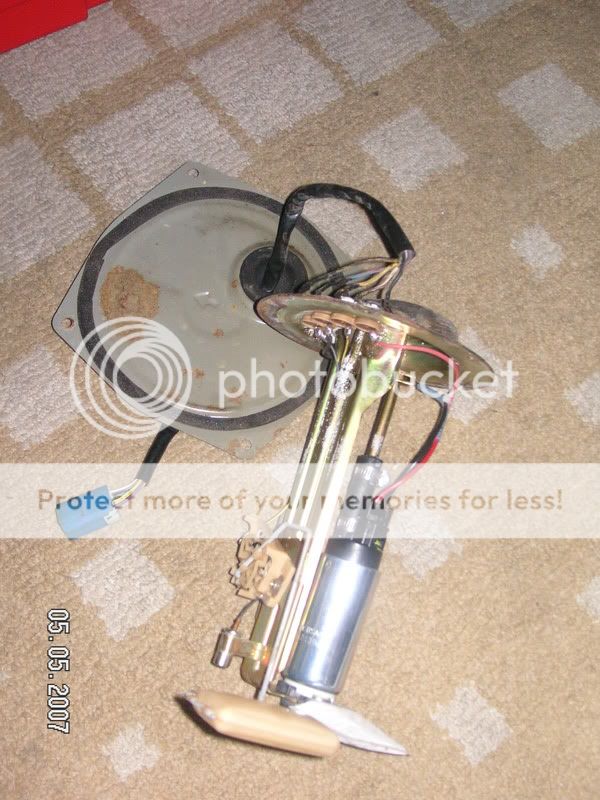 This will hold up to my future power goals! Its kind of a "peace of mind" type of thing! The old sock was really dirty and appeared to be an original Nissan JECS unit. This will be sufficient.  And heres a clip of me starting to run the engine. The injectors werent getting power from the resistor so i had to use Propane to start it. These led me to the injectors. I couldn't here the injectors "clicking" when cranking. I set the fuel pressure to a factory 36.3PSI and was not getting any fuel. As always it was electrical. I'll go into further detail later.  I'll keep 'em coming! :bigthumb Modified by davidricardo86 at 12:44 AM 5/15/2007Modified by davidricardo86 at 1:03 AM 5/15/2007 | |
| | | | davidricardo86
Light Duty Poster
Number of posts : 160
Age : 37
Location : Chicago
Vehicle : 92 S13 SE Coupe
Reputation : 0
| | Subject: Re: David's CA18DET build-up thread! July 20th 2007, 3:13 am | |
| Heres some video clips of the engine finally running on its own! This first one was earlier last week when we had just gotten it to start by itself wiring everything up correctly and suppling power to the resistor then from there to the injectors. Luckily i had this guy named Danny, he is shown here in the begining of the clip helping me out. When Danny was younger, he used to tune Toyotas and "sport compacts" like us. You know how much Puerto Ricans love their Toyotas! Guatemalans too! Back in the day he put a 2-rotar rotary RX7 engine into an old school rear wheel drive Celica. The guy knows what he's doing and he sure showed me a few things! Sorry for the crappy quality of the videos but its the best my camera can do. Here is the clip of the intake manifold vacuum leak. You can hear it and coolant/water was leaking out the front and clearly visible! Luckily it was the bolts were loose and i had to retighten everything up and it ran great after that.  And heres another clip of it actually running better without the leak.  :biggrin Modified by davidricardo86 at 1:06 AM 5/15/2007 | |
| | | | davidricardo86
Light Duty Poster
Number of posts : 160
Age : 37
Location : Chicago
Vehicle : 92 S13 SE Coupe
Reputation : 0
| | Subject: Re: David's CA18DET build-up thread! July 20th 2007, 3:14 am | |
| I did a compression and leakage test yesterday and this is what i got for my results.
1. 125-130psi
2. 130-135psi
3. 130-135psi
4. 125-130psi
Now this was done with the engine cold. I also havent driven the car or used the engine very long so im pretty sure these numbers will go up as everything starts to wear in a little. Once the piston rings heat up and expand i should get better results.
As far as the leakage test, usually you want to see somewhere in the 15-20% area. My percentage exceeded this for each cylinder. I had to use a ratchet and socket to hold the crankshaft from moving and each time the gauge kept going down past 20, 15, 10 even 5% when i did this. Im happy with the results so this is good for now. Ill recheck both of these within a few months.
Now my only problem right now is that damn intake manifold gasket! Im talking about the one that goes in between the head and the sub-manifol! I thought i had fixed my problem by tightening all the bolts real good but apparently it wasnt good enough. I didnt have the vacuum leak but i still have the coolant leak right by the thermostat housing. The leak is from the one and only coolan passage in the manifold and it sucks that im going to have to remove everything just to replace that gasket! This time im going to make sure everything is tight, flat and maybe use a little bit of gasket sealer to help out. I doubt my surfaces are warped but ill check it once i disassemble it.
Another thing im going to have to find are some power steering lines because it looks like mine are done for. Im getting oil all over the place!
I recently had to replace the gaskets between the head and lower intake manifold, and the gasket between the upper manifold and lower manifold. I was still leaking coolant so i had no other choice. | |
| | | | davidricardo86
Light Duty Poster
Number of posts : 160
Age : 37
Location : Chicago
Vehicle : 92 S13 SE Coupe
Reputation : 0
| | Subject: Re: David's CA18DET build-up thread! July 20th 2007, 3:27 am | |
| [QUOTE=HarryJ;1112871]Hi David, I looked at your project and I am that impressed! As you are a real expert on ca18, perhaps you can tell me, if there is a need to use special crankshaft and rod bearings in a tuned engine. I come from Germany, and there is obviously nobody who can tell me about these special things. I ve built up my engine with forged pistons and rods, a T28 turbo and an programmable fuel/ignition controller. With some modified cams and a modified exhaust system, it should have about 300 or more hp, but I am not sure if the bearings will stand this.... Many thanks Harry[/QUOTE] Listen HarryJ! What i will tell you is don't stress the bearings so much. As long as the the reciprocating assembly is fine, and overall in good mechanical condition, it should have no problem seeing those kind of hp numbers on standard bearings. Nissan isn't as bad as you might think. I've got Federal Mugols and Clevites which are both known to be great amongst the performance industry. My machinist put them in because i told him i was after performance and for something a "step up" from stock! The clearances are all to Nissan's specs. Combine this with a good oil pump, some clean oil and enough pressure and you're set! Nothing too crazy is need Honestly I'd worry about fuel, air, and igniton all working together the right way first!:thumbsup Check it out guys, here are some of my most recent pictures! I lost my camera so and i haven't bought a new one, these are some old pictures i took before i lost it.  My dual fan setup. 2 12" puller fans ran parallel using a relay circuit, thermostatic coolant switch, and adjustable "on" temperature controller. I'll try and get more photos. Agency Power red coolant hoses. 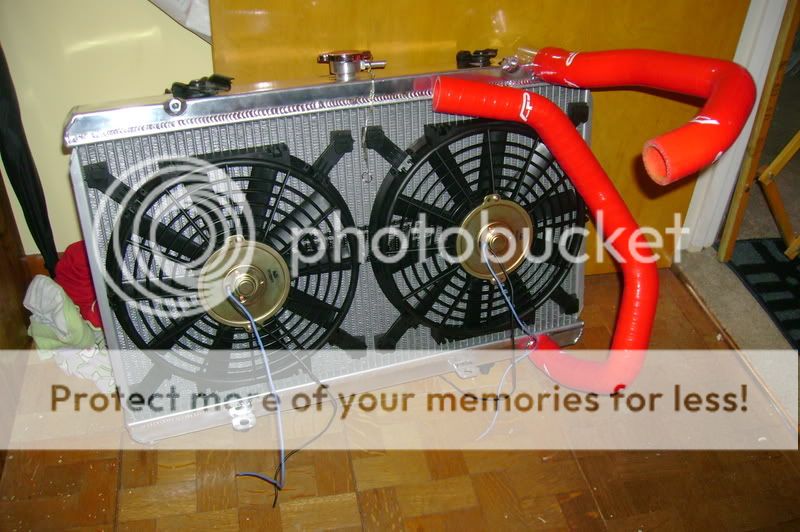 Mishimoto Radiator. Great rad for the money!  Intercooler from ebay kit. Yay. 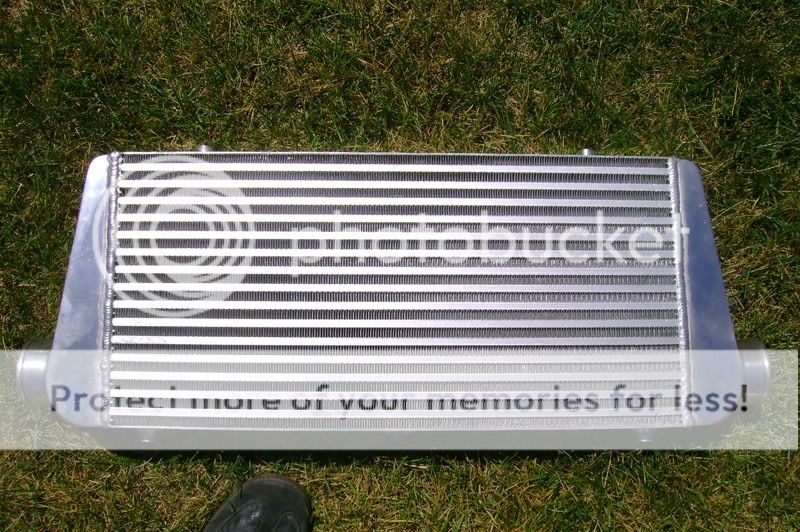 A dent. That sucks! 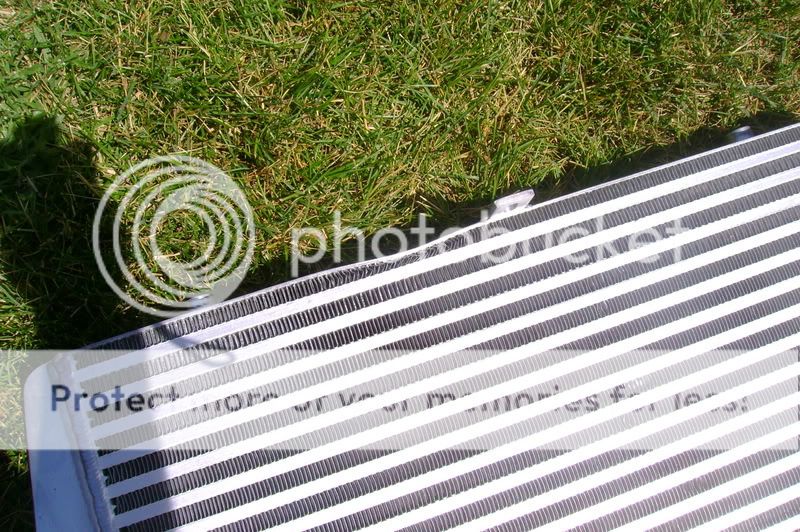 Fits pretty good. Be creative when mounting one of these things! 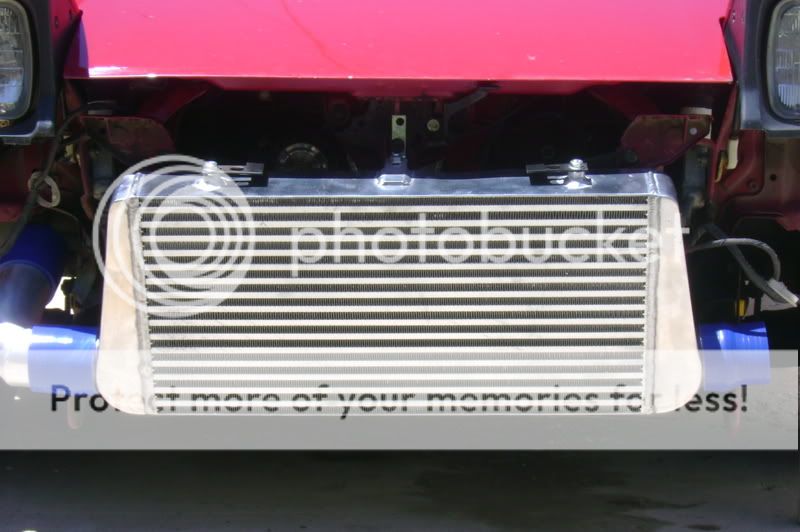 Its a pretty big core but i think it'll be fine! 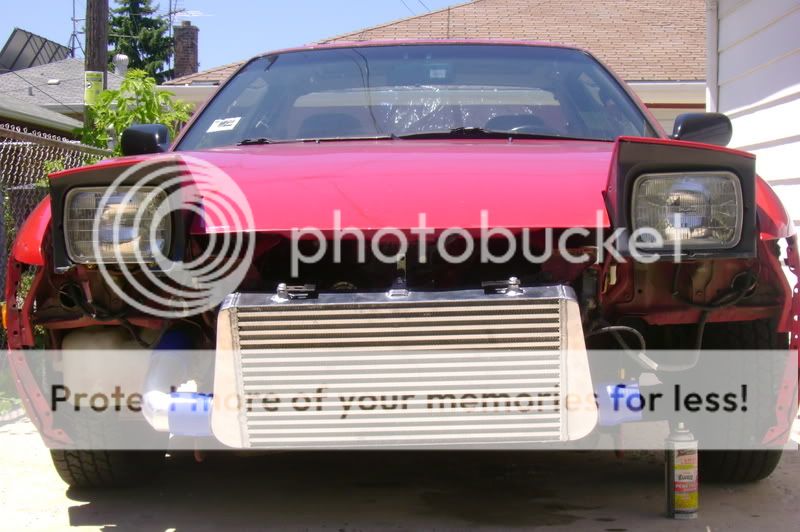 Another one... 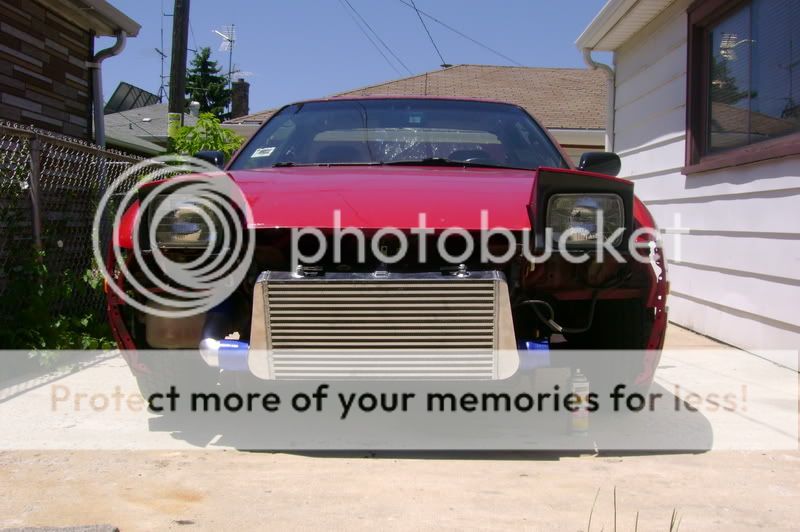 I had to remove the windshield washer bottle to cut a hole for the IC piping. 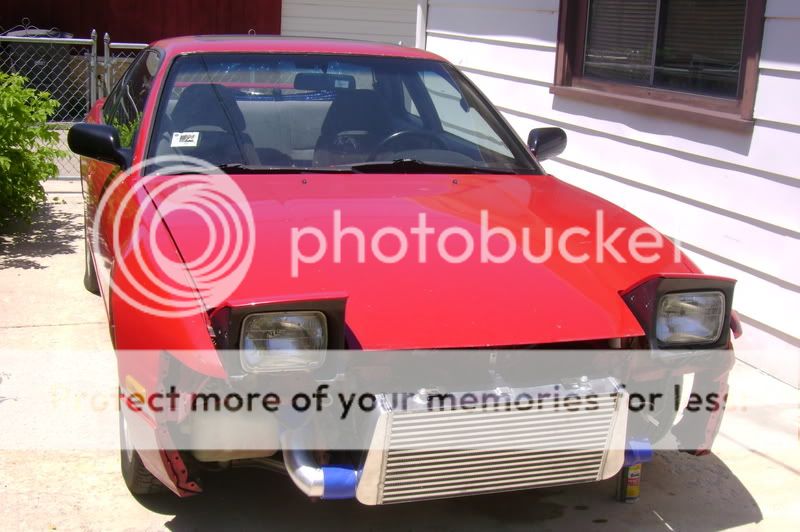 Damn you rain! Crazy ass clouds!  I hate working outside... especially if the weather sucks! 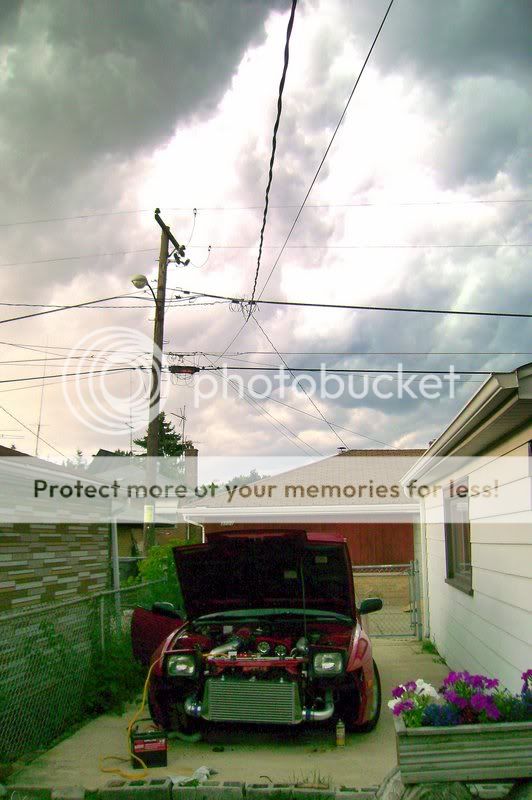 Looking more and more complete. Slowly... 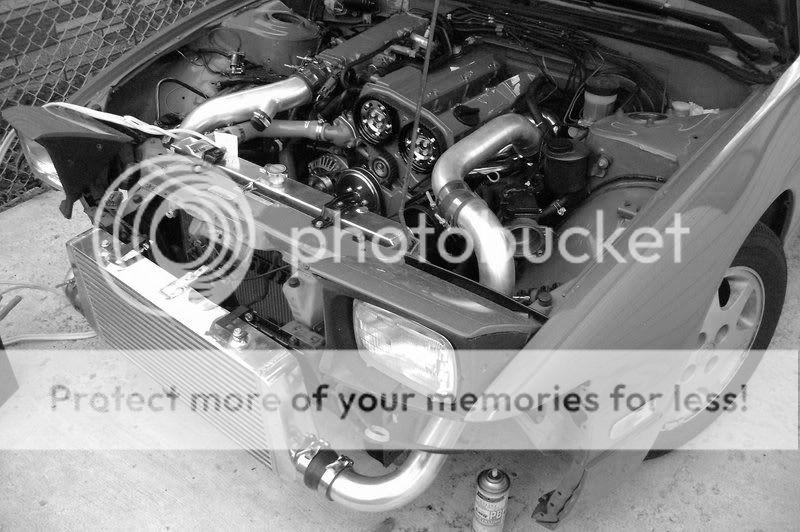   | |
| | | | k c
Established Member

Number of posts : 746
Age : 36
Location : Chicago, IL
Vehicle : CTA BRO
Reputation : 0
| | Subject: Re: David's CA18DET build-up thread! July 20th 2007, 3:51 am | |
| nice job man!
what do you plan on doing next? wheels? suspension maybe? | |
| | | | D*S Roski
DS! DS! DS!

Number of posts : 3911
Age : 39
Location : Pilsen Chicago. . .
Vehicle : g35
Reputation : 17
| | Subject: Re: David's CA18DET build-up thread! July 20th 2007, 4:12 am | |
| BRING HER TO THE MEET. . . | |
| | | | Sponsored content
| | Subject: Re: David's CA18DET build-up thread! | |
| |
| | | | | | David's CA18DET build-up thread! | |
|
Similar topics | |
|
| | Permissions in this forum: | You cannot reply to topics in this forum
| |
| |
| |
|